
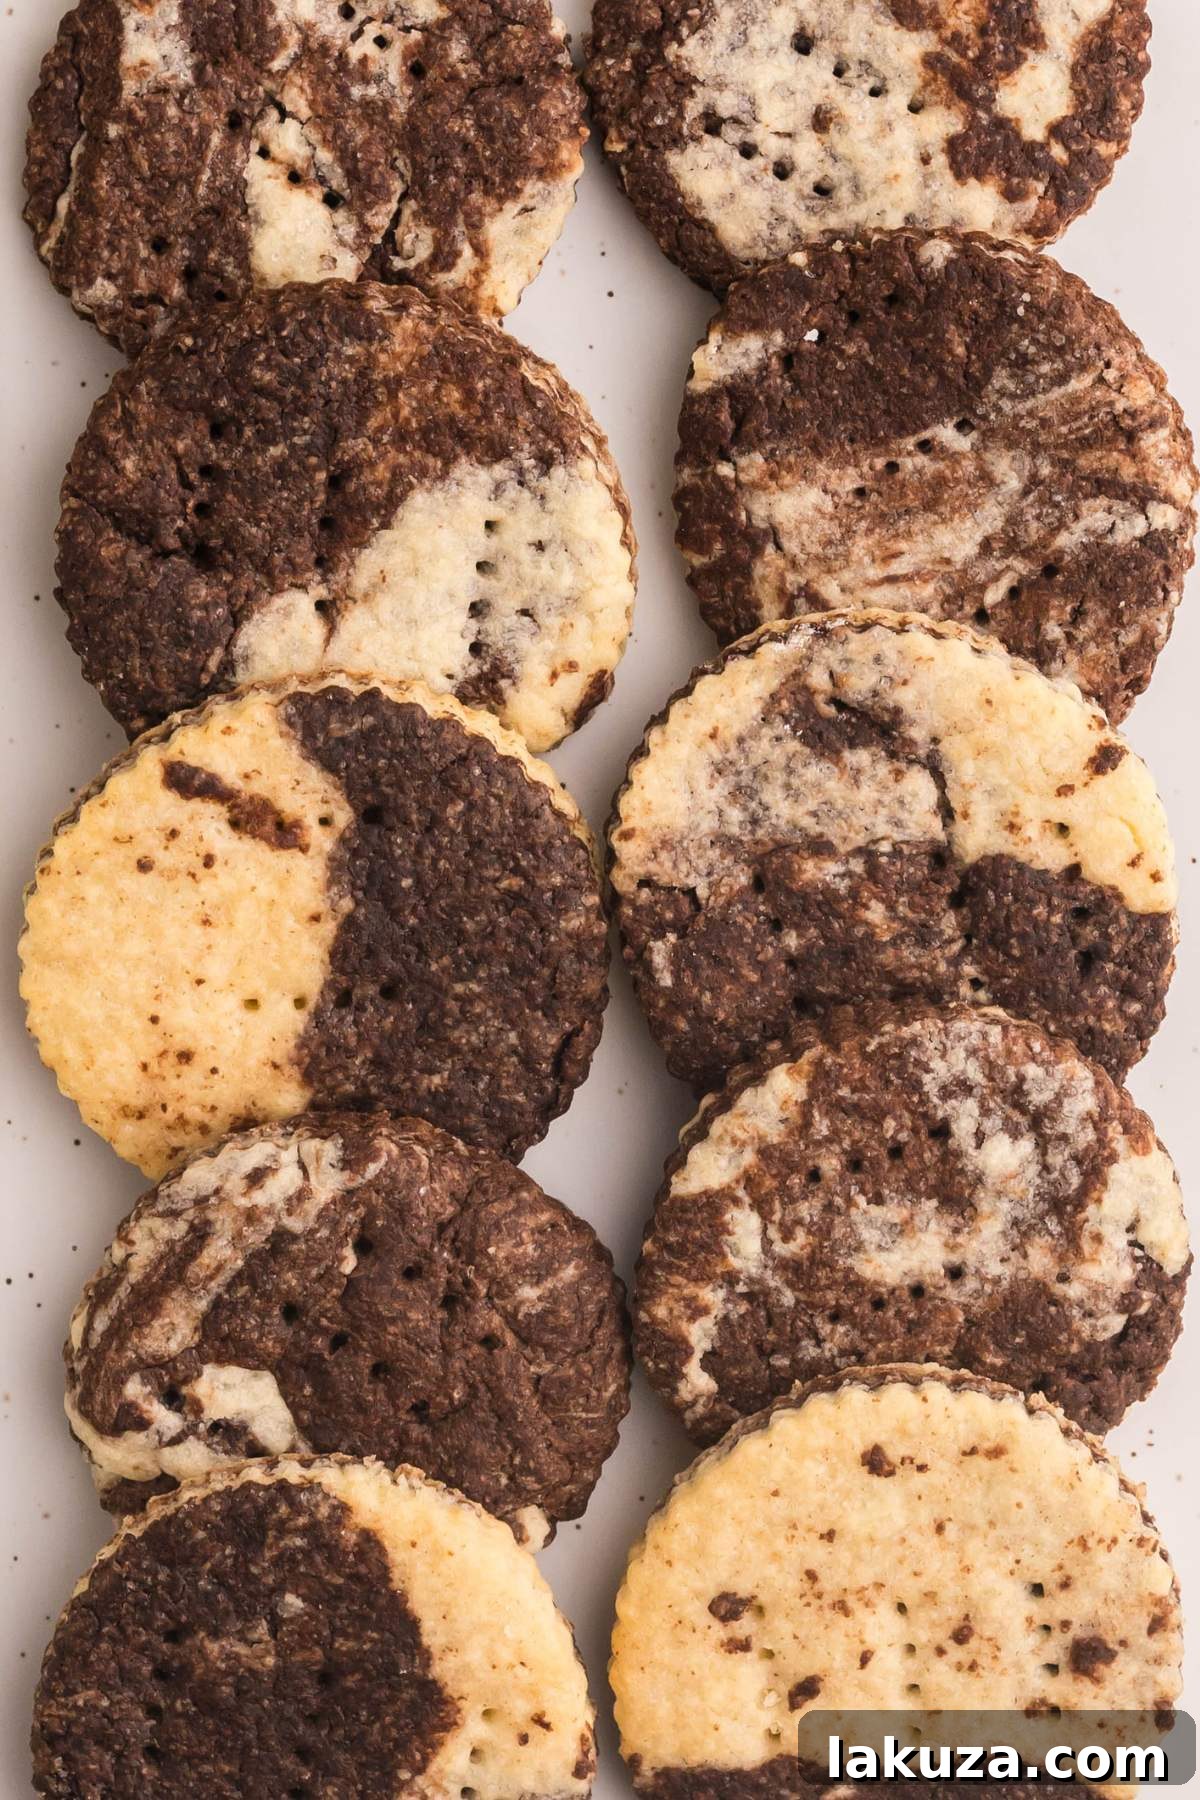
There’s something truly enchanting about a swirl of rich, dark cocoa weaving through a buttery, old-fashioned shortbread cookie. These exquisite treats have become an absolute staple in my kitchen, not just for the festive holiday season, but truly all year long. What makes this recipe an undeniable keeper is its elegant simplicity: it relies on everyday pantry ingredients, yet the final product looks like it came straight from the most sophisticated bakery case, ready to impress with its delicate texture and captivating marble pattern.
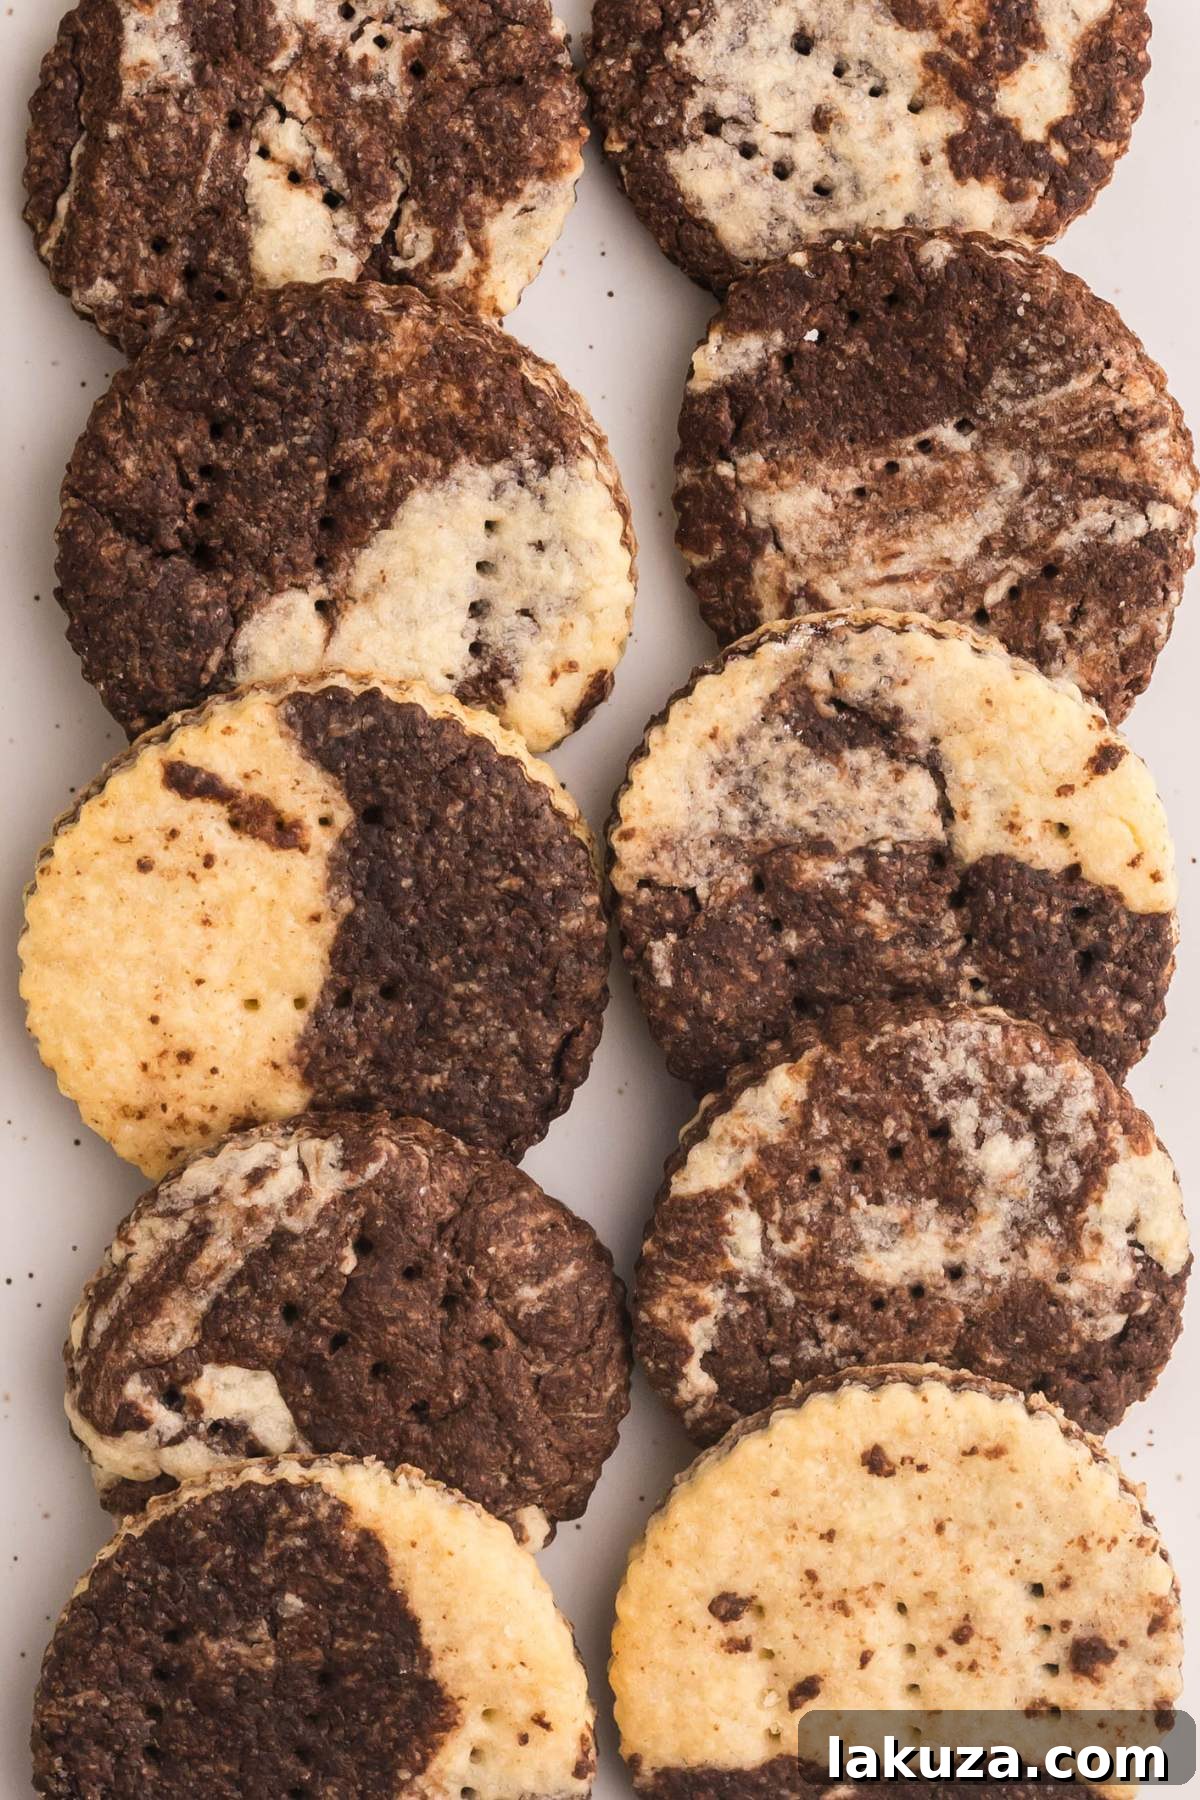
These chocolate marble shortbread cookies are a delightful surprise for all ages. Kids especially love the magical chocolate swirls that appear as you slice into the dough – it’s like a little reveal party with every cut! Beyond their charm, these cookies are incredibly practical. They hold their freshness wonderfully for days, making them a perfect make-ahead option for busy party preparations or to have on hand for a relaxed holiday weekend. The tender crumb and rich flavor make them irresistible, a true testament to the timeless appeal of classic shortbread, elevated with a touch of cocoa artistry.
Table of Contents
- The Essentials: What You’ll Need for Chocolate Marble Shortbread
- Mastering the Swirl: Step-by-Step Instructions
- Storage Tips: Keeping Your Shortbread Fresh
- Creative Twists: Simple Variations to Elevate Your Cookies
- Explore More Shortbread Delights
- Common Questions About Shortbread Cookies
- Printable Recipe Card
The Essentials: What You’ll Need for Chocolate Marble Shortbread
Crafting these gorgeous chocolate marble shortbread cookies begins with a few basic, high-quality ingredients you likely already have in your pantry. This recipe is designed to be straightforward, but knowing a bit more about each component can help you achieve that perfect, melt-in-your-mouth texture and distinct flavor. If you’re planning to scale up this recipe for a larger batch – perhaps to fill multiple cookie trays or for gifting – remember that you can easily double or triple the quantities. When doing so, it’s always best to keep the dough divided into smaller, manageable portions during the chilling process to ensure it firms up evenly. Additionally, for consistent golden-brown edges and thorough baking, bake one sheet of cookies at a time.
Ingredients
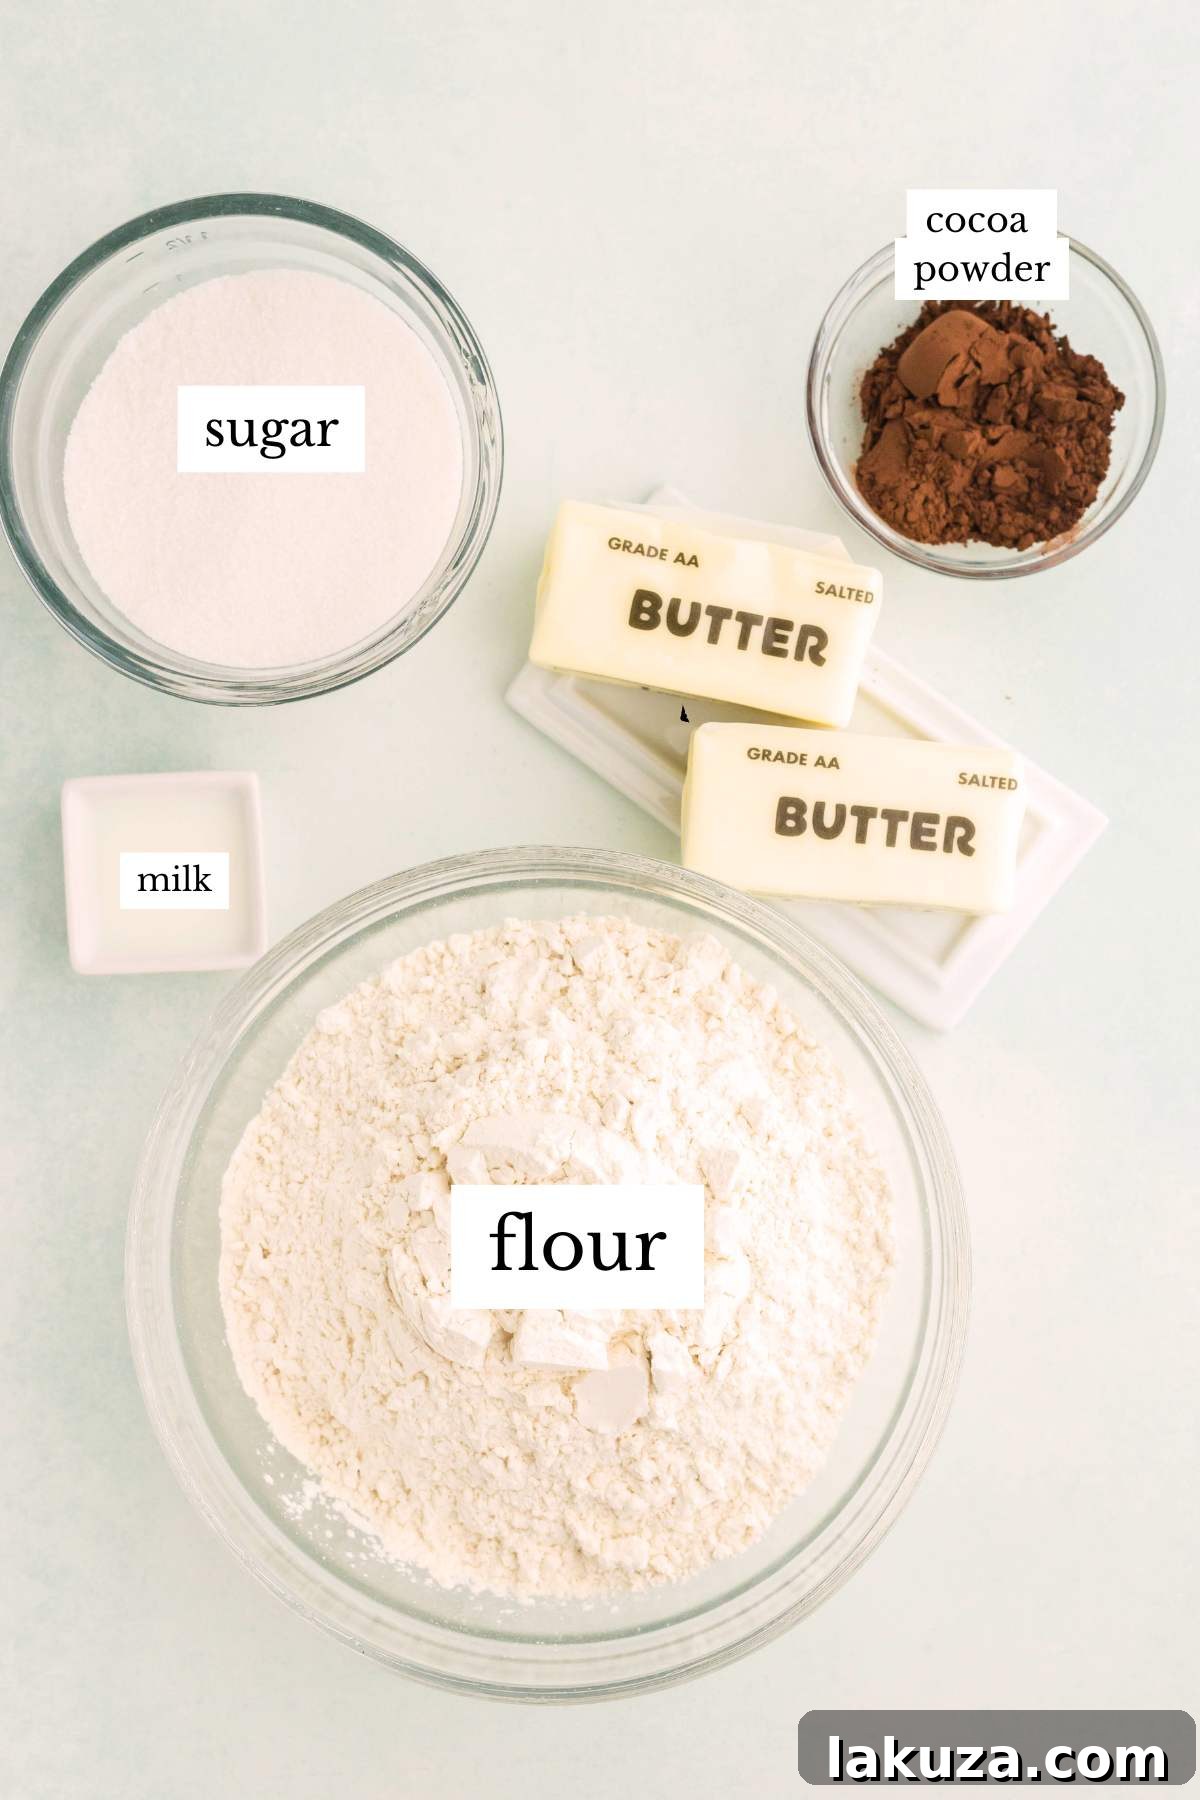
For the Classic Shortbread Dough:
- 4 cups all-purpose flour: While any good quality all-purpose flour will work, some bakers prefer a lower protein flour for an even more tender crumb. Sifted flour can also lead to a lighter texture, but it’s not strictly necessary for this forgiving recipe.
- 1 cup salted butter, softened: The quality of your butter significantly impacts the final taste and texture of shortbread. Using a good quality, full-fat salted butter will yield the best results. It’s crucial for the butter to be properly softened (room temperature) but not melted, as this allows it to cream smoothly with the sugar, creating air pockets that contribute to the cookie’s signature delicate crumb. If you only have unsalted butter, simply add 1/4 teaspoon of fine salt to the flour mixture.
- 1 cup granulated sugar: Standard granulated sugar provides the perfect balance of sweetness and contributes to the crispness of the cookies.
- 2–3 tablespoons milk, as needed to bring dough together: Start with the smaller amount and add gradually. The exact quantity may vary depending on the humidity in your kitchen and the specific flour used. The goal is just enough milk to make the dough cohesive, not sticky or wet.
For the Rich Chocolate Swirl:
- 2 tablespoons dark cocoa powder: While any unsweetened cocoa powder will work, a dark cocoa or Dutch-process cocoa is highly recommended. These types of cocoa powders are less acidic and offer a deeper, richer chocolate flavor and a more striking dark color, creating a beautiful contrast with the vanilla dough.
- 1–2 teaspoons milk, if needed: A tiny splash of milk helps to moisten the cocoa powder and integrate it smoothly into the dough, ensuring an even chocolate mixture without any dry spots.
Optional for Finishing Touches:
- Melted dark or white chocolate, for drizzling: A drizzle of melted chocolate adds an extra layer of flavor and makes these cookies look incredibly polished and professional, perfect for holiday platters or as thoughtful homemade gifts. You can also use both dark and white chocolate for an even more striking visual appeal.
Essential Equipment
You won’t need any fancy gadgets to make these beautiful cookies. Here’s what you’ll want to have on hand:
- Large Mixing Bowl: For combining your ingredients.
- Hand Mixer or Stand Mixer: While you can cream butter and sugar by hand, a mixer makes the process much quicker and ensures a light, fluffy mixture.
- Parchment Paper: Crucial for rolling out the dough without sticking and for easy transfer to baking sheets. It also prevents your cookies from sticking to the pan.
- Baking Sheets: For baking your cookies. Use heavy-duty baking sheets for even heat distribution.
- Wire Cooling Rack: Essential for allowing baked cookies to cool completely and prevent them from becoming soggy.
- Rolling Pin: For evenly flattening your dough.
- Cookie Cutters: For shaping your shortbread. Classic rounds are lovely, but feel free to get creative with stars, squares, or festive shapes.
Mastering the Swirl: Step-by-Step Instructions
1. Cream the Butter and Sugar to Perfection
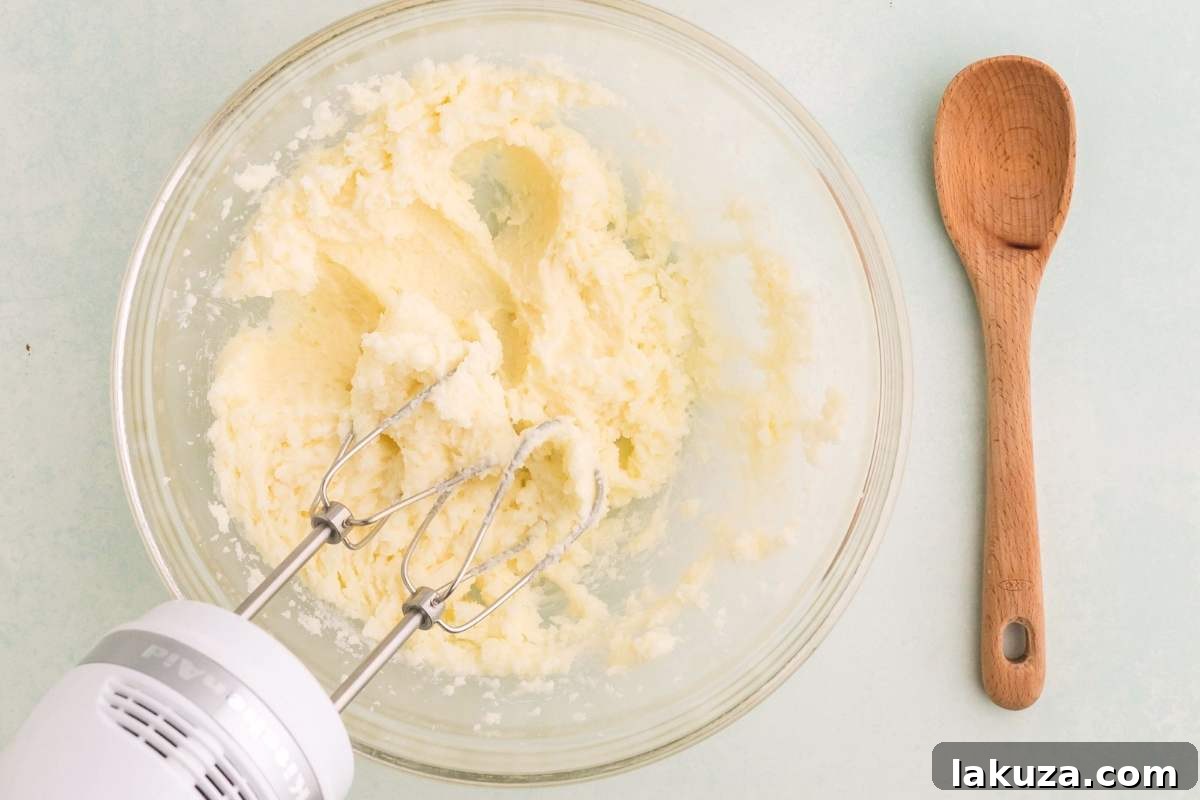
In a spacious mixing bowl, begin by beating the softened salted butter with the granulated sugar. Use either a hand mixer or a stand mixer fitted with the paddle attachment. Cream these two ingredients together until the mixture transforms into a light, airy, and fluffy consistency. This step is more critical than you might think; it incorporates air into the butter, which contributes significantly to the tender crumb of the finished shortbread. The butter should be soft enough to easily indent with a finger, yet still hold its shape—never melted or greasy, as this would prevent proper aeration. If your butter is too cold, it won’t cream properly and will leave you frustrated. If it’s too warm, the dough might become oily. Aim for that perfect room temperature for optimal results.
2. Incorporate the Flour and Add Milk Gradually
Once your butter and sugar are beautifully creamed, gradually add the all-purpose flour to the mixture. Begin mixing on a low speed to avoid a cloud of flour, and continue until the dough appears crumbly. This initial crumbly texture is exactly what you want for shortbread, as it indicates proper integration without overworking the gluten. Keep mixing until the flour begins to clump together, forming larger, moist crumbs. At this point, it’s time to introduce the milk. Drizzle in just enough milk, one tablespoon at a time, until the dough comes together and holds its shape when you gently squeeze a portion in your hand. Be very cautious not to add too much milk; shortbread is meant to be a dry, crumbly dough. Remember the golden rule of baking: you can always add more liquid, but you can’t take it out! A slightly dry dough is better than a sticky one, as it will yield a more tender cookie.
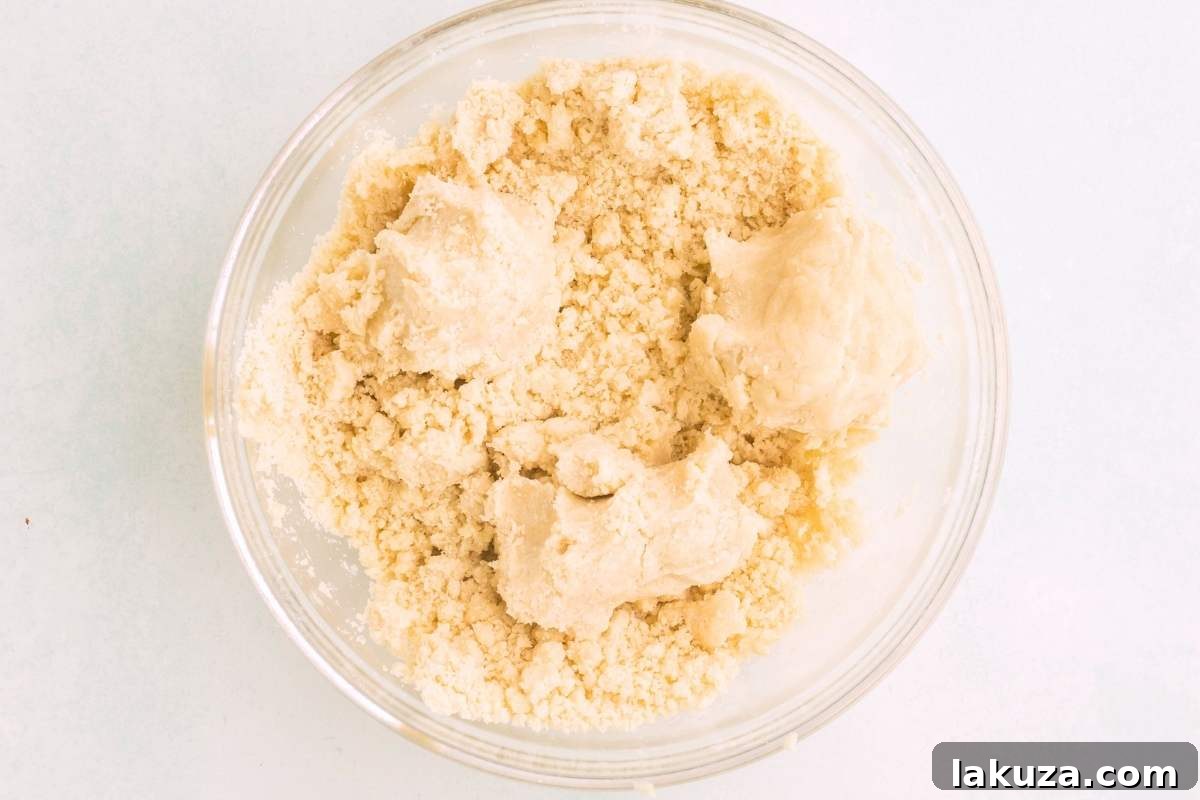
3. Create the Distinct Chocolate Dough
Now for the fun part that gives these cookies their signature look! Carefully divide the prepared shortbread dough into two equal halves. Set one half aside; this will remain your plain, vanilla shortbread. To the other half, add the dark cocoa powder. Mix this portion until the cocoa is thoroughly and evenly blended, resulting in a rich, uniformly colored chocolate dough. If the chocolate dough seems a bit too dry or stiff, add a tiny splash (1-2 teaspoons) of milk to help it come together smoothly. As noted in the ingredients, opting for dark or Dutch-process cocoa will not only give you a more pronounced, deeper chocolate flavor but also the most visually appealing marbling effect due to its intense color, contrasting beautifully with the light vanilla dough.
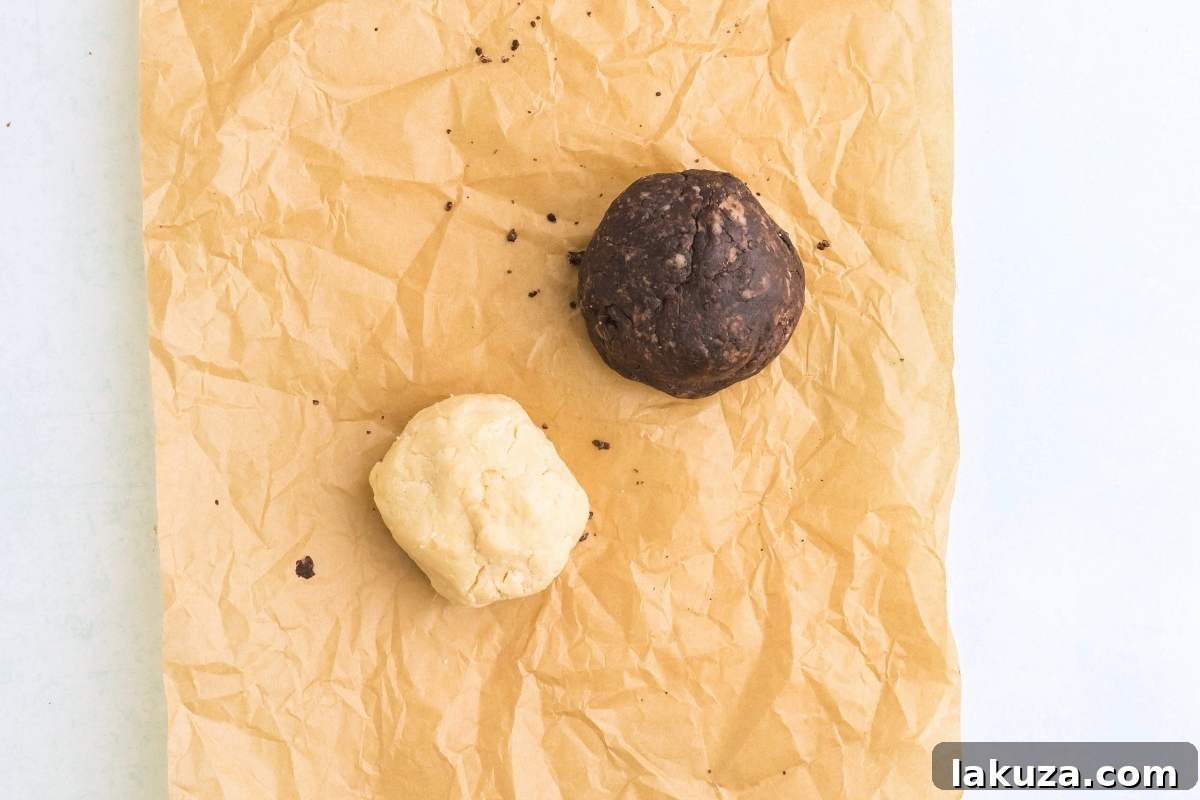
4. Master the Art of Marbling the Dough
To achieve those mesmerizing swirls, gently flatten both the plain and the chocolate dough halves into approximate disks. Stack the chocolate disk directly on top of the plain vanilla disk. Now, with a light hand, gently fold or knead the stacked dough just a few times. The key here is to mix minimally—you want to see beautiful ribbons and swirls of both colors, not a completely blended brown dough. Two or three gentle turns or folds are usually sufficient to create that stunning marbled look. Resist the urge to overmix, as this will cause the colors to fully combine, losing the elegant marble effect. This step is where the magic truly happens, transforming simple dough into a visually appealing masterpiece.
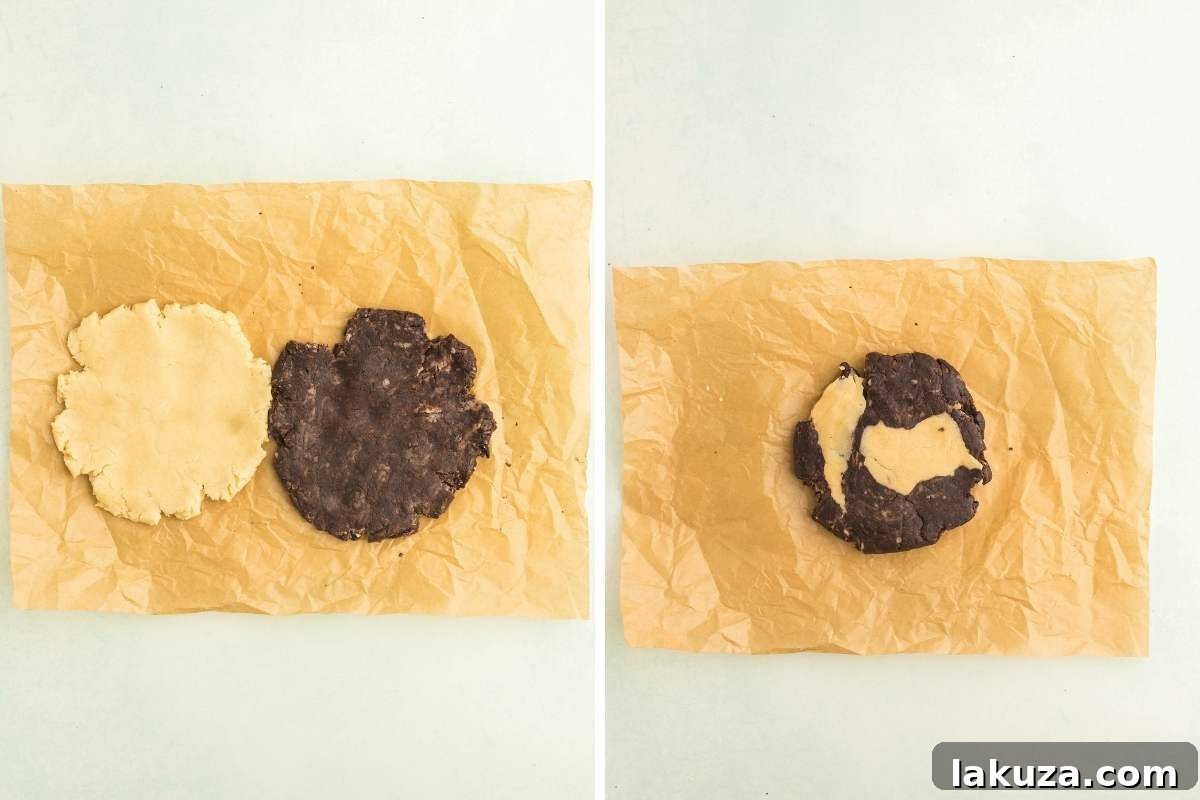
5. Chill the Dough for Perfect Shortbread
Once your dough is marbled to perfection, wrap it tightly in plastic wrap. Transfer the wrapped dough to the refrigerator and chill it for a minimum of 1 to 2 hours, or until it is firm to the touch. This chilling step is absolutely crucial for shortbread. It allows the butter within the dough to solidify, which in turn prevents the cookies from spreading excessively during baking. A properly chilled dough ensures your cookies hold their beautiful shape, maintain crisp edges, and bake up with that quintessential, tender shortbread crumble that everyone loves. Don’t skip this step, as it’s the secret to bakery-quality results. If you’re short on time, you can place it in the freezer for about 30 minutes, but keep a close eye on it.
6. Roll and Cut Your Swirled Cookies
Preheat your oven to 350°F (175°C). Once the dough is firm from chilling, unwrap it and place it on a sheet of parchment paper. Using a rolling pin, roll the dough evenly to a thickness of approximately ½ inch. This thickness is ideal for achieving a substantial shortbread cookie that is both satisfying and retains its delicate texture. Now comes the creative part: cut the dough into any shapes you desire using cookie cutters. Classic rounds are always a good choice, but feel free to use squares, rectangles, or even festive shapes for special occasions. If at any point the dough starts to feel too soft or difficult to handle while cutting, simply slide it back into the refrigerator for a few minutes to firm up again. This ensures clean cuts and helps maintain the integrity of the marbled pattern.
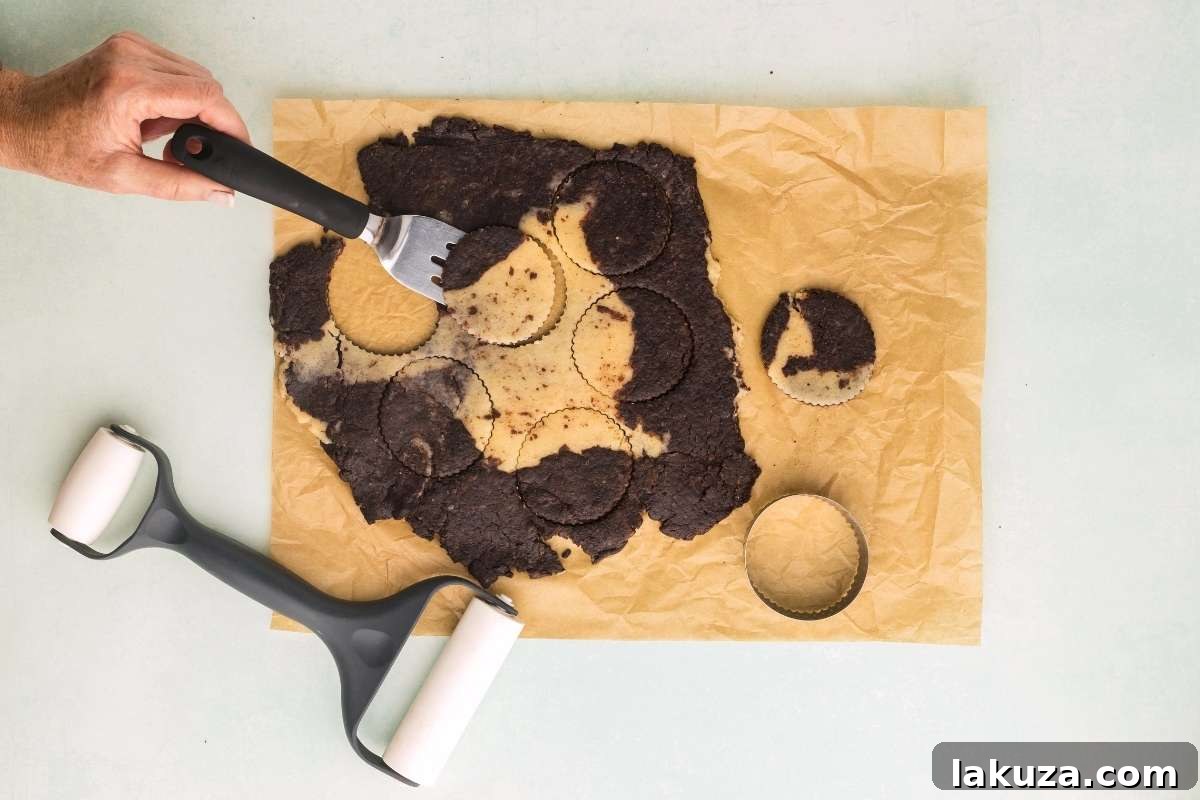
7. Bake to Light Golden Perfection
Carefully transfer your cut cookies to a parchment-lined baking sheet, leaving a small space between each one. Before baking, gently prick each cookie several times with a fork. These small perforations serve an important purpose: they help air escape from the dough during baking, preventing excessive puffing and ensuring the cookies retain their flat, classic shortbread shape and delicate crispness. Bake for about 15 minutes. The precise baking time can vary depending on your oven and the thickness of your cookies, so keep a close eye on them. You’re looking for the edges to be just barely golden; the center of the shortbread should remain light in color. Overbaking can make shortbread tough, so err on the side of slightly underbaked for a truly melt-in-your-mouth texture.
8. Cool and Add Optional Finishing Touches
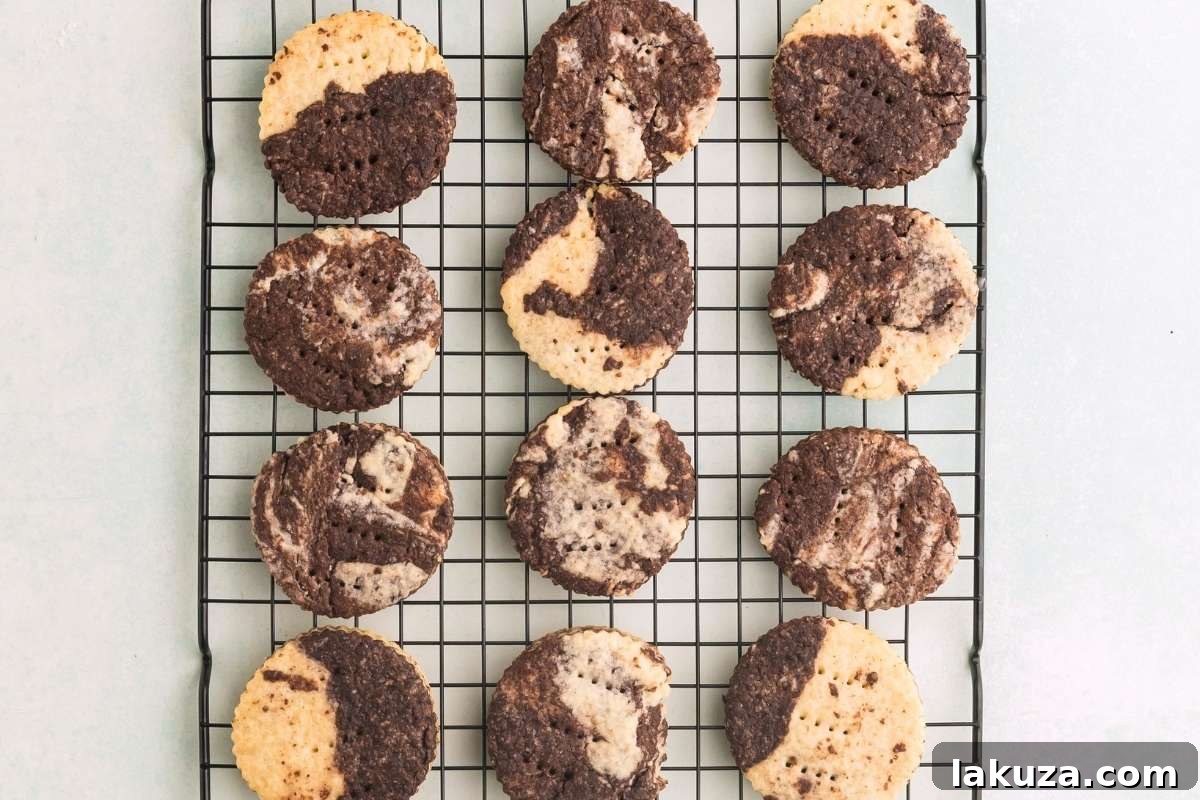
Once baked, allow the cookies to cool completely on a wire rack. This is important for them to set properly and develop their full crispness. As an optional but highly recommended step, you can drizzle melted dark or white chocolate over the cooled cookies. This extra touch not only enhances the flavor profile but also adds a beautiful, sophisticated visual element, making them even more appealing for serving or gifting. For an extra festive touch, consider sprinkling a pinch of flaky sea salt or cocoa nibs over the wet chocolate drizzle before it sets. Alternatively, these cookies are absolutely delicious left plain, allowing the pure buttery and subtle chocolate flavors to shine through.
Storage Tips: Keeping Your Shortbread Fresh
One of the many advantages of shortbread cookies is their excellent keeping qualities. To maintain their delicious freshness and crisp texture, store your baked chocolate marble shortbread cookies in an airtight container at room temperature for up to one week. For slightly extended storage, they can be kept in the refrigerator for up to 10 days, though their texture is often best at room temperature. For longer-term planning, both the baked cookies and the unbaked dough freeze beautifully. Tightly wrap the unbaked dough in plastic wrap and then aluminum foil; it can be chilled for up to three days before baking or frozen for up to three months. Baked cookies, once completely cooled, can also be frozen in an airtight container for up to three months. Simply thaw them at room temperature before serving or baking (for dough), and they’ll taste as fresh as the day they were made.
Creative Twists: Simple Variations to Elevate Your Cookies
While the classic chocolate marble shortbread is perfect as is, it also serves as a fantastic canvas for creative variations. Shortbread’s simple base makes it incredibly adaptable to different flavor profiles. Here are a few easy ideas to inspire your next batch:
- Mocha Marble: For coffee lovers, this variation adds an exquisite depth to the chocolate. Simply stir a teaspoon of instant espresso powder (or finely ground instant coffee) into the chocolate half of the dough along with the cocoa powder. The espresso doesn’t make the cookies taste like coffee; instead, it magically enhances and deepens the chocolate flavor, making it even richer and more complex without adding any extra steps to the marbling process.
- Vanilla Bean Marble: To truly highlight the plain shortbread and make the swirl stand out even more, mix in a teaspoon of high-quality vanilla bean paste or pure vanilla extract into the plain dough half before you begin the marbling process. Vanilla bean paste will also add beautiful flecks of vanilla to the lighter dough, giving it a gourmet touch and an even sweeter, cozier aroma and flavor.
- Almond Marble: If you enjoy nutty notes, add a tiny splash (about ½ teaspoon) of almond extract to the plain dough. Almond pairs wonderfully with chocolate, creating a sophisticated flavor combination that is both comforting and aromatic. The smell of these baking will fill your kitchen with an irresistible fragrance. For an extra crunch, you could even fold in a small amount of finely chopped toasted almonds into the plain dough.
- Citrus Zest Swirl: For a bright and zesty twist, finely grate the zest of one lemon or orange and mix it into the plain shortbread dough. The citrus notes provide a lovely counterpoint to the rich chocolate, adding a refreshing burst of flavor that is particularly delightful during warmer months or as a palate cleanser after a rich meal.
Explore More Shortbread Delights
My love for shortbread stems from its incredible versatility and the fact that such a simple recipe, with so few ingredients, can yield such delightful results. If you’ve enjoyed these chocolate marble cookies, you’ll surely love exploring other ways to customize and enjoy this classic treat. Here are more of our favorite shortbread recipes that are worth trying:
- For an elegant and simple treat, try making a classic rectangle shortbread dipped in chocolate, then sprinkled with whatever toppings you like—think chopped nuts, sprinkles, or a dusting of cocoa.
- Why not elevate your shortbread experience by making a luscious lemon buttercream and assembling shortbread cookie sandwiches? The tartness of lemon buttercream perfectly complements the buttery cookies.
- For something cute and festive, especially for fall celebrations, don’t miss these charming Halloween shortbread cookies. They’re fun to decorate and a hit with kids and adults alike.
Common Questions About Shortbread Cookies
It is strongly advised against skipping the chilling step. Chilling the dough is critical because it allows the butter to firm up again after mixing. If the butter is too warm, the cookies will spread excessively in the oven, losing their defined shape and delicate crispness. Chilling helps the shortbread maintain its perfect form and achieve that desirable crumbly texture.
Shortbread dough is inherently a bit crumbly, and this is perfectly normal, even desirable for its signature texture. It’s not meant to be a smooth, elastic dough like yeast bread. If your dough is so crumbly that it won’t hold together when pressed firmly, it likely needs a little more moisture. Add milk one teaspoon at a time, mixing briefly after each addition, until the dough just barely comes together when squeezed in your hand. Be careful not to add too much!
Yes, absolutely! Baking shortbread in a pan is a very traditional and popular method, especially for “petticoat tails” or shortbread squares. To do this, press the marbled dough evenly into an 8×8 inch baking pan. Prick the entire surface with a fork, as you would with individual cookies, and bake until the top is lightly golden, which typically takes about 25–30 minutes. Once baked, cut the shortbread into squares or wedges while it’s still warm in the pan. Allow it to cool completely before removing the pieces.
The key to beautiful marbling is minimal handling after you combine the two doughs. Flatten each dough into similar-sized discs, stack them, and then gently fold or lightly knead them just 2-3 times. The goal is to create distinct swirls, not to completely blend the colors. If you overmix, the chocolate will disperse too much, resulting in a muted, less dramatic effect or an entirely brown dough.
Printable Recipe Card
Chocolate Marble Shortbread Cookies
Classic buttery shortbread with a subtle swirl of dark chocolate. Simple enough for everyday baking, yet pretty enough to grace any cookie tray or holiday spread.
By Katie Shaw
20 mins
15 mins
1 hr
1 hr 35 mins
Approximately 30 cookies
Equipment
- 1 Large Mixing bowl
- 1 Hand mixer (or stand mixer)
- Parchment paper
- 1 Baking Sheet
- 1 Wire cooling rack
- Rolling Pin
- Cookie Cutters (optional)
Ingredients
- 4 cups all-purpose flour
- 1 cup salted butter, softened
- 1 cup granulated sugar
- 2 tablespoons dark cocoa powder
- 2–3 tablespoons milk, as needed to moisten dough
Instructions
- Cream butter and sugar. In a large mixing bowl, cream together the softened butter and granulated sugar until the mixture is light and fluffy. This can take 3-5 minutes with a mixer.
- Add flour, then milk. Gradually add the all-purpose flour to the creamed butter and sugar. Mix on low speed until the dough looks crumbly. Then, add milk, one tablespoon at a time, mixing just until the dough comes together when pressed firmly in your hand. Be careful not to overmix or add too much milk.
- Divide and add chocolate to half. Divide the dough into two equal halves. Leave one half plain. To the other half, add the 2 tablespoons of dark cocoa powder. Mix until the cocoa is thoroughly and evenly blended into the dough. If needed, add 1-2 teaspoons of milk to help the chocolate dough become smooth and cohesive.
- Swirl the dough. Flatten both the plain and the chocolate dough halves into roughly equal-sized discs. Stack the chocolate disc directly on top of the plain disc. Gently knead or fold them together just a few times (2-3 turns) to create a beautiful marbled effect. Stop mixing before the colors fully blend.
- Chill the dough. Wrap the marbled dough tightly in plastic wrap and place it in the refrigerator to chill for 1 to 2 hours, or until it is firm enough to roll and cut without sticking or spreading.
- Roll and cut. Preheat your oven to 350°F (175°C). On a sheet of parchment paper, roll the chilled dough evenly to a thickness of about ½ inch. Use cookie cutters to cut the dough into your desired shapes. If the dough softens too much, return it to the fridge for a few minutes.
- Prick and bake. Place the cut cookies onto a parchment-lined baking sheet, leaving a small space between them. Prick each cookie several times with a fork to allow air to escape during baking. Bake for 15 minutes, or until the edges are just barely golden. The centers should remain light.
- Cool and finish. Carefully transfer the baked cookies to a wire rack and allow them to cool completely. For an optional, elegant finish, drizzle the cooled cookies with melted dark or white chocolate. Let the chocolate set before serving or storing.
Notes
For best results, always use high-quality butter for shortbread. To achieve a deeper, more intense chocolate flavor, you can increase the cocoa powder to 3 tablespoons. For holiday presentation, consider drizzling with both dark and white chocolate, then sprinkling with a touch of flaky sea salt or colorful sprinkles.
Nutrition (per serving, estimated)
Calories: 142kcal
Carbohydrates: 20g
Protein: 2g
Fat: 6g
Saturated Fat: 4g
Polyunsaturated Fat: 0.3g
Monounsaturated Fat: 2g
Trans Fat: 0.2g
Cholesterol: 16mg
Sodium: 50mg
Potassium: 26mg
Fiber: 1g
Sugar: 7g
Vitamin A: 191IU
Calcium: 6mg
Iron: 1mg