

Homemade Peach Galette: Your Essential Summer Dessert
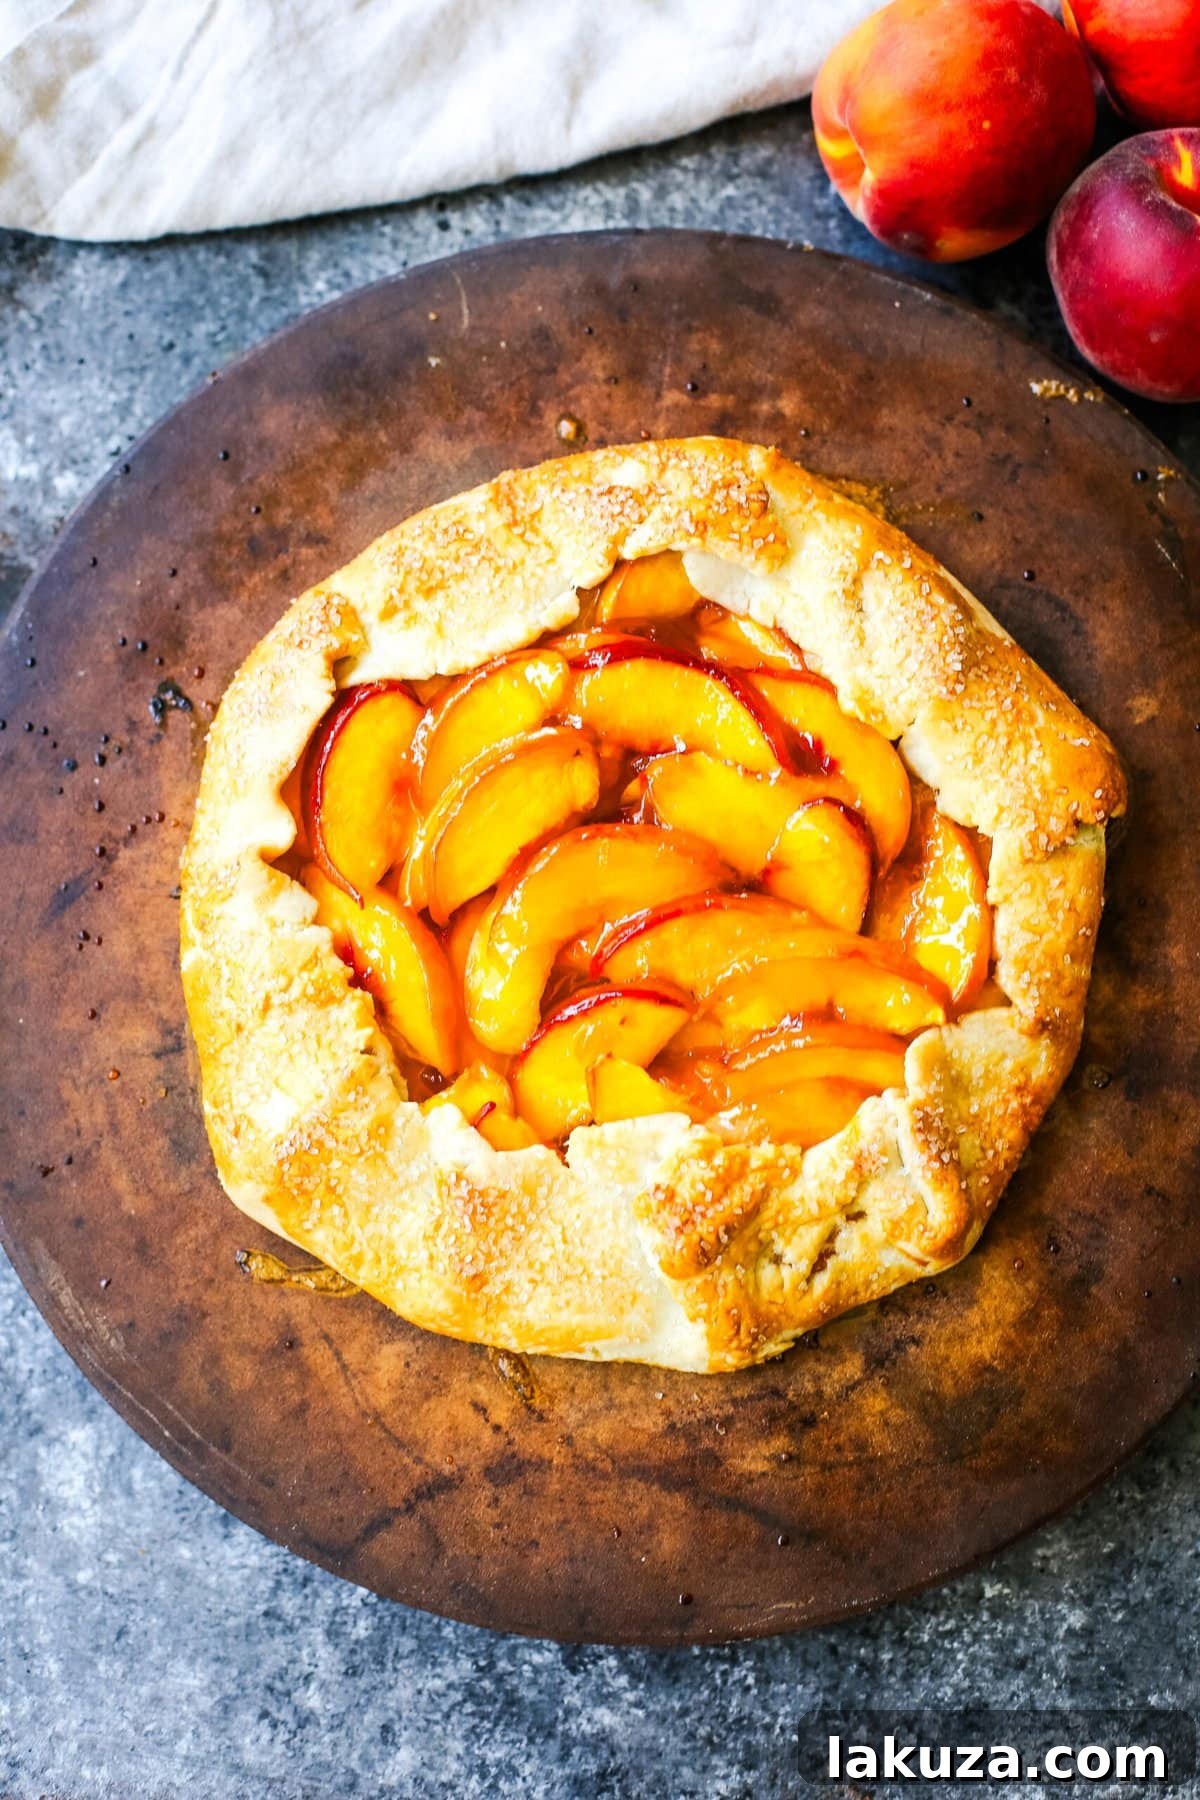
There’s nothing quite like the taste of summer, and this Homemade Peach Galette perfectly encapsulates it. Imagine a warm, golden crust, irresistibly buttery and flaky, cradling a generous filling of sweet, sun-ripened peaches. Baked to perfection, this rustic yet elegant dessert is not just a treat for the palate, but also a celebration of the season’s finest fruit. Forget complicated pies; this simple peach recipe offers all the deliciousness with a fraction of the effort, making it the ideal summer dessert for any occasion. It’s truly the best way to enjoy the peak of peach season!

As the vibrant hues of summer unfurl, so does the season of succulent peaches. The sheer delight of biting into a perfectly ripe, in-season peach is unparalleled—bursting with natural sweetness and dripping with juice. This distinct quality makes them an absolute star in any dessert, and I find myself eager to highlight their glorious flavor in every imaginable creation. While many fruits shine, fresh, seasonal peaches truly elevate a dish from good to extraordinary, especially in this easy-to-make galette. The contrast between a perfectly ripe, seasonal peach and one picked too early is immense, and you’ll taste the difference in every bite of this galette.
Galettes have become one of my favorite go-to desserts, primarily for their delightful simplicity and charmingly rustic aesthetic. Unlike the precision often required for a traditional pie, galettes embrace imperfection. Their free-form nature means there’s no need for fancy pie plates or intricate crimping techniques. Just a simple fold of the dough over the luscious fruit filling creates a beautiful, homemade look that truly speaks to the heart of comforting, home-baked goodness. This inherent ease makes them accessible even for novice bakers, promising impressive results every time, all while achieving that desirable elegant, yet unpretentious, appearance.
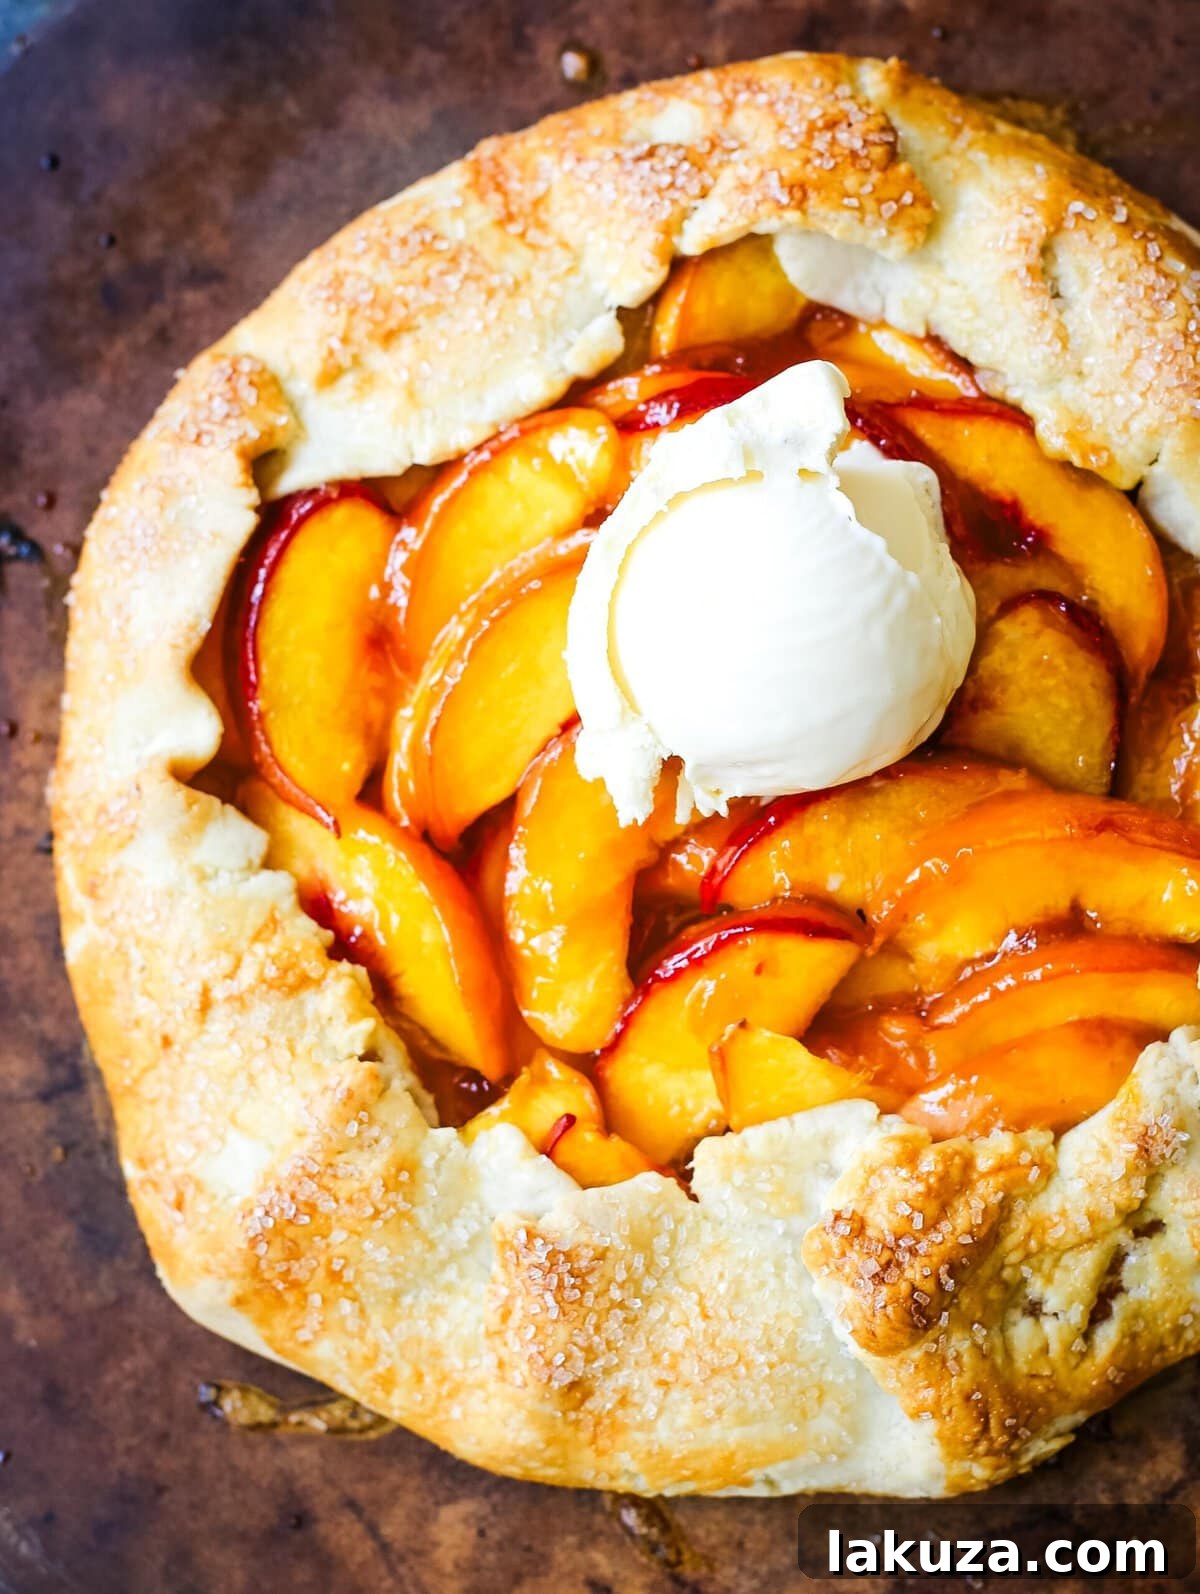
The magic of this homemade peach galette begins with a meticulously prepared, buttery pie crust that achieves that coveted golden, flaky texture. This delicate casing encases a vibrant, homemade peach filling, sweetened just right to complement the fruit’s natural sugars, and subtly enhanced with a hint of vanilla. Once baked until golden and bubbling, the galette emerges from the oven, filling your kitchen with an intoxicating aroma of sweet peaches and warm pastry. Served warm, perhaps with a scoop of creamy vanilla bean ice cream melting gently over the succulent peaches, it transforms into an unforgettable summer experience – a truly perfect ending to any meal, inviting everyone to enjoy its wholesome goodness.

What Exactly is a Galette?
A galette, derived from the French word “galette” meaning “flat cake,” is a term that broadly refers to various flat, round, or free-form cakes. In the culinary world, it most commonly describes a rustic, open-faced tart. What sets a galette apart is its distinctive presentation: the dough is rolled into a large circle, a sweet or savory filling is placed in the center, and then the edges of the dough are simply folded up and over the filling, creating a beautifully crimped and imperfect border. The center remains exposed, allowing the vibrant filling to be showcased. This casual approach to baking gives galettes an inviting homemade charm that traditional pies often lack in their pursuit of perfection.
- Dough: At its heart, a galette relies on a rich and tender pie dough. This dough is typically rolled out into a generous, thin circle, providing a sturdy yet delicate foundation for the filling. The quality of the dough is crucial for that desirable flaky texture that contrasts so wonderfully with the soft fruit. A well-made dough is the secret to a galette that holds its shape and delivers a satisfying crunch.
- Filling: The versatility of a galette truly shines in its filling. While sweet variations often feature seasonal fruits like peaches, apples, various berries, or plums—sweetened with sugar and enhanced with spices like cinnamon or nutmeg—savory options are equally delicious. These might include cheeses, vegetables, or meats, creating a delightful meal any time of day, from a light lunch to a sophisticated appetizer.
- Preparation: The preparation process is intentionally straightforward, contributing to the galette’s rustic charm. After the filling is artfully arranged in the center of the rolled-out dough, the outer edges are gently folded inwards, partially covering the filling but leaving a central portion exposed. This free-form folding technique is what gives the galette its signature homemade, unpretentious appearance. It’s a forgiving dessert, allowing for artistic expression without the pressure of precision.
Interestingly, this delightful pastry also shares a strong resemblance with the Italian “crostata.” While both refer to a type of free-form tart with a rustic, folded crust, the term “crostata” specifically roots the dessert in Italian culinary traditions, similar to how “galette” points to its French origins. Regardless of the name, the essence of a simple, fruit-filled, open-faced tart remains the same—a testament to delicious simplicity and the timeless appeal of fresh ingredients. It’s a dessert that feels both ancient and refreshingly modern.
For those who adore these rustic tarts, I’ve shared several beloved recipes previously. If you enjoy the easy elegance of galettes, you might also love our vibrant Fresh Blackberry Galette and a delightful Cherry Galette, both featuring a perfectly buttery pie crust. Each recipe emphasizes the ease and charm of this wonderful dessert style, proving that gourmet taste doesn’t have to mean complicated baking, and celebrating seasonal fruits in the most delicious way.

Essential Ingredients for Your Perfect Peach Galette
Crafting the perfect Homemade Peach Galette requires a few simple yet high-quality ingredients. Each plays a crucial role in achieving that coveted balance of flaky crust and luscious, sweet fruit filling. Here’s a detailed look at what you’ll need to create this amazing summer dessert:
- Fresh Peaches: The absolute star of the show! Always opt for ripe, in-season peaches for the best flavor, juiciness, and aromatic intensity. Their natural sweetness dictates how much sugar you’ll need to add to the filling. Choose firm-ripe peaches that yield slightly to pressure.
- Granulated Sugar: This sweetens the peaches and helps draw out their natural juices, creating a delicious, syrupy filling. Remember to adjust the amount based on the inherent sweetness of your chosen peaches.
- Cornstarch: A vital thickening agent for the peach filling. It plays a crucial role in preventing the galette from having a soggy bottom by absorbing excess moisture released by the peaches during baking, ensuring a perfectly set filling.
- Vanilla Extract: Enhances the overall flavor profile of the peaches, adding a warm, aromatic note that complements the fruit beautifully and ties all the flavors together.
- Egg: Used primarily for an egg wash. A beaten egg (or just the yolk) brushed over the crust provides a beautiful golden-brown sheen and aids in browning, giving your galette a professional, appealing look. An egg white can also be used as a pre-bake barrier against a soggy crust.
- Unsalted Butter: The foundation of a truly exceptional, flaky pie crust. It is paramount that the butter is kept very cold and cut into small cubes to create those desirable pockets of steam that result in a wonderfully flaky texture.
- All-Purpose Flour: Provides the necessary structure for the galette dough. The key to a tender crust is to avoid overmixing the flour, which can develop too much gluten and lead to a tough result.
- Salt: An often-underestimated ingredient, salt is essential for both the crust and the filling. In the crust, it balances the richness of the butter, and in the filling, it significantly enhances the sweetness and depth of flavor of the peaches.
- Buttermilk or Ice Water: Used to bring the dough together. Buttermilk adds a slight tangy note and contributes to a more tender crust, while ice water ensures the butter remains cold, which is absolutely crucial for achieving maximum flakiness.
- Apricot or Peach Jam: An optional but highly recommended ingredient for a glossy, professional finish and an extra layer of fruit flavor over the baked peaches. It gives the galette a beautiful sheen and extra pop of fruit flavor.

Step-by-Step Guide: Crafting Your Delicious Peach Galette
Creating this rustic Peach Galette is a rewarding process that yields a stunning dessert with minimal fuss. Follow these detailed steps for a perfect result every time, celebrating the simple beauty of summer peaches.
Preparing the Flaky Dough
- Combine Dry Ingredients: In a large mixing bowl, or the bowl of a food processor, whisk together 1 ¾ cups plus 1 tablespoon of all-purpose flour and ½ teaspoon of salt. This step ensures an even distribution of the salt throughout the dough, crucial for balanced flavor.
- Cut in Cold Butter: Add ¾ cup (12 tablespoons) of cold, cubed unsalted butter to the dry ingredients. If using a pastry cutter, work the butter into the flour until the mixture resembles coarse crumbs, with some larger pea-sized pieces of butter still visible. If using a food processor, pulse briefly, about 8-10 times, until you achieve the same coarse crumb consistency. The key here is to keep the butter as cold as possible to achieve a truly flaky crust.
- Introduce Cold Liquid: Gradually add ¼ cup of ice water or cold buttermilk, one tablespoon at a time, mixing gently after each addition. Continue until the dough just begins to come together. The dough should be moist enough to hold its shape but not sticky to the touch. Avoid adding too much liquid, as this can make the dough tough and less tender.
- Chill the Dough (Optional but Recommended): Gently form the dough into a flat disk. Wrap it tightly in plastic wrap and refrigerate for at least 1 hour, or up to 2 days. Chilling the dough allows the gluten to relax, making it easier to roll out without shrinking, and ensures the butter remains cold, contributing to a superior flaky texture when baked.
Crafting the Sweet Peach Filling
- Prepare the Peaches: Begin by washing your 1 ¼ lbs of fresh peaches. Peeling is entirely optional; the skins will soften significantly during baking, but for a silkier texture, you may peel them. To peel easily, blanch them briefly in boiling water for 30-60 seconds, then immediately transfer to an ice bath. Once peeled (if desired), slice the peaches into uniform, roughly ¼-inch thick slices.
- Mix the Filling: In a large bowl, gently combine the sliced peaches with ⅓ cup of granulated sugar (adjusting to taste based on peach sweetness), 1 tablespoon of cornstarch, and ½ teaspoon of vanilla extract. Toss everything carefully to ensure the peaches are evenly coated. The sugar will draw out the natural juices, and the cornstarch will work its magic to thicken these juices, preventing a soggy crust and ensuring a luscious filling.
Assembling Your Rustic Galette
- Roll Out the Dough: On a lightly floured surface, unwrap your chilled dough disk. Roll it out into a large circle, approximately 12 inches in diameter and about ⅛-inch thick. Aim for an even thickness to ensure uniform baking and a consistently flaky crust.
- Transfer to Baking Sheet: Carefully transfer the rolled dough onto a baking sheet lined with parchment paper. This prevents sticking and makes cleanup a breeze. Optional: For an extra layer of protection against a soggy bottom, lightly brush the inner circle of the dough (where the peaches will sit) with an egg white. This creates a barrier against moisture.
- Add the Peach Filling: Arrange the prepared peach slices in a beautiful single layer in the center of the dough, leaving a generous 2-inch border all around the edges. Be sure to leave behind any excess liquid that may have accumulated in the peach bowl, as too much moisture can lead to a soggy crust.
- Fold the Edges: Gently fold the 2-inch border of the dough up and over the outer edge of the peach filling. Overlap the dough as needed, creating natural pleats, and press gently to seal any seams. This free-form folding is what gives the galette its signature rustic appeal, showcasing the beautiful fruit.
- Brush and Sprinkle: In a small bowl, lightly beat the remaining egg (or just the egg yolk if you used the white earlier). Brush this egg wash generously over the folded dough edges. This will help the crust achieve a beautiful golden-brown color and a subtle sheen. Finish by sprinkling the egg-washed crust with coarse sugar (such as turbinado or sanding sugar) for a lovely sparkle and added textural crunch.
Baking to Golden Perfection
- Preheat Oven & Bake: Preheat your oven to 375°F (190°C). Once preheated, carefully transfer the baking sheet with the assembled galette to the oven. Bake for approximately 40-45 minutes, or until the crust is a deep golden brown and the peach filling is visibly bubbling in the center. The bubbling indicates the fruit juices have thickened beautifully, and the peaches are tender.
- Cool: Remove the galette from the oven and allow it to cool on the baking sheet for at least 10-15 minutes before attempting to move or slice it. This crucial cooling period allows the filling to set further and makes the galette much easier to handle without falling apart.
Optional Finishing Touch: A Glossy Glaze
For an added touch of elegance and intensified fruit flavor, consider this optional but highly recommended step:
14. Brush with Jam: While the galette is still warm, gently warm 2 tablespoons of apricot or peach jam in the microwave for 10-15 seconds until it becomes smooth and fluid. Using a pastry brush, lightly brush this warmed jam over the exposed peach slices. This creates a beautiful, glistening sheen and locks in extra peachy goodness, giving your galette a truly gourmet finish that looks as good as it tastes.

Expert Tips for Making the Best Peach Galette
Achieving a show-stopping Peach Galette is simpler than you think with these professional tips that will ensure a perfectly flaky crust and a deliciously juicy filling every time:
- Keep Ingredients Cold: This is paramount for a flaky crust. Ensure your butter is ice-cold and your water (or buttermilk) is chilled. Cold butter creates pockets of steam in the oven, which leads to those desirable flaky layers, preventing a tough or dense crust.
- Don’t Overwork the Dough: Mix the dough just until it comes together. Overworking develops gluten excessively, resulting in a tough, rather than tender, crust. Handle it minimally and with gentle hands.
- Taste Your Peaches: The sweetness of peaches can vary widely depending on ripeness and variety. Taste a slice before mixing the filling and adjust the amount of sugar accordingly. If your peaches are super sweet, you might need less sugar; if they’re a bit tart, add a little more to balance the flavors perfectly.
- Prevent Soggy Bottoms: This is a common pitfall but easily avoided. To combat it, ensure you toss the peach slices thoroughly with cornstarch; this thickens the juices released during baking. Additionally, brushing the inner crust with a thin layer of egg white before adding the fruit creates an effective moisture barrier, protecting the dough from the juicy filling.
- Egg Wash for Golden Shine: A simple egg wash (a beaten egg or just the egg yolk) brushed generously over the folded crust before baking doesn’t just add a beautiful golden color but also a lovely, subtle sheen. This makes your galette look professionally baked and incredibly appetizing.
- Jam for Enhanced Sweetness and Sheen: The optional step of brushing warmed apricot or peach jam over the baked fruit is a game-changer. It provides a gorgeous glossy finish that catches the light and intensifies the fruit’s flavor, elevating the overall appearance and taste to a gourmet level, adding a final touch of sweetness and beauty.
Frequently Asked Questions About Peach Galettes
How to prevent a galette from getting a soggy bottom?
The most effective strategy to avoid a soggy galette bottom is a two-pronged approach. Firstly, ensure you generously toss your sliced peaches with cornstarch. This crucial ingredient binds with the fruit’s natural juices as they release during baking, preventing excess moisture from saturating the crust. Secondly, brushing the inside of the galette crust with a thin layer of egg white before adding the filling creates a protective barrier, essentially waterproofing the dough against the juicy peaches. This combination ensures a beautifully crisp and flaky crust every time, even with the juiciest peaches.
How do I store the galette?
To keep your galette fresh, store any leftovers in an airtight container. It can be kept at room temperature for up to 2 days, especially if covered loosely. If you prefer to extend its freshness, refrigerate it for up to 5 days. For the best enjoyment, gently reheat individual slices in a preheated oven at 300°F (150°C) for a few minutes. This will help to crisp up the crust and warm the filling, bringing back that delightful freshly baked taste and texture.
Should I peel the peaches for the galette?
Peeling the peaches for a galette is entirely a matter of personal preference. During the baking process, the peach skins soften considerably, so they won’t be tough or unpleasantly chewy. Many people enjoy the slight textural contrast and the ease of leaving them on. However, if you prefer a perfectly smooth, uniform texture in your filling and don’t mind the extra step, then peeling them is recommended. It won’t significantly alter the flavor, so it’s purely about texture.
Can I use frozen or canned peaches?
Yes, you can absolutely use frozen or canned peaches when fresh are not available or out of season. However, it’s crucial to manage their moisture content diligently. If using frozen peaches, make sure to thaw them completely and drain them exceptionally well to remove all excess water, perhaps even gently pressing them in a clean towel. For canned peaches, drain them thoroughly from their syrup and pat them dry. Too much moisture will lead to a very soggy crust, so careful draining is key to a successful galette with a crisp bottom.
Can I make the peach galette dough ahead of time?
Absolutely! Preparing the dough in advance is a fantastic time-saver. You can make the galette dough and store it wrapped tightly in plastic wrap in the refrigerator for up to 2-3 days. This allows you to assemble and bake the galette on demand, making it an ideal option for entertaining or busy days. Just remember to let it soften slightly at room temperature for about 10-15 minutes before rolling if it’s too firm directly from the fridge, to prevent cracking.
What can I serve with my Peach Galette?
While a scoop of classic vanilla bean ice cream is always a winning combination, there are many other delightful serving options. Consider a dollop of freshly whipped cream, perhaps infused with a hint of cinnamon, almond extract, or even a touch of bourbon for an adult twist. A drizzle of warm caramel sauce, a sprinkle of toasted slivered almonds, or chopped pistachios can also add wonderful depth and texture. For a lighter touch, a side of plain or vanilla Greek yogurt or a simple mint garnish would be lovely.
Other Irresistible Peach Dessert Recipes
If you’ve fallen in love with the sweet charm of peaches and are looking for more ways to celebrate this incredible summer fruit, you’re in luck! Here are some more delightful peach dessert recipes that are sure to inspire your baking and delight your taste buds:
Peach Crisp
A quintessential comfort dessert featuring tender, sweetened peaches baked under a crispy brown sugar and oat crumble topping. This classic is often served warm with a generous scoop of creamy vanilla ice cream, creating a delightful contrast of textures and temperatures.
Peach Cobbler
Indulge in this quintessential Southern dessert where juicy, ripe peaches are crowned with a sweet, cake-like biscuit topping, baked until golden and bubbling. It’s a heartwarming and timeless treat that’s perfect for family gatherings or a cozy evening in.
Texas Style Peach Cobbler
A rich and comforting variation of the classic, this recipe features fresh, perfectly sweetened peaches baked beneath a creamy, exceptionally buttery cake-like topping. A true Texas favorite, it offers a decadent twist on a beloved dessert.
Peach Dump Cake
For the ultimate easy peach dessert that requires minimal effort, this 4-ingredient dump cake is a revelation. It effortlessly combines peaches, French vanilla cake mix, and butter for a surprisingly delicious and effortlessly satisfying treat, perfect for a quick fix.


Peach Galette
By: Modern Honey® – www.modernhoney.com
This Homemade Peach Galette is made with a warm, golden crust that’s both buttery and flaky and filled with juicy, sweetened, sun-ripened peaches and baked until perfection. This is the perfect summer dessert recipe!
Prep Time: 20 minutes
Cook Time: 40 minutes
Servings: 8
Print Recipe
Ingredients
Butter Pie Crust:
- 3/4 cup (12 Tablespoons) Cold Butter (cut into cubes)
- 1 3/4 cup + 1 Tablespoon All-Purpose Flour
- 1/2 teaspoon Salt (if using salted butter, reduce salt to 1/4 tsp)
- 1/4 cup Cold Water or Buttermilk
Peach Filling:
- 1 1/4 lbs. Fresh Peaches
- 1/3 cup Granulated Sugar (or more to taste)
- 1 Tablespoon Cornstarch
- 1/2 teaspoon Vanilla Extract
For Topping:
- 1 large Egg (beaten, for brushing on top)
- 2 Tablespoons Apricot Jam (or preferred fruit jam)
- Coarse sugar, for sprinkling
Instructions
PIE DOUGH:
- In a large bowl or food processor, combine the flour and salt. Add the cold, cubed butter and cut it into the flour mixture using a pastry cutter or your fingers until it resembles coarse crumbs with some pea-sized butter pieces. If using a food processor, pulse until this texture is achieved.
- Gradually add ice water or cold buttermilk, 1 tablespoon at a time, mixing until the dough just comes together. It should be moist but not sticky.
- Form the dough into a disk, wrap it in plastic wrap, and refrigerate for at least 1 hour (or up to 2 days) to chill thoroughly.
PEACH FILLING:
- Peel (if desired) and slice the peaches into roughly 1/4-inch thick pieces. In a large bowl, combine the sliced peaches, sugar, cornstarch, and vanilla extract. Toss gently to coat all the peaches evenly.
ASSEMBLING THE GALETTE:
- On a lightly floured surface, roll the chilled dough into a 12-inch circle. Carefully transfer the dough to a parchment-lined baking sheet. Optional: Brush the inner circle of the dough with an egg white to create a moisture barrier.
- Arrange the peach slices in the center of the dough, leaving a 2-inch border. Discard any excess liquid from the peach bowl.
- Fold the edges of the dough over the peaches, overlapping as needed and gently pressing to seal.
- Brush the folded dough edges with the beaten egg (or egg yolk) and sprinkle generously with coarse sugar for a golden finish and added sparkle.
BAKING:
- Preheat your oven to 375°F (190°C). Bake the galette for 40-45 minutes, or until the crust is golden brown and the filling is bubbling.
- Remove from the oven and let the galette cool on the baking sheet for at least 10-15 minutes before serving.
OPTIONAL FINISH:
- For a glossy finish, warm the apricot or peach jam in the microwave until smooth. Brush it over the peaches while the galette is still warm. Serve immediately with vanilla ice cream.
Notes
For more detailed information and troubleshooting tips, refer to the FAQ section within the blog post above.
Should I peel the peaches? Peeling is optional. The skins soften during baking, but you can peel them if you prefer a smoother filling texture.
Nutrition Facts (per serving)
(Approximation based on 8 servings)
- Calories: 429 kcal
- Carbohydrates: 57g
- Protein: 7g
- Fat: 19g
- Saturated Fat: 12g
- Polyunsaturated Fat: 1g
- Monounsaturated Fat: 5g
- Trans Fat: 1g
- Cholesterol: 71mg
- Sodium: 308mg
- Potassium: 158mg
- Fiber: 3g
- Sugar: 14g
- Vitamin A: 819 IU
- Vitamin C: 3mg
- Calcium: 20mg
- Iron: 3mg
Nutrition information is automatically calculated and should be used as an approximation.
Additional Info
- Course: Dessert
- Cuisine: French
- Keywords: peach crostada, peach galette, peach tart, summer dessert, fruit tart, easy peach dessert
Enjoyed this recipe?
We’d love to hear from you! Please leave a comment below to share your thoughts and experiences.
Jump to Comments