

Welcome to the ultimate guide for baking the most irresistible soft and chewy sugar cookies that require absolutely no frosting! This isn’t just another cookie recipe; it’s a celebration of simple perfection, a timeless treat that evokes warmth and nostalgia with every bite. If you’ve been searching for a classic sugar cookie that’s effortlessly quick, incredibly easy, and so delicious it stands proudly on its own without the need for any elaborate decorations, your quest ends here.

Sugar cookies hold a special place in many hearts, often bringing back cherished memories of childhood holidays and family gatherings. For me, growing up, my Mom’s kitchen was always filled with the comforting aroma of freshly baked sugar cookies. They graced our table for every single holiday celebration, and more often than not, we’d sneak a few (or more!) right off the cooling rack, long before any frosting could even be considered. This particular recipe captures that exact magic, delivering a cookie so inherently delightful, it truly needs no additional embellishment.
While I’ve shared various sugar cookie variations in the past – from festive Christmas Sugar Cookies adorned with seasonal cheer to delightful Frosted Soft and Chewy Sugar Cookies that melt in your mouth – this recipe strips away the complexities to focus purely on a perfectly tender, slightly crisp-edged, and wonderfully chewy texture. It’s about celebrating the inherent goodness of a well-made sugar cookie, letting its natural buttery sweetness shine through.
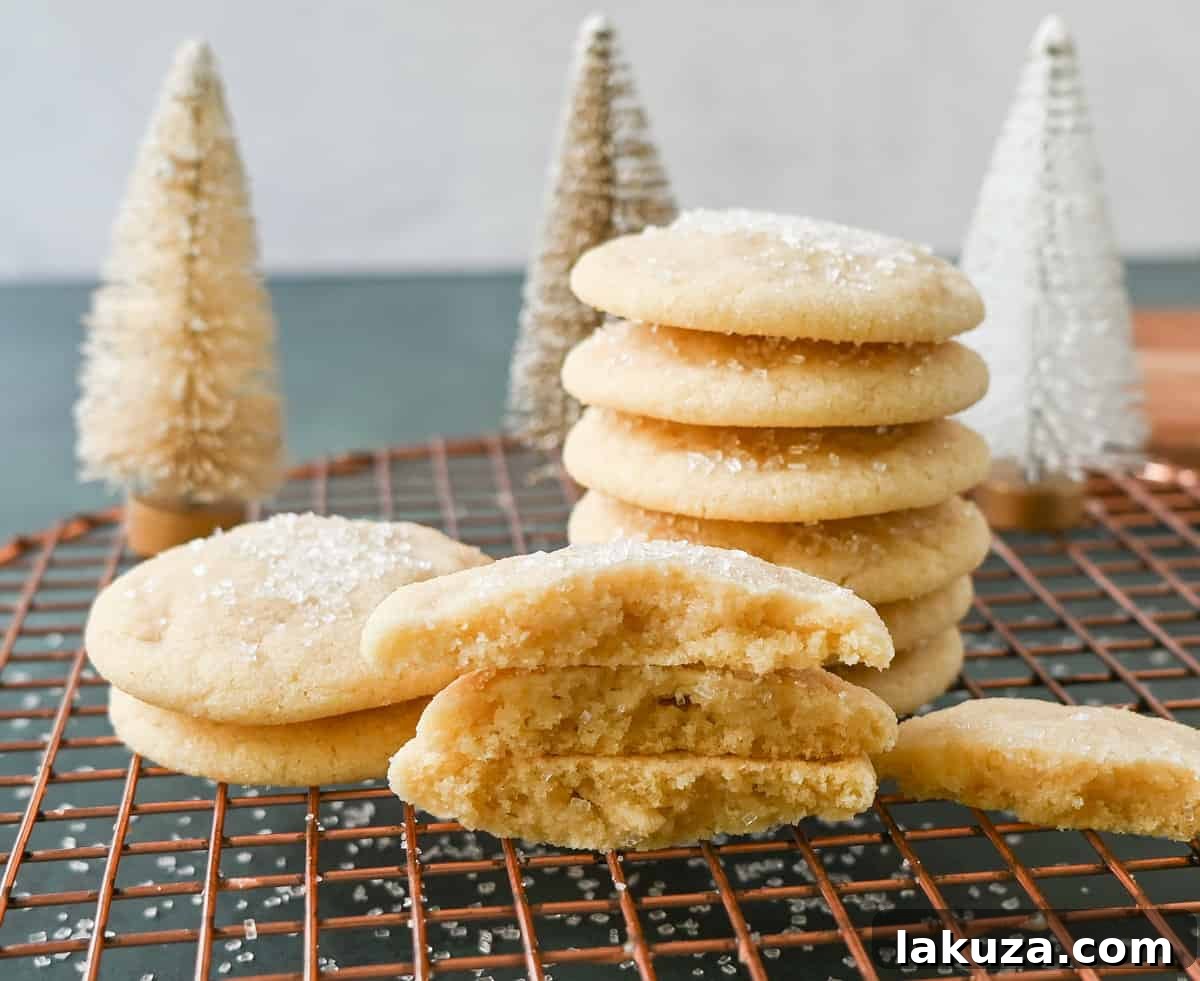
Unveiling the Secret to the Best Soft Sugar Cookie Recipe
So, what exactly makes this sugar cookie recipe stand out from the rest? It boils down to a few key factors that prioritize simplicity, incredible texture, and unforgettable flavor, making it a true crowd-pleaser for any occasion.
- Effortlessly Simple “Drop” Method: Forget the fuss of rolling pins, intricate cookie cutters, and messy shaping. This is a wonderfully easy “drop sugar cookie recipe.” You simply scoop the dough, roll it into balls, and place them on your baking sheet. No rolling, no intricate cutting into shapes, and certainly no need for frosting. It’s truly as straightforward as baking gets, making it perfect for busy bakers or those new to the kitchen.
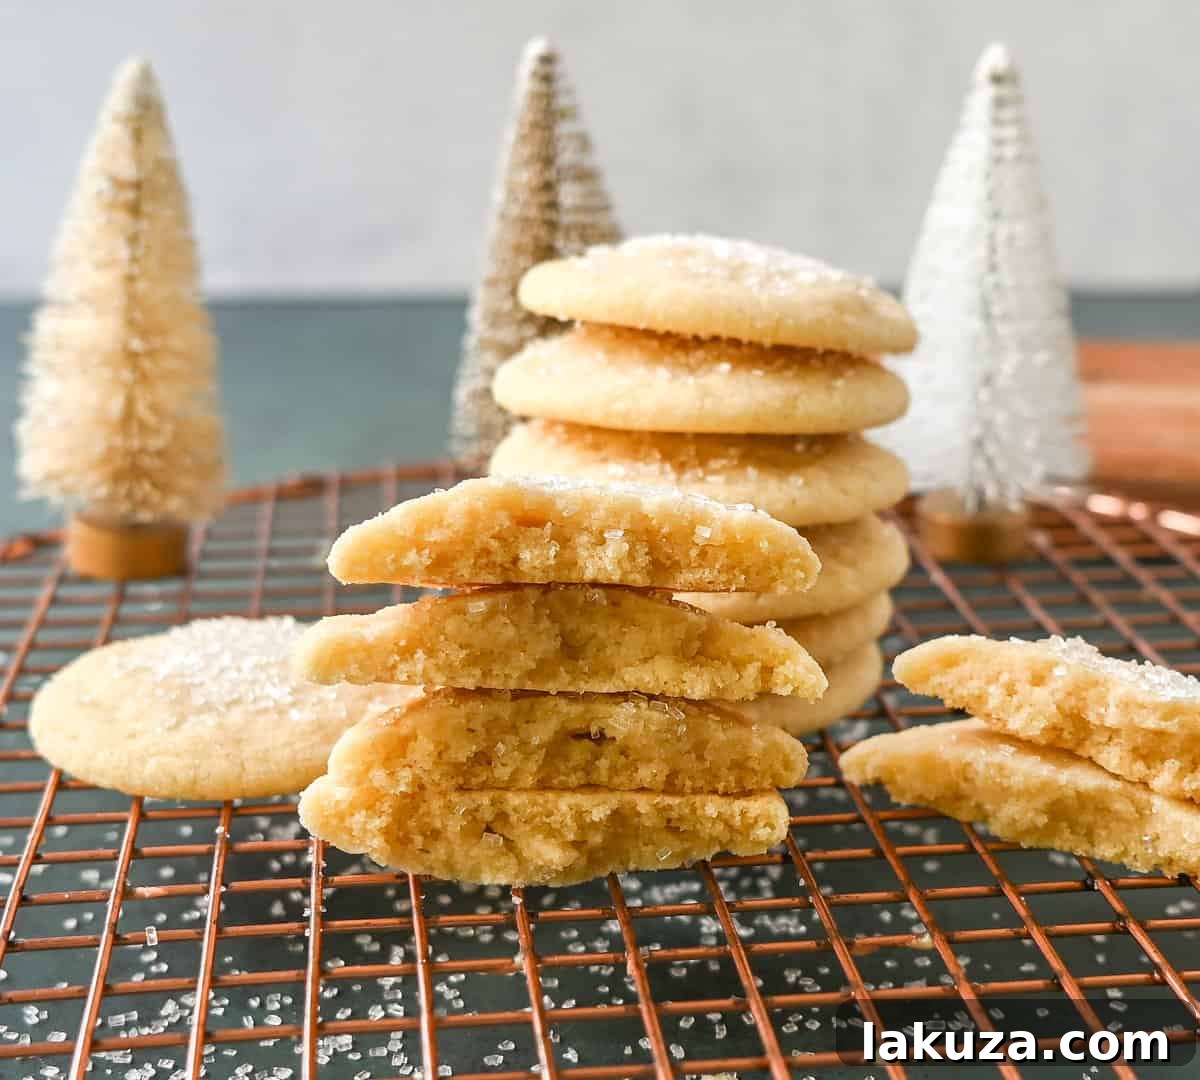
- The Perfect Soft and Chewy Harmony: The hallmark of these cookies is their unparalleled texture – a perfect balance of soft, tender centers and delicately chewy edges. Each bite offers a delightful experience, enhanced by a generous sprinkle of sparkling sugar after baking. This adds not only an extra touch of sweetness but also a subtle, pleasant crunch that elevates the cookie from great to truly extraordinary.
- Quality Ingredients, Maximum Flavor: Crafted with only simple, high-quality ingredients, these cookies prove that you don’t need a complicated list to achieve profound flavor. The integrity of each ingredient shines through, creating a rich, buttery taste that appeals to everyone. They are especially beloved on holiday goodie plates, offering a comforting, homemade touch that friends and family will adore.
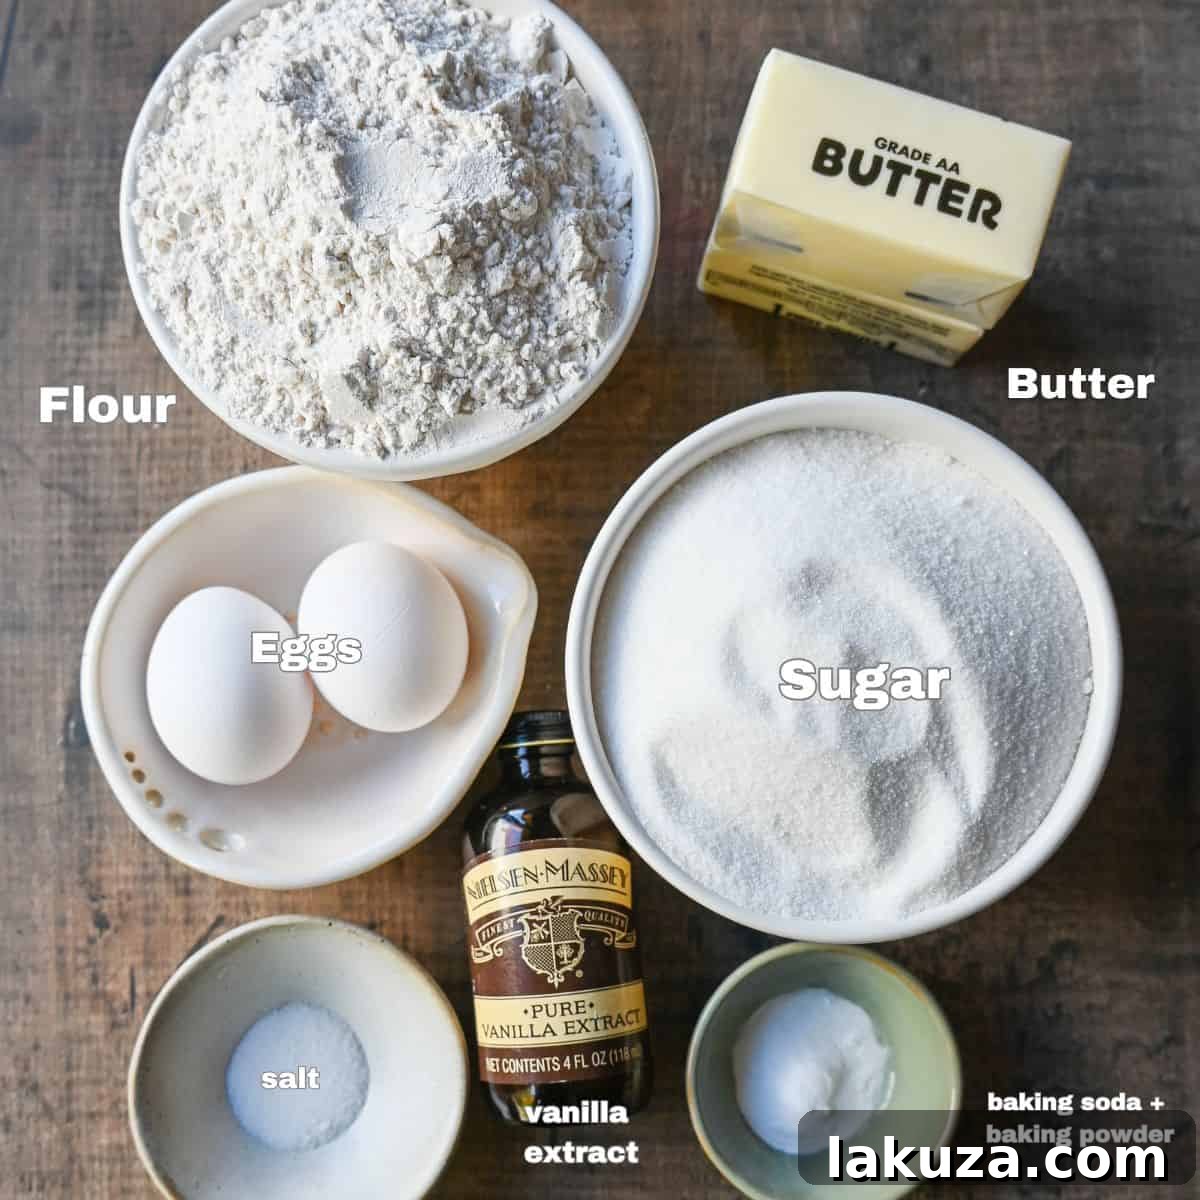
Essential Ingredients for Irresistibly Soft Sugar Cookies:
Creating these delightful cookies starts with a careful selection of common pantry staples. Each ingredient plays a vital role in achieving that coveted soft, chewy texture and rich flavor:
- Butter: For best results and precise flavor control, I highly recommend using unsalted butter. This allows you to adjust the salt content perfectly. If you only have salted butter on hand, simply reduce the amount of added salt in the recipe to 1/8 teaspoon. Ensure your butter is at proper room temperature – soft enough to indent with a finger but still holding its shape.
- Granulated Sugar: The classic choice for sugar cookies, granulated sugar contributes to both the sweetness and the delicate crispness of the cookie edges. It creams beautifully with butter to create a light, airy base for the dough.
- Egg + Extra Egg Yolk: The large egg provides structure and moisture. The addition of an extra egg yolk is a secret weapon for achieving that wonderfully chewy texture. Egg yolks are rich in fat, which tenderizes the cookie and prevents it from becoming dry or crumbly.
- Pure Vanilla Extract: Do not skimp on quality here! A high-quality, pure vanilla extract makes a noticeable difference in the overall flavor profile of your sugar cookies, adding a warm, aromatic depth that is essential to this classic treat.
- All-Purpose Flour: The primary structural component. Standard all-purpose flour works perfectly for a balanced cookie. For an even more tender cookie, you can experiment with using half all-purpose flour and half cake flour. Cake flour has a lower protein content, resulting in a softer crumb.
- Baking Powder + Baking Soda: These leavening agents work in harmony to help the cookies rise beautifully in the oven, contributing to their soft interior. Baking powder creates lift, while baking soda reacts with the acidic components (like buttermilk if used, or simply the brown sugar in some recipes) to provide spread and tenderness.
- Salt: A crucial ingredient that balances the sweetness and enhances all the other flavors in the cookie. It brings out the rich butter and vanilla notes, preventing the cookies from tasting bland.
- Sparkling or Sanding Sugar: This coarse sugar is sprinkled on the cookies immediately after they come out of the oven. It adds a beautiful sparkle, a delightful crunch, and an extra layer of sweetness that makes these unfrosted cookies truly special.
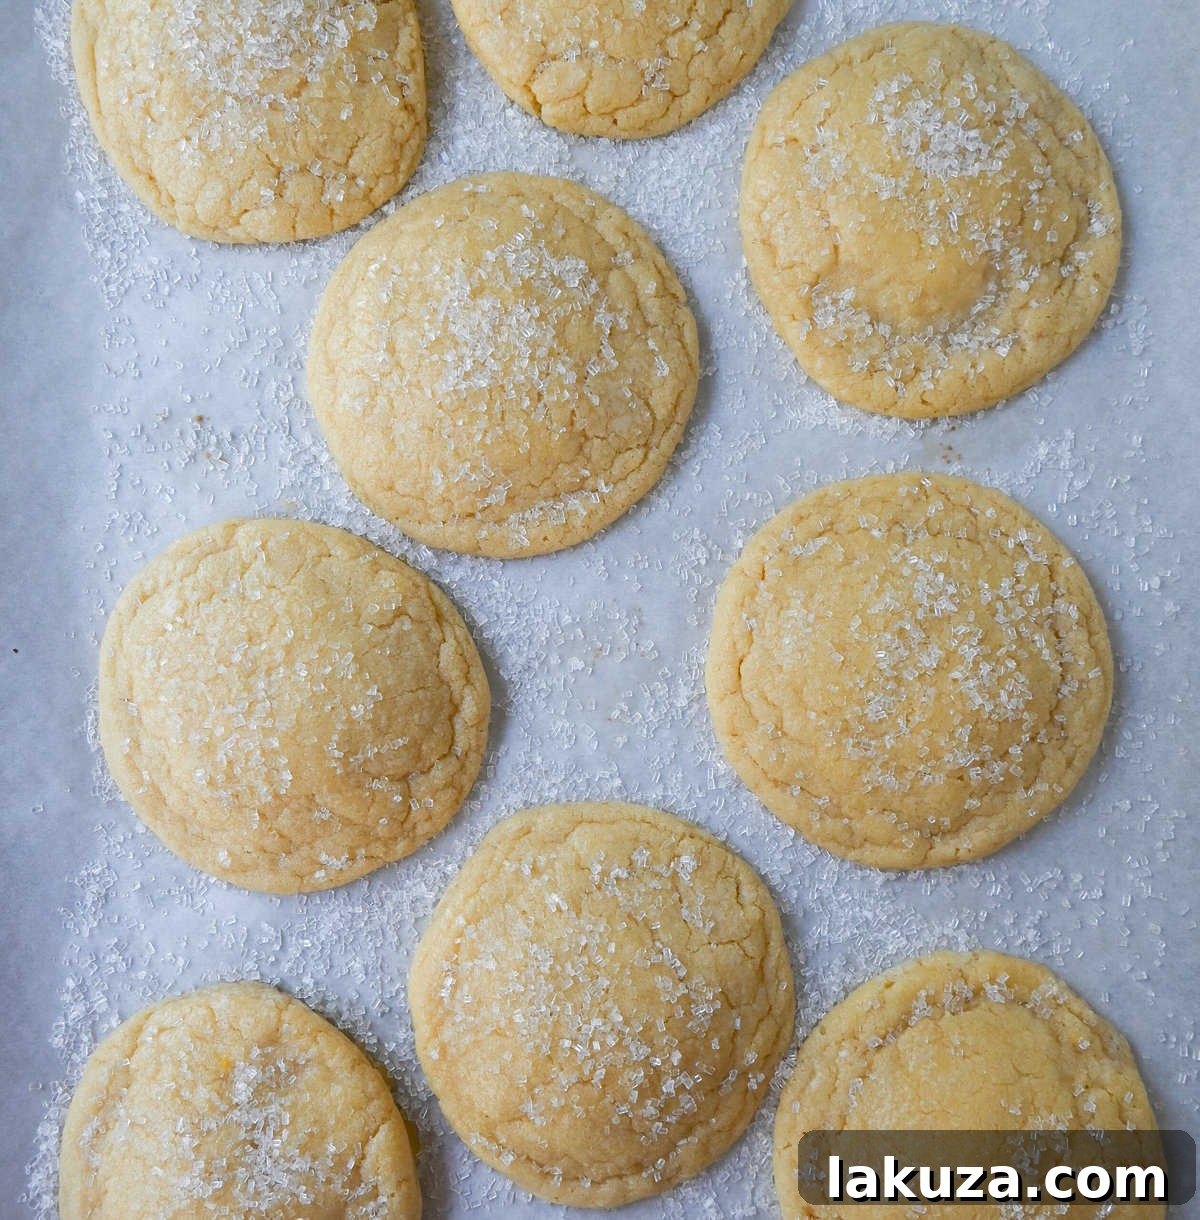
Simple Steps to Craft Soft and Chewy Sugar Cookies:
Baking these cookies is a straightforward process, even for novice bakers. Follow these steps for perfect results:
- Cream Butter and Sugar to Perfection: Begin by creaming together the softened butter and granulated sugar in a large mixing bowl. Beat them for a full 4 minutes using an electric mixer until the mixture transforms into a light, airy, and fluffy consistency. This step incorporates air, which is crucial for the cookie’s tender texture. Be sure to scrape down the sides of the bowl periodically to ensure even mixing. Next, add the large egg, the extra egg yolk, and the pure vanilla extract. Continue mixing for another minute until everything is well combined and smooth.
- Gently Fold in the Dry Ingredients: In a separate bowl, whisk together the all-purpose flour, baking powder, baking soda, and salt. Gradually add this dry mixture to your wet ingredients, mixing only until just combined. The key here is to avoid overmixing the dough. Overworking the flour develops too much gluten, which can result in tough, dense cookies rather than the soft and chewy kind we’re aiming for.
- Chill the Cookie Dough: The Essential Step: Once your dough is mixed, wrap it tightly in plastic wrap and refrigerate for at least 1 hour. While it might be tempting to skip this step, chilling is vital for preventing your cookies from spreading too much in the oven, ensuring they maintain a beautiful, plump shape.
- Prepare for Baking: After the dough has sufficiently chilled, remove it from the refrigerator. Preheat your oven to 350 degrees Fahrenheit (175°C). Line your baking sheets with parchment paper or silicone baking mats; this prevents sticking and promotes even baking. Scoop generous portions of dough and roll them into smooth balls, then arrange them on the prepared baking sheet, leaving adequate space between each cookie to allow for spreading.
- Bake Until Golden and Soft: Place the baking sheet into your preheated oven. Bake for approximately 9-12 minutes. The cookies are ready when their edges are lightly golden, but their centers still appear slightly soft and puffy. This slight underbaking is crucial for achieving that signature soft and chewy texture, as they will continue to set as they cool. Immediately upon removing the cookies from the oven, generously sprinkle them with sparkling or sanding sugar for that extra sweetness and delightful crunch. Allow them to cool on the baking sheet for a few minutes before transferring them to a wire rack to cool completely. Refer to the FAQ section below for tips on making them perfectly round!

The Importance of Chilling Sugar Cookie Dough: A Non-Negotiable Step
Chilling your cookie dough isn’t just a suggestion; it’s a critical step for achieving beautifully shaped, flavorful sugar cookies. This period of refrigeration serves multiple important purposes that directly impact the final product:
- Prevents Excessive Spreading: The most immediate and noticeable benefit of chilling is that it solidifies the butter in the dough. When the cold dough enters a hot oven, the butter takes longer to melt, allowing the cookies to set and rise slightly before they begin to spread. This prevents your cookies from turning into thin, flat discs.
- Develops and Deepens Flavors: Beyond structural benefits, chilling allows the flavors in your cookie dough to meld and deepen over time. The vanilla, butter, and sugar have more time to fully infuse throughout the flour and other ingredients, resulting in a more complex and rich taste.
- Hydrates Dry Ingredients: The flour and other dry ingredients in the dough get a chance to fully hydrate during chilling. This leads to a more tender and uniform texture, as the flour absorbs moisture and softens, contributing to that desirable soft and chewy quality.
While I’ve certainly experimented with baking these cookies without chilling the dough, they invariably turned out flatter. Although still delicious, they lacked the plumpness and ideal texture that a proper chill provides. So, for the best soft and chewy sugar cookies, embrace the chill time – at least 1 hour, or even overnight, if you have the patience!
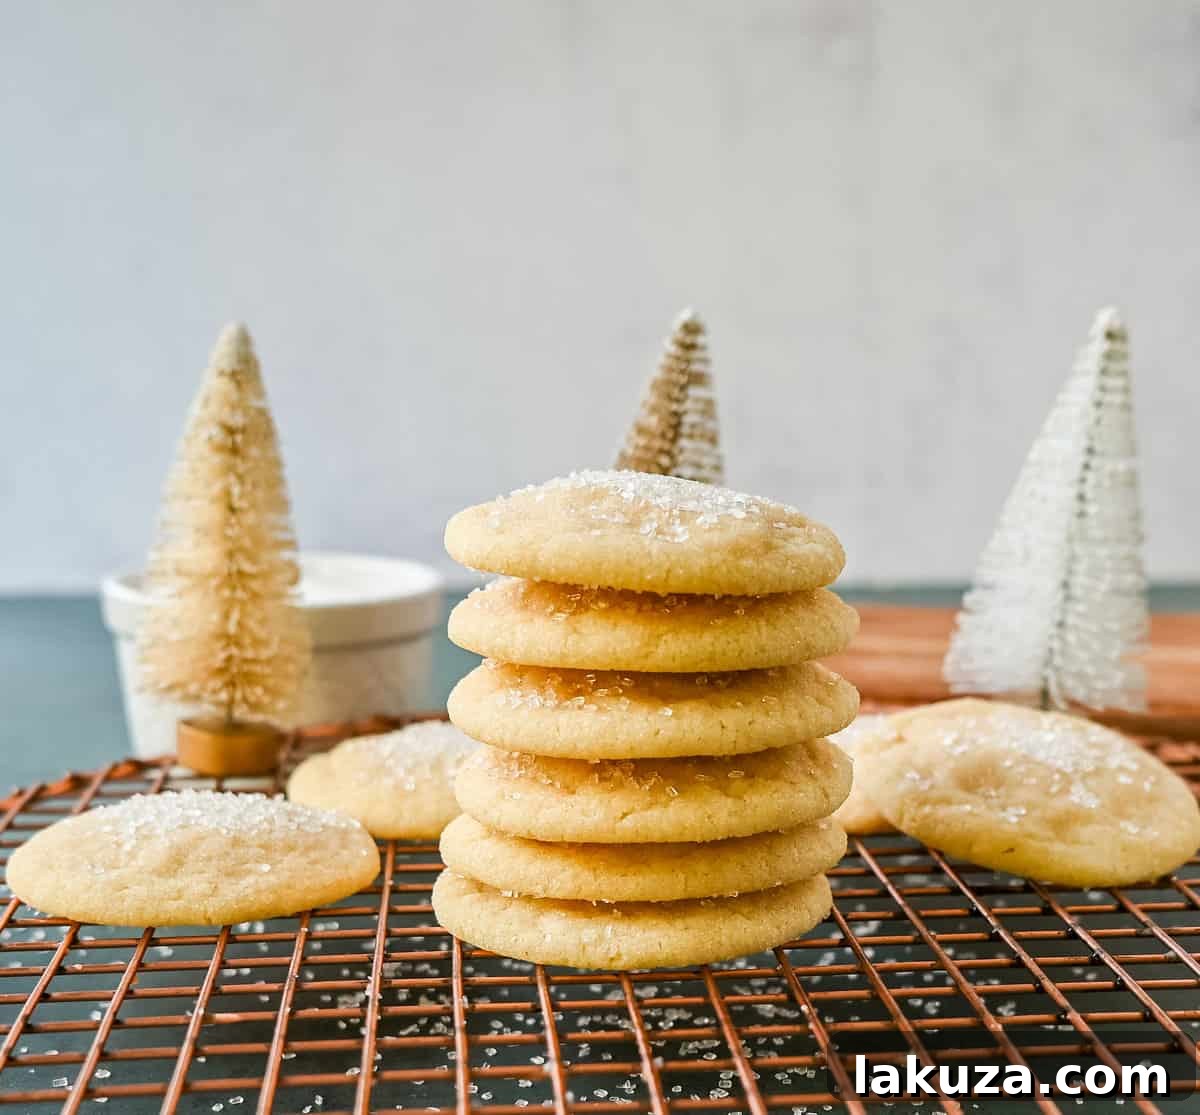
Troubleshooting: Why Are My Sugar Cookies Flat?
It’s a common baking frustration: you envision plump, soft cookies, but they emerge from the oven as disappointingly flat rounds. Several factors can contribute to flat sugar cookies, but with a few adjustments, you can achieve that perfect puffy texture:
- Butter Temperature: The temperature of your butter is paramount. It should be “barely softened room temperature.” This means it’s pliable enough to leave an indent when pressed, but still firm. If your butter is too soft or, worse, melted, it won’t be able to hold air when creamed with sugar, leading to a dough that spreads excessively in the oven.
- Inaccurate Flour Measurement: Too little flour can also cause cookies to spread too much. Always measure your flour accurately, preferably using a kitchen scale for precision. If measuring by volume, spoon the flour into your measuring cup and then level it off with a straight edge (like the back of a knife) – never pack it in.
- Insufficient Chilling Time: As discussed, chilling the dough is crucial. If the dough isn’t cold enough, the butter will melt too quickly in the hot oven, causing the cookies to spread before their structure can set. Aim for at least 1-2 hours of chilling.
- Oven Temperature: An oven that isn’t hot enough can cause cookies to spread. Ensure your oven is accurately preheated. An oven thermometer can be a valuable tool to verify the temperature.
- Greased Baking Sheets: While parchment paper is recommended, if you are using unlined baking sheets, ensure they are not overly greased. Too much grease can act as a lubricant, causing the cookies to spread more.
5 Expert Baking Tips for Unforgettable Sugar Cookies:
While this is an inherently simple and quick sugar cookie recipe, incorporating a few expert tips can truly elevate your baking game and ensure consistently perfect results every time. These small details can make all the difference in achieving that ideal soft, chewy, and flavorful cookie.
Tip 1: Soften the Butter Properly
The correct butter temperature is perhaps the most crucial step for achieving the perfect sugar cookie texture. Butter that is too cold won’t cream properly, leading to a dense cookie, while butter that’s too warm or melted will cause your cookies to spread excessively. The ideal consistency for room temperature butter is when you can easily press your finger into it, leaving an indent, but it still maintains its shape. Plan ahead by taking your butter out of the refrigerator 30-60 minutes before you start baking. Resist the urge to microwave it, as even a few seconds too long can lead to partially melted butter, which will negatively impact the cookie’s texture.
Tip 2: Cream the Butter and Sugar Thoroughly
The creaming process is more than just mixing; it’s about incorporating air into your butter and sugar mixture. This aeration is what contributes to the light, soft, and chewy texture of your sugar cookies. Using an electric mixer, beat the butter and sugar together on medium-high speed until the mixture becomes visibly lighter in color, fluffy, and significantly increased in volume. This typically takes a full 3-4 minutes. Don’t rush this step, as it’s foundational to the cookie’s structure and tenderness.
Tip 3: Measure Flour with Precision
Flour is the backbone of your cookie, and measuring it incorrectly can drastically alter the final product. Too much flour will result in dry, dense, and crumbly cookies, while too little can make them spread too much. The most accurate method is to use a digital kitchen scale. If you’re measuring by volume, avoid scooping flour directly from the bag, which compacts it. Instead, lightly spoon the flour into your measuring cup until it’s overflowing, then level it off with the straight edge of a knife. This “spoon and level” method prevents over-measuring.
Tip 4: Don’t Skip Chilling the Dough
We’ve emphasized this before, but it bears repeating: chilling your cookie dough is an essential step you should not skip! It’s your best defense against flat, overly-spread cookies. Refrigerating the dough for at least 1-2 hours (or even overnight for enhanced flavor development) allows the butter to firm up and the dry ingredients to fully hydrate. This ensures your cookies hold their shape better during baking, yielding a thicker, chewier cookie. Patience truly pays off here.
Tip 5: Avoid the Pitfall of Overbaking
Overbaking is the arch-nemesis of soft and chewy sugar cookies. Cookies can go from perfectly baked to dry and crunchy in a matter of seconds. Keep a watchful eye on your cookies as they bake. Remove them from the oven as soon as the edges appear lightly set and golden, even if the centers still look slightly soft or underdone. Remember, cookies continue to cook for a few minutes after they are removed from the oven due to residual heat. Allowing them to cool on the baking sheet for 5-10 minutes before transferring them to a wire rack will help them firm up without overbaking. I always love to sprinkle the sparkling sugar on them the moment they emerge from the oven!
Where to Find Sparkling Sugar?
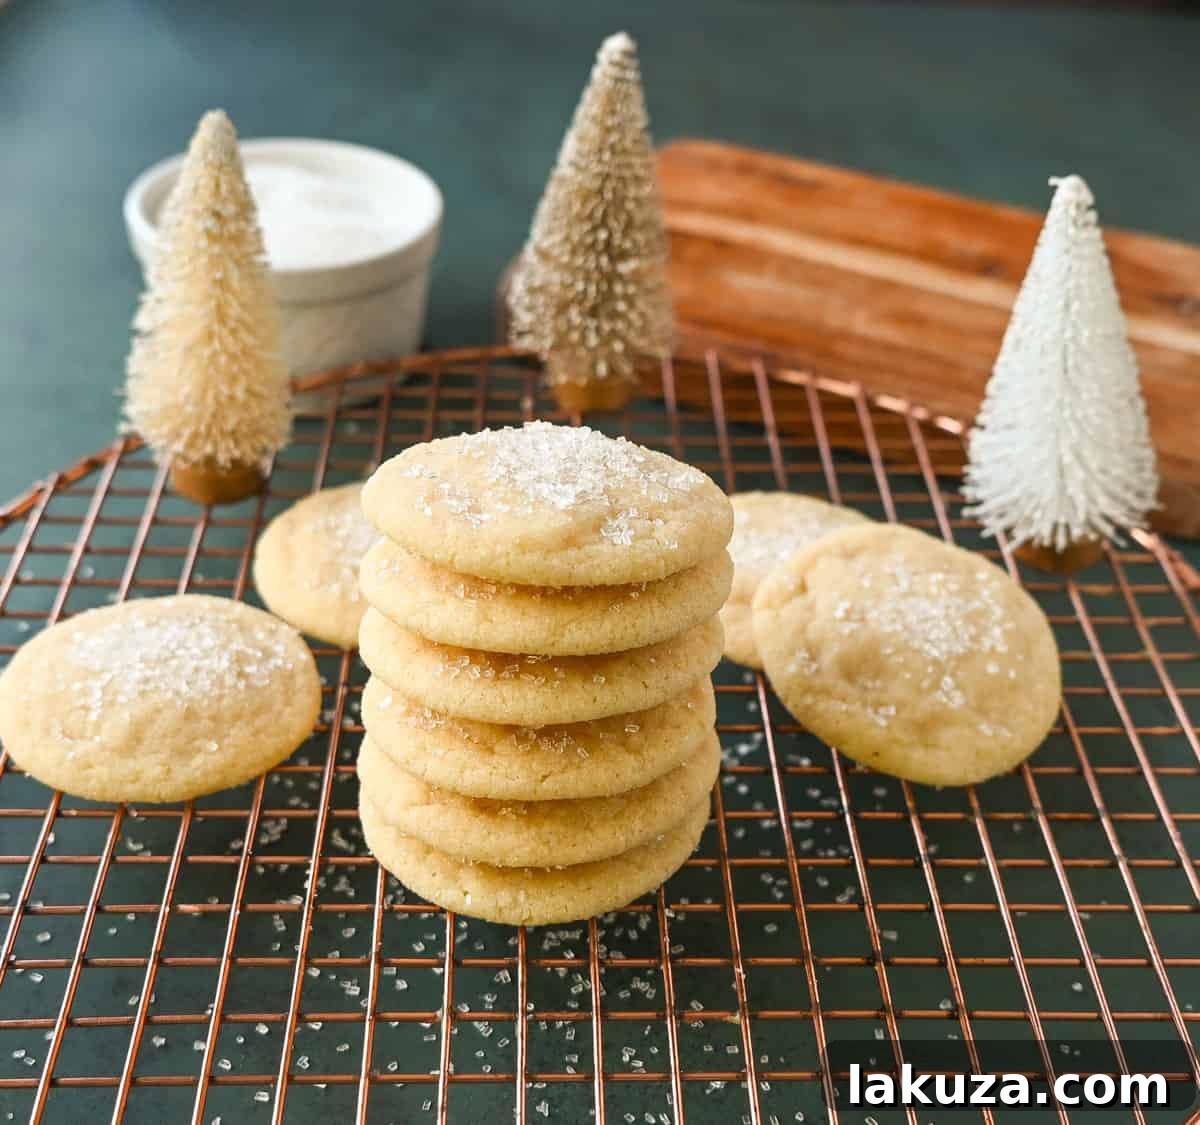
Sparkling sugar, also known as sanding sugar or shimmer sugar, is a coarse, decorative sugar that adds both visual appeal and a delightful crunch to baked goods. You can typically find it in the baking aisle of your local grocery store, often near the sprinkles and other cake decorating supplies. It’s also widely available for purchase online through various retailers. Don’t confuse it with regular granulated sugar; sparkling sugar has larger crystals that resist melting during baking (or in this case, retain their crunch when sprinkled on hot cookies).
Making Ahead, Storing, and Freezing Your Soft Sugar Cookies:
These soft sugar cookies are wonderfully versatile when it comes to preparation and storage, making them an excellent choice for meal prep or future enjoyment.
Storing Baked Cookies: To keep your baked sugar cookies at their peak softness and chewiness, store them in an airtight container at room temperature. They will remain fresh and delicious for 3-5 days. For optimal freshness, you can even place a slice of bread in the container with the cookies; the bread’s moisture will help keep the cookies soft.
Can Sugar Cookies Be Frozen? Absolutely! You have the flexibility to freeze both the baked cookies and the raw cookie dough, allowing you to enjoy homemade treats whenever a craving strikes.
- Freezing Cookie Dough Balls: If you want to bake fresh cookies on demand, freezing the dough is a fantastic option. First, roll the dough into individual balls as instructed in the recipe. Place these dough balls on a baking sheet lined with parchment paper, ensuring they don’t touch each other. Freeze until they are firm (this usually takes about 1-2 hours). Once firm, transfer the frozen cookie dough balls to a heavy-duty Ziploc freezer-safe bag or an airtight container. Label with the date and baking instructions. They can be stored for up to 2-3 months. When ready to bake, simply place the frozen dough balls on a parchment-lined baking sheet and bake for an additional 1-2 minutes longer than the recipe specifies for unfrozen dough, as they will take slightly longer to cook through.
- Freezing Already Baked Sugar Cookies: To freeze baked cookies, ensure they have cooled completely to room temperature. This is crucial to prevent ice crystals from forming. Once fully cooled, place them in a single layer in a freezer-safe airtight container or stack them with parchment paper in between layers, then place them in a Ziploc freezer-safe bag. Squeeze out as much air as possible before sealing. Baked cookies can be frozen for up to 1 month. To thaw, simply remove them from the freezer and let them come to room temperature on the counter.

Frequently Asked Questions About Soft Sugar Cookies:
Can I use salted butter in this sugar cookie recipe?
Yes, you certainly can! While unsalted butter is generally recommended for precise control over the salt content, salted butter will work in a pinch. If you opt for salted butter, simply reduce the amount of added salt in the recipe to 1/8 teaspoon to avoid making your cookies too salty. The slight difference in flavor will be minimal and still result in delicious cookies.
How do I make my cookies perfectly round?
Achieving perfectly round cookies is a simple trick! As soon as you remove the hot cookies from the oven, while they are still warm and pliable, take a large round cookie cutter or a biscuit cutter (slightly larger than your cookies) and place it around each cookie. Gently swirl the cutter around the cookie, nudging its edges inward, until it forms a uniform, perfectly round circle. You can also use a small turner or spatula to gently press the edges towards the center of the cookie for a similar effect.
How do I know when my sugar cookies are done baking?
Determining the perfect doneness is key to soft and chewy sugar cookies. Since oven temperatures can vary, it’s important to watch your cookies closely. Look for cookies where the edges have just started to set and have a very light golden color, while the centers still appear soft, slightly puffy, and perhaps even a little underbaked. The golden rule for soft and chewy cookies is to NOT OVERBAKE! They will continue to firm up and set as they cool on the baking sheet once removed from the oven. If you wait until they are fully golden and firm in the center, they will become dry and crunchy.
Popular Cookie Recipes You Might Also Love:
If you’re a fan of these delightful sugar cookies, you’ll surely enjoy exploring some of our other crowd-pleasing cookie recipes, perfect for any occasion:
Brown Sugar Cookies
Christmas Sugar Cookies
Soft Chewy Sugar Cookies
Jacque’s Buttery Sugar Cookies


Best Soft and Chewy Sugar Cookies (No Frosting)
Ingredients
- 1 cup Unsalted Butter, softened
- 1 1/2 cups Granulated Sugar
- 1 large Egg
- 1 large Egg Yolk
- 2 teaspoons Pure Vanilla Extract
- 2 1/2 cups All-Purpose Flour
- 1 teaspoon Baking Powder
- 1/2 teaspoon Baking Soda
- 3/4 teaspoon Salt (if using salted butter, reduce to 1/8 teaspoon)
- Sparkling or Sanding Sugar, for sprinkling
Instructions
- In a large mixing bowl, cream together the softened butter and granulated sugar for 4 minutes or until light and fluffy. Scrape the sides of the bowl. Add the large egg, egg yolk, and pure vanilla extract, mixing for 1 minute longer until well combined.
- In a separate bowl, whisk together the flour, baking powder, baking soda, and salt. Gradually fold the dry ingredients into the wet ingredients, mixing only until just combined. Be careful not to overmix, as this can lead to tough cookies.
- Chill the dough: Wrap the cookie dough tightly in plastic wrap and refrigerate for at least 1 hour. This step is essential for preventing the cookies from spreading too much during baking.
- Preheat oven to 350 degrees F (175°C). After the dough has chilled, remove it from the refrigerator. Line baking sheets with parchment paper. Roll the dough into uniform balls and place them onto the prepared baking sheet, leaving some space between each.
- Bake on a light-colored baking sheet for 9-12 minutes, or until the edges are lightly golden and set, but the centers still appear soft. As soon as you remove the cookies from the oven, generously sprinkle them with sparkling or sanding sugar. Let them cool on the baking sheet for a few minutes before transferring to a wire rack to cool completely.
Notes
Can I use salted butter in this sugar cookie recipe? Yes, you can! If you use salted butter, simply reduce the added salt to 1/8 teaspoon in the recipe. Unsalted butter allows for better salt control, but salted butter will still yield delicious results.
How do I make my cookies perfectly round? For perfectly round cookies, immediately after removing them from the oven, use a large round cookie cutter or biscuit cutter (slightly larger than the cookie). Place it around each hot cookie and gently swirl it to nudge the edges inward, shaping them into a uniform circle. You can also use a small spatula to press the edges gently.
Store baked sugar cookies in an airtight container at room temperature to keep them soft and chewy for 3-5 days.
CAN SUGAR COOKIES BE FROZEN? Yes! Both baked cookies and cookie dough can be frozen.
To freeze dough: Roll dough into balls, freeze on a baking sheet until firm, then transfer to a freezer-safe bag. Bake from frozen for 1 minute longer.
To freeze baked cookies: Let them cool completely, then place them in a freezer-safe bag or airtight container. Thaw at room temperature before serving.
Nutrition
Nutrition information is automatically calculated and should only be used as an approximation.