

Ultimate Guide to Ice Cream Nachos: The Perfect Customizable Dessert
Get ready to revolutionize your dessert game with a treat that’s as fun to make as it is to eat: Ice Cream Nachos! Imagine combining the satisfying crunch of golden waffle cone pieces with generous scoops of your favorite creamy ice cream, all generously drizzled and piled high with an endless array of delicious toppings like rich chocolate fudge, gooey caramel, fluffy whipped cream, and vibrant maraschino cherries. This creative and shareable dessert is not just a dish; it’s an experience, perfect for any gathering or a special family night.

A Tradition Reimagined: The Sweet Inspiration Behind Ice Cream Nachos
The best recipes often stem from cherished memories and family traditions. For me, the inspiration for Ice Cream Nachos was born out of a beloved New Year’s Eve ritual. When my children were young, every single year, we’d cap off the celebrations by crafting a colossal ice cream sundae. We’d all gather around the kitchen island, eyes wide with anticipation, ready to dive into a truly magnificent creation brimming with various ice cream flavors, decadent sauces, a mountain of whipped cream, and plenty of crunchy waffle cone pieces for texture.
This annual sundae spectacle was something my kids eagerly looked forward to, creating a heartwarming tradition that marked the end of one year and the beginning of another. As they grew, I wanted to find a way to recapture that same magic and communal joy in a new, exciting form. Knowing our family’s deep affection for classic savory nachos, the idea struck: why not apply that same shareable, customizable concept to a sweet treat? And just like that, “Ice Cream Nachos” were conceived. Since their inception, they’ve been an absolute sensation, bringing smiles and delicious fun to every occasion.
What Exactly Are Ice Cream Nachos?
At its heart, Ice Cream Nachos are a brilliantly simple yet incredibly versatile dessert that ingeniously fuses the playful, crunchy texture of traditional nachos with the creamy, indulgent sweetness of a classic ice cream sundae. This isn’t just a dessert; it’s an experience built for sharing and customization, making it a guaranteed crowd-pleaser.
Instead of savory tortilla chips, the foundation of this delightful dessert is crafted from crisp waffle cones, broken into perfect, bite-sized “chips.” These golden, airy pieces provide an irresistible crunch that beautifully contrasts with the smooth, cold ice cream. Layered atop this crunchy base are generous scoops of your favorite ice cream flavors – think classic vanilla, rich chocolate, or refreshing strawberry, or even a mix of all three! The grand finale involves an extravagant assortment of toppings: luscious chocolate fudge, velvety caramel sauce, a shower of colorful sprinkles, vibrant fresh berries, finely chopped nuts, and, of course, a cloud of whipped cream. Every bite offers a different combination of textures and tastes, making it an adventure for the palate.
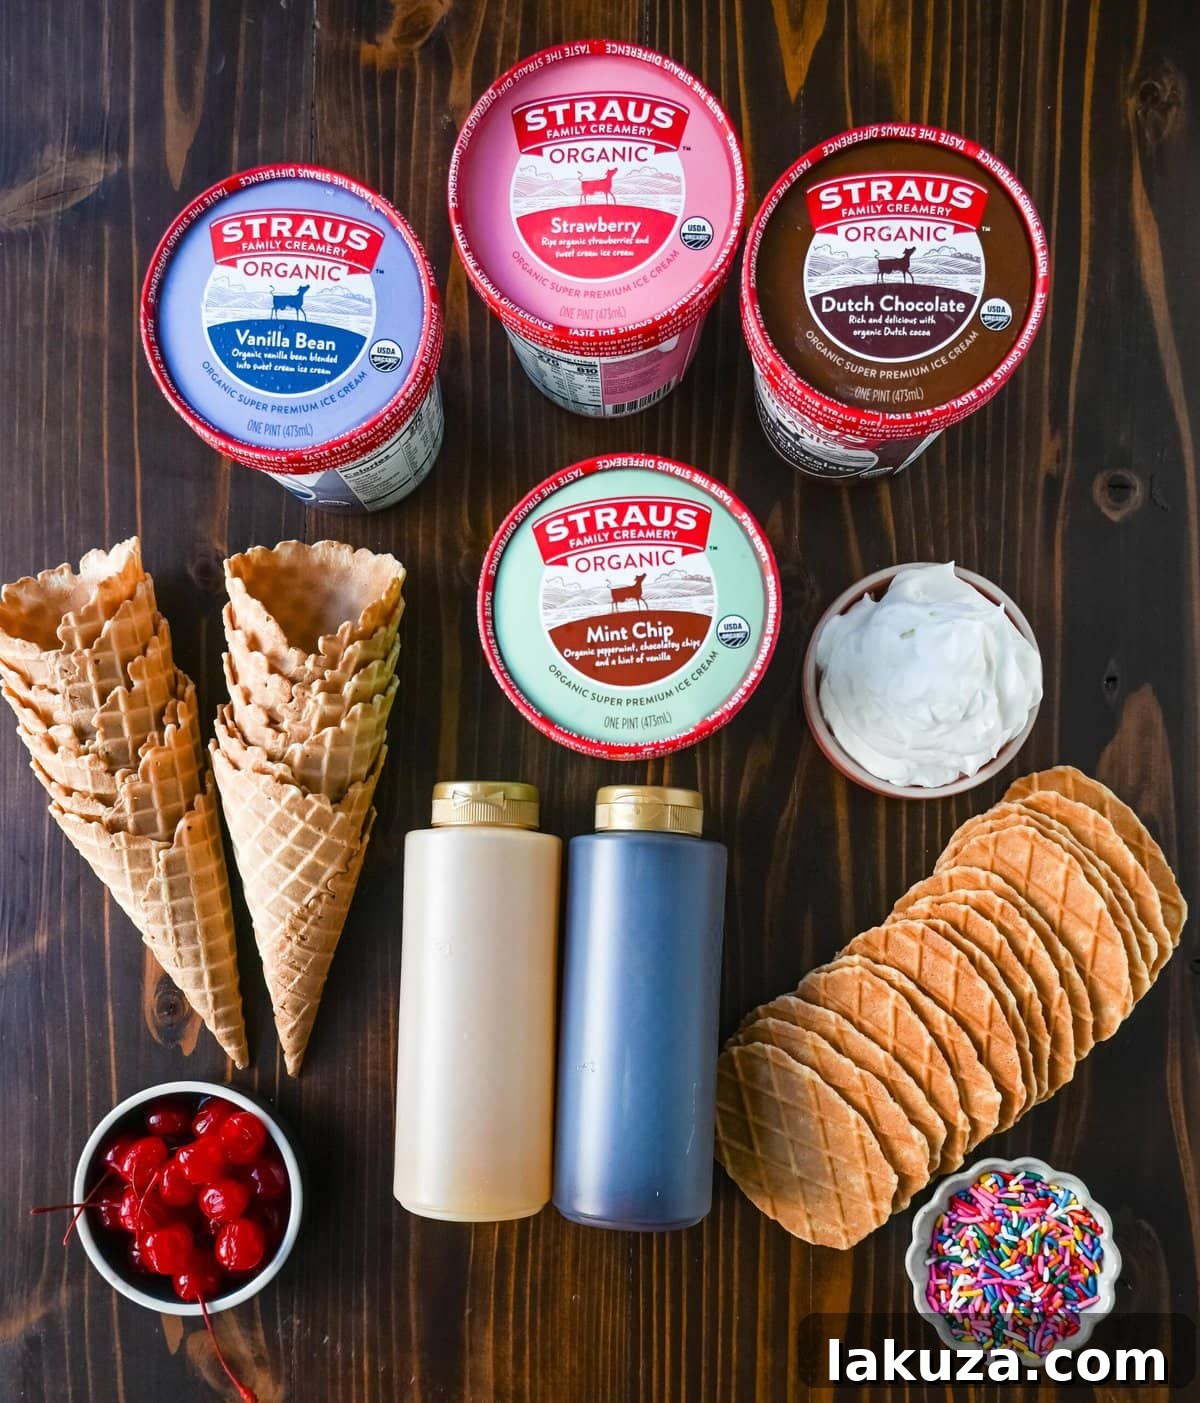
Essential Ingredients for Your Ice Cream Nacho Masterpiece
The true beauty of Ice Cream Nachos lies in their adaptability. While we provide a fantastic starting point, feel free to unleash your creativity and incorporate any of your beloved ice cream toppings! The more variety, the merrier, allowing everyone to customize their perfect bite.
Core Components:
- Waffle Cones: These form the crunchy foundation of your nachos. Use classic pointed cones or even waffle bowls for thicker, more scoop-friendly “chips.” A standard 12-count package is a great starting point for a generous platter.
- Butter Waffle Cookies (Optional): For an extra layer of delicate, buttery crunch and flavor, consider adding these. Trader Joe’s offers excellent ones, but any similar crispy butter cookie will elevate the texture.
- Assorted Ice Cream Flavors (Pints Recommended):
- Straus Strawberry Ice Cream: A delightful fruity classic that adds a refreshing note.
- Straus Vanilla Bean Ice Cream: The quintessential creamy base; its subtle elegance pairs beautifully with almost any topping.
- Straus Dutch Chocolate Ice Cream: Rich, deep, and indulgent – a must-have for serious chocolate lovers.
- Pro Tip: Don’t be limited to just these! Choose 2-3 of your family’s or guests’ favorite pints for a diverse experience. Consider mint chip, cookie dough, coffee, or even a sorbet for a lighter, dairy-free option.
- Chocolate Fudge Sauce: Warm it slightly for an even more luscious, pourable drizzle that coats every element.
- Caramel Sauce: A sweet, buttery counterpoint to the chocolate, adding a luxurious stickiness.
- Whipped Cream: Essential for that fluffy, cloud-like finish, adding a light and airy texture.
Delightful Optional Toppings to Elevate Your Nachos:
This is where the magic truly happens! Offer a wide variety to cater to all tastes and preferences.
- Maraschino Cherries: The iconic sundae topper, adding a vibrant pop of color and a burst of sweet-tart flavor.
- Fresh Fruit: Sliced fresh strawberries, bananas, blueberries, raspberries, or kiwi add natural sweetness, a refreshing contrast, and beautiful color.
- Sprinkles: Rainbow sprinkles, chocolate sprinkles, or themed sprinkles for holidays or special occasions.
- Chopped Nuts: Peanuts, walnuts, pecans, or almonds – lightly toasted for enhanced flavor and extra crunch.
- Candies: Mini M&M’s, chopped candy bars (like Snickers or Reese’s Peanut Butter Cups), gummy bears, or chocolate-covered pretzels for a sweet and salty kick.
- Chocolates: Chocolate chips (mini or regular), elegant chocolate shavings, or even a drizzle of white chocolate sauce for visual appeal and flavor.
- Cookie Crumbles: Crushed Oreos, graham crackers, or shortbread cookies for added texture and a familiar, comforting taste.
- Coconut Flakes: Toasted or raw for a tropical twist that complements many fruit flavors.
- Additional Syrups: Consider strawberry syrup, butterscotch, or even a hint of maple syrup for unique flavor profiles.
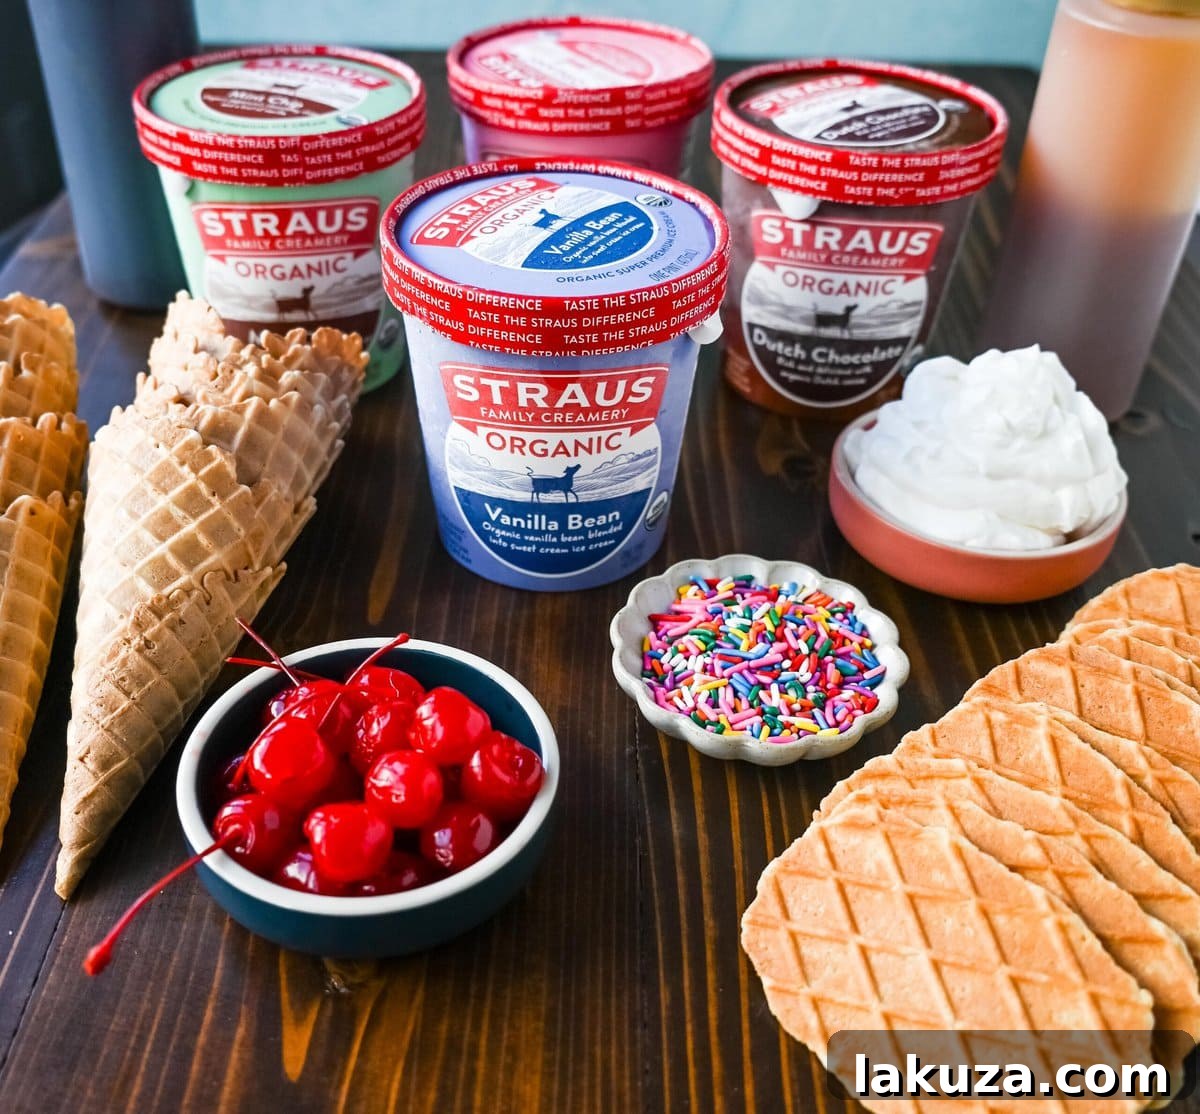
Step-by-Step Guide: How to Assemble Your Spectacular Ice Cream Nachos
Creating Ice Cream Nachos is less about precise measurements and more about joyful, creative assembly. Follow these simple steps for a dessert that’s guaranteed to impress and satisfy everyone’s sweet cravings.

- Prepare Your “Chips”: Take your chosen waffle cones or bowls and gently break them into irregular, chip-sized pieces. Aim for fragments that are easy to pick up and can comfortably hold a scoop of ice cream and toppings. Arrange these crunchy pieces artfully on a large serving platter, a baking sheet, or individual plates, ensuring an even layer. If you’re using butter waffle cookies, break them into similar pieces and scatter them amongst the waffle cone chips for added texture and flavor.
- Pre-Scoop the Ice Cream (Highly Recommended!): This crucial step ensures a quick, mess-free assembly and significantly slows down melting. Using an ice cream scoop, create uniform balls of your chosen ice cream flavors. Place these scoops onto a baking sheet lined with parchment paper or a silicone mat. Freeze the scoops for at least 1-2 hours, or until they are very firm. This preparation will make the final assembly much smoother and give you more time to admire and enjoy your creation before it softens.
- Arrange the Ice Cream: Once your ice cream scoops are firm and ready, carefully place them strategically over the waffle cone chips on your serving platter. Distribute the different flavors evenly across the base to ensure a delightful variety in every serving. You can create a central mound or scatter them throughout the “chips” for a more dispersed look.
- Drizzle with Decadence: Generously drizzle both chocolate fudge sauce and caramel sauce over the ice cream scoops and waffle cone chips. Don’t be shy – these sauces are fundamental to the “nacho” experience, creating that signature gooey, indulgent layer. For an even smoother pour, you can warm the sauces slightly in the microwave or a double boiler.
- Layer on the Toppings: Now for the most exciting part! Sprinkle all your desired optional toppings liberally over the ice cream nachos. This is where your creativity truly shines. Add fresh fruit like sliced strawberries and bananas, a scattering of colorful sprinkles, a handful of finely chopped nuts, your favorite candies, or decadent chocolate pieces. Aim for a good mix of colors, textures, and flavors to make every bite interesting.
- Crown with Whipped Cream & Cherries: Finish your masterpiece with generous dollops of freshly whipped cream (from a can or homemade). For that classic sundae look and an extra pop of color, don’t forget to top each dollop with a vibrant maraschino cherry (or several!).
- Serve Immediately and Enjoy: Gather your family and friends, grab some serving spoons, and dig in! Ice cream nachos are best enjoyed right after assembly to prevent excessive melting and to keep those waffle cones wonderfully crisp. The joy is in the immediate, shared indulgence!
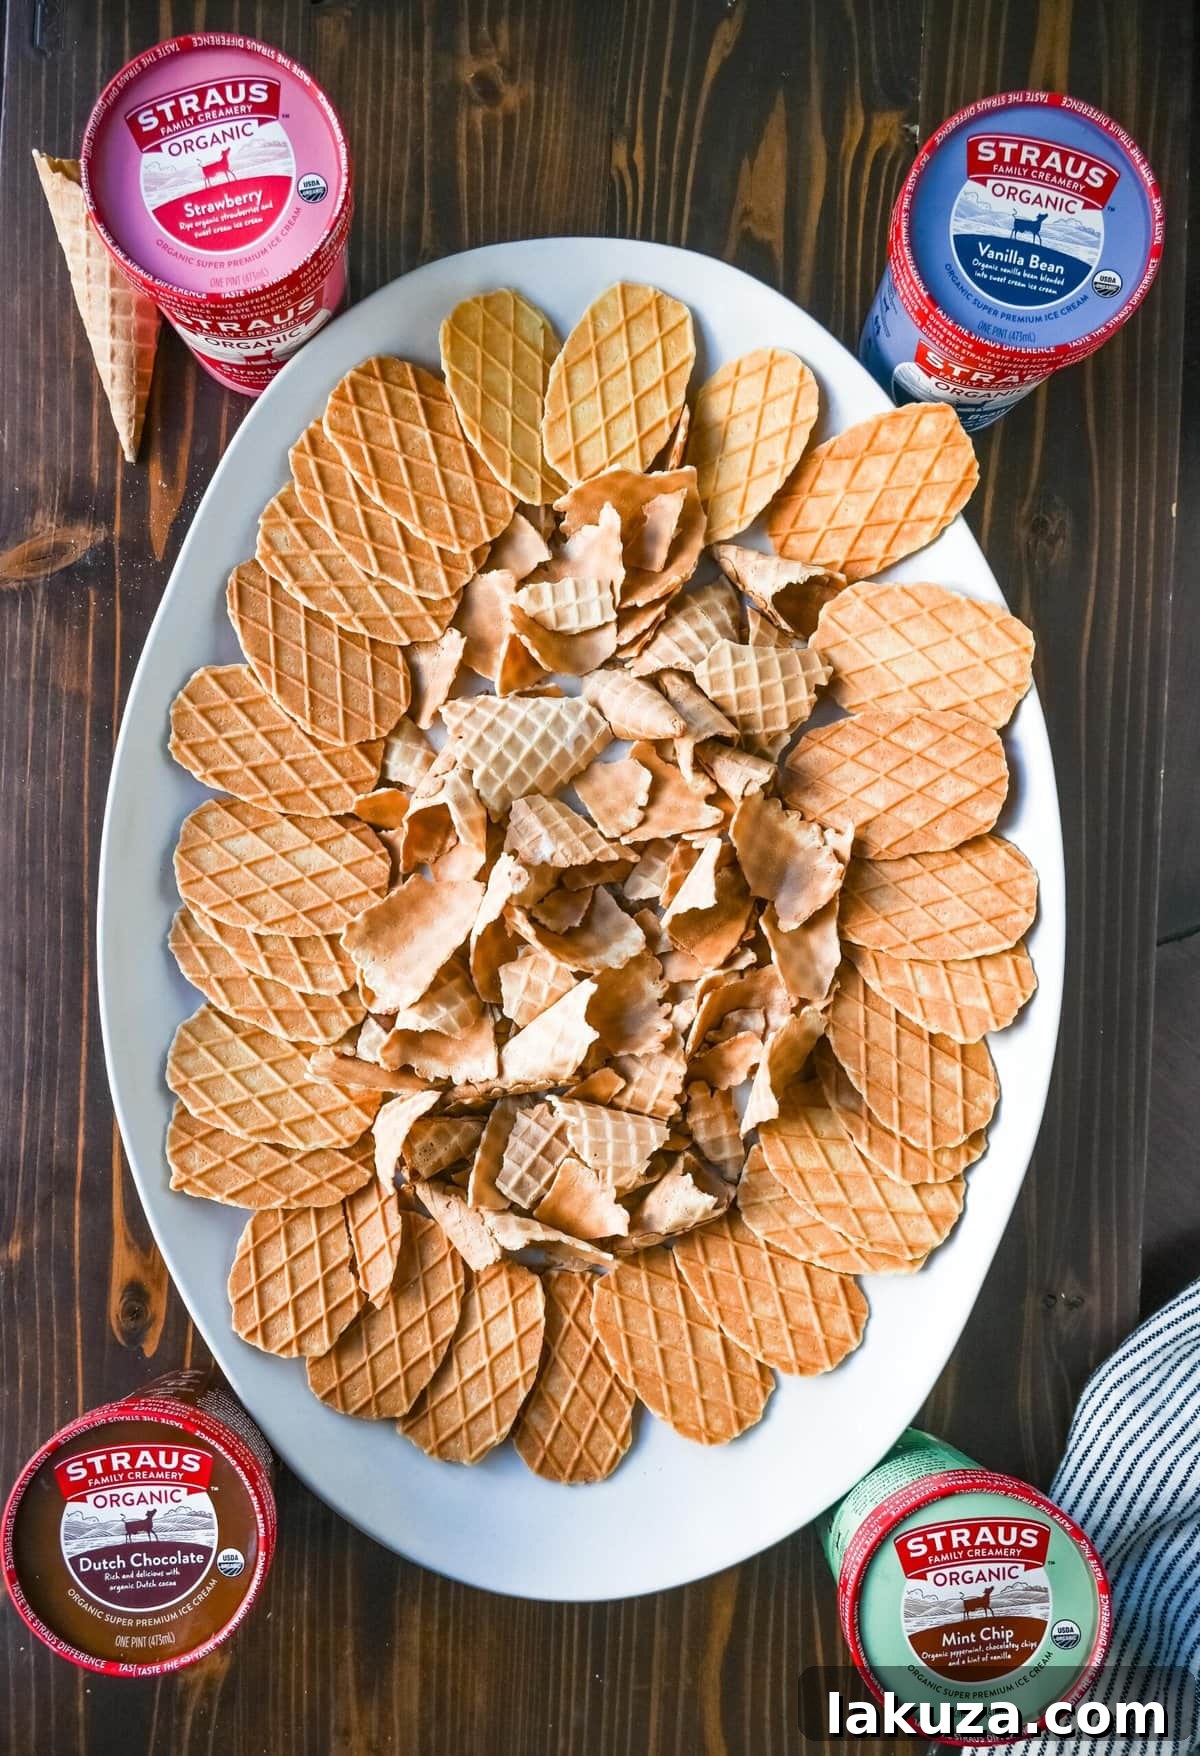
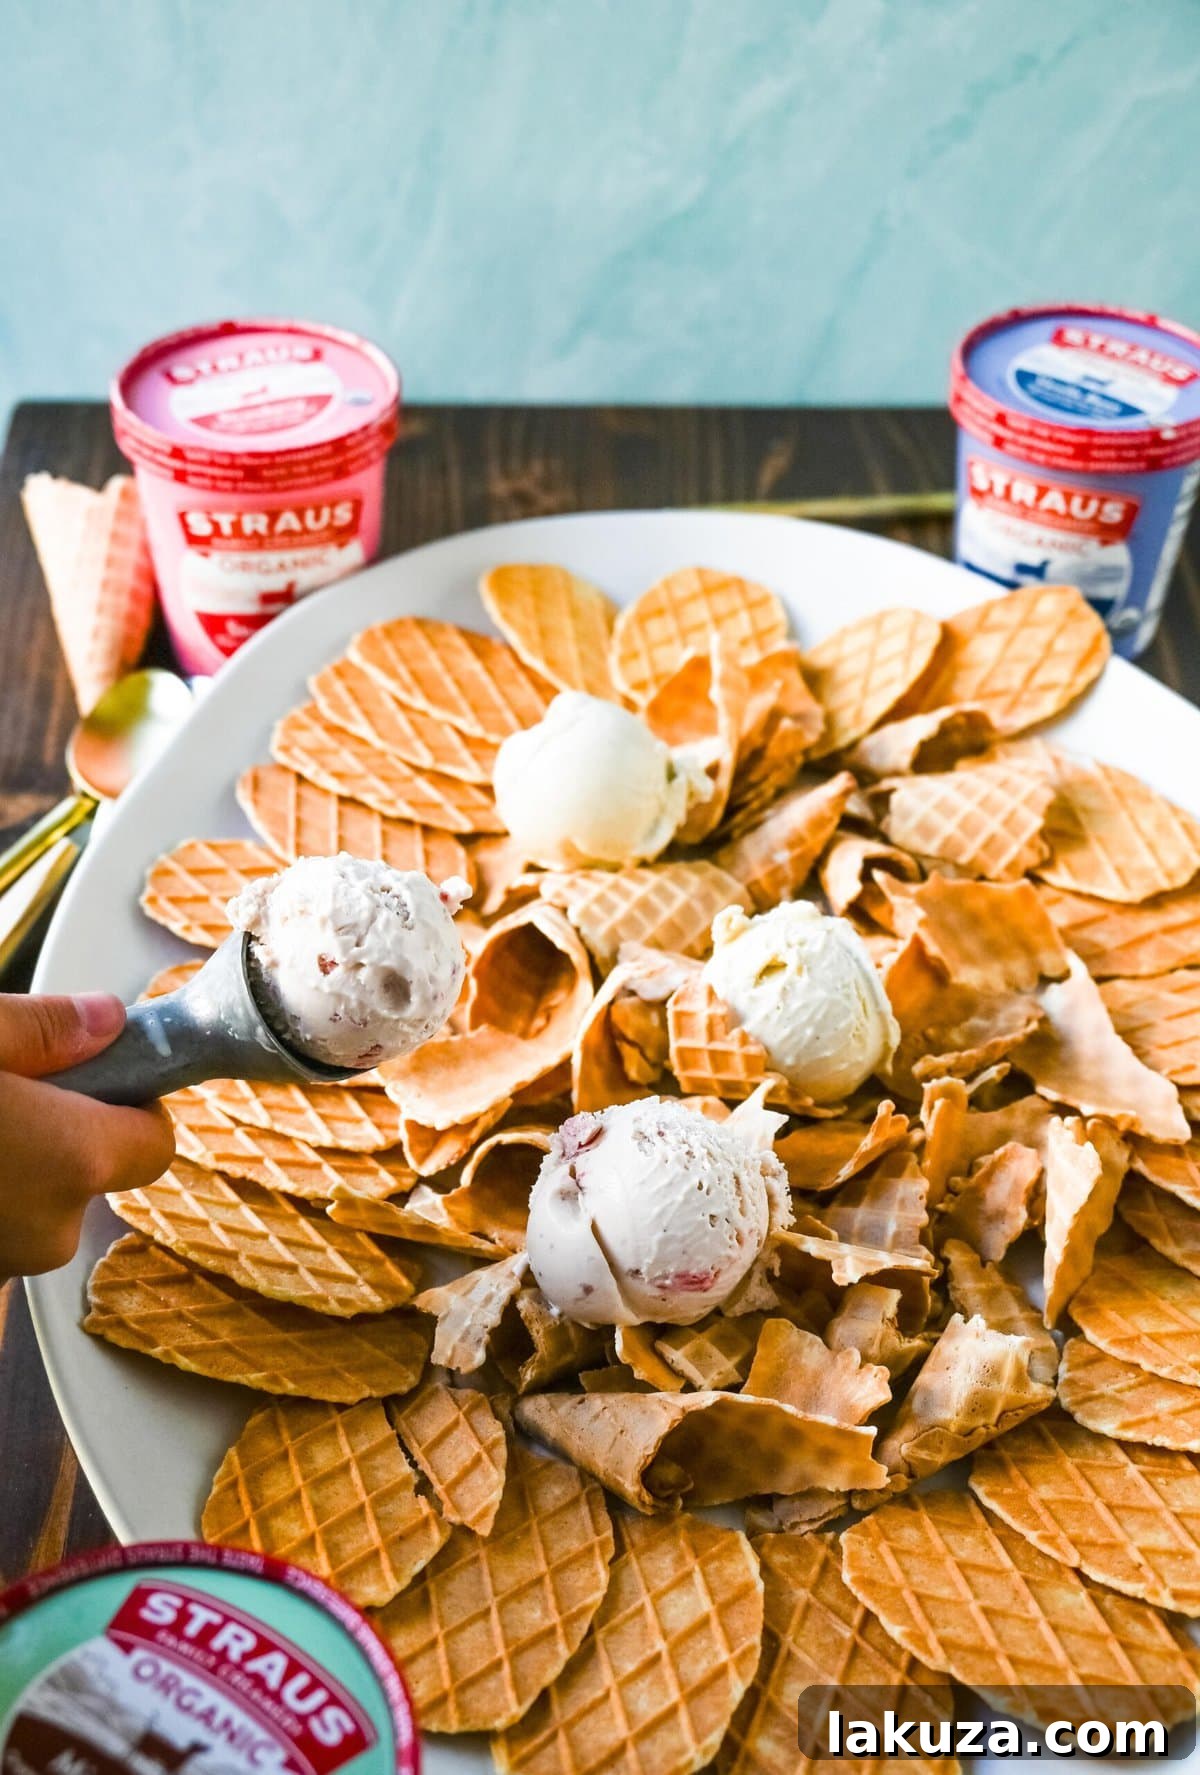

Pro Tips for Perfect Ice Cream Nachos
To ensure your Ice Cream Nachos are an absolute triumph every time, keep these expert tips in mind.
How to Keep Your Ice Cream Nachos Cold and Crisp?
The key to fantastic ice cream nachos is diligent temperature management. As mentioned, pre-scooping your ice cream and freezing the scoops for 1-2 hours until firm is the single most effective way to slow down melting. This ensures your ice cream holds its shape beautifully during assembly, giving you more time to adorn it with toppings. Once assembled, the dessert should be served immediately. For party settings where you might be serving multiple pints of ice cream, consider keeping the containers nestled in buckets of ice. This helps maintain their optimal temperature, preventing them from softening too quickly before they even reach the platter, guaranteeing fresh and firm ice cream for all your guests.
Should You Scoop Ice Cream Ahead of Time?
Absolutely, yes! Scooping ice cream ahead of time is not just recommended; it’s a game-changer for ice cream nachos. This technique provides several significant benefits: first, it allows the individual ice cream scoops to become very firm, ensuring they hold their distinct shape and don’t immediately melt or collapse when placed on the warm-temperature waffle cone pieces. Second, it drastically speeds up the entire assembly process, transforming what could be a frantic rush against the clock into a smooth, enjoyable, and stress-free experience. You can even prepare these perfectly formed scoops a day or two in advance and store them in an airtight container in the freezer until needed, making party prep a breeze.

Preventing Soggy Waffle Cones
No one likes a soggy chip, even a sweet one! To keep your waffle cone pieces wonderfully crisp and structurally sound for scooping, follow these guidelines:
- Serve Immediately: The most straightforward solution. Assemble your ice cream nachos just before you plan to eat them, and serve without delay. The less time the ice cream and sauces sit on the cones, the crisper they’ll remain.
- Toasting for Extra Crunch: For an even crispier and more robust base, spread the broken waffle cone pieces on a baking sheet. Toast them in a preheated oven at 300°F (150°C) for about 5-7 minutes, or until they are lightly golden and fragrant. Be careful not to burn them! Let them cool completely to room temperature before assembly; this process intensifies their crunch and helps them resist moisture.
- Layering Strategy: If you anticipate a slight delay in serving, or if you want to give guests maximum control, consider arranging the ice cream scoops in the center of the platter. Then, place the waffle cone pieces strategically around the sides, allowing guests to scoop ice cream and toppings onto their individual “chips” as they eat. This method ensures the cones stay separate and crisp until the very last bite.
Frequently Asked Questions About Ice Cream Nachos
For parties, you have two excellent, crowd-pleasing options. You can assemble one magnificent, large platter of ice cream nachos ahead of time (utilizing our pre-scooping and crispness tips) and present it as a show-stopping, communal centerpiece for guests to dig into. Alternatively, and often more popular for larger groups, set up an interactive “Ice Cream Nacho Bar.” Provide separate bowls of broken waffle cone pieces, various pre-scooped and frozen ice cream flavors, and an enticing array of toppings in individual dishes. This allows each guest to customize their dessert exactly to their liking, creating a fun activity and ensuring the ice cream remains optimally cold until they’re ready to create their perfect nacho pile.
While the final assembly and serving are best done immediately before enjoyment for optimal texture, you can certainly prepare all the components in advance. Break your waffle cones, pre-scoop and freeze your ice cream, and get all your sauces and toppings prepped and ready in separate containers. This “mise en place” approach makes the actual assembly a breeze, turning it into a quick, fun task rather than a frantic race against melting ice cream. Simply combine everything right before your guests are ready for dessert.
It’s surprisingly easy to adapt ice cream nachos to various dietary preferences! For healthier options, focus heavily on fresh fruit toppings like berries, sliced kiwi, and mango. Use low-fat or sugar-free ice cream varieties, and look for whole-wheat waffle cones if they are available. For dairy-free needs, many excellent plant-based ice creams (almond milk, oat milk, coconut milk, or cashew milk) are widely available and come in a fantastic range of flavors. Just ensure your chosen sauces and toppings are also dairy-free if necessary. Gluten-free waffle cones are also an option for those with gluten sensitivities, allowing everyone to enjoy this delightful treat.
The sky’s the limit when it comes to creative combinations! Get experimental with themes to make your ice cream nachos extra special:
- Tropical Twist: Combine coconut flakes (toasted!), fresh pineapple chunks, mango pieces, and a vibrant drizzle of lime zest or passion fruit sauce.
- S’mores Sensation: Feature mini marshmallows (lightly toasted with a kitchen torch!), crushed graham crackers, and an extra generous layer of chocolate fudge sauce.
- Cookie Monster Mash: Use crushed Oreos, soft chocolate chip cookie dough bites, and perhaps a scoop of blue-dyed vanilla ice cream for a playful touch.
- Peanut Butter Lover’s Dream: Drench with creamy peanut butter sauce, sprinkle with chopped Reese’s peanut butter cups, and add a scattering of chopped roasted peanuts for ultimate indulgence.
- Caramel Apple Delight: Sautéed apple pieces with a hint of cinnamon, rich caramel sauce, and a sprinkle of streusel or crushed shortbread cookies for a comforting, autumnal feel.
Don’t be afraid to experiment and find your family’s new favorite combination!
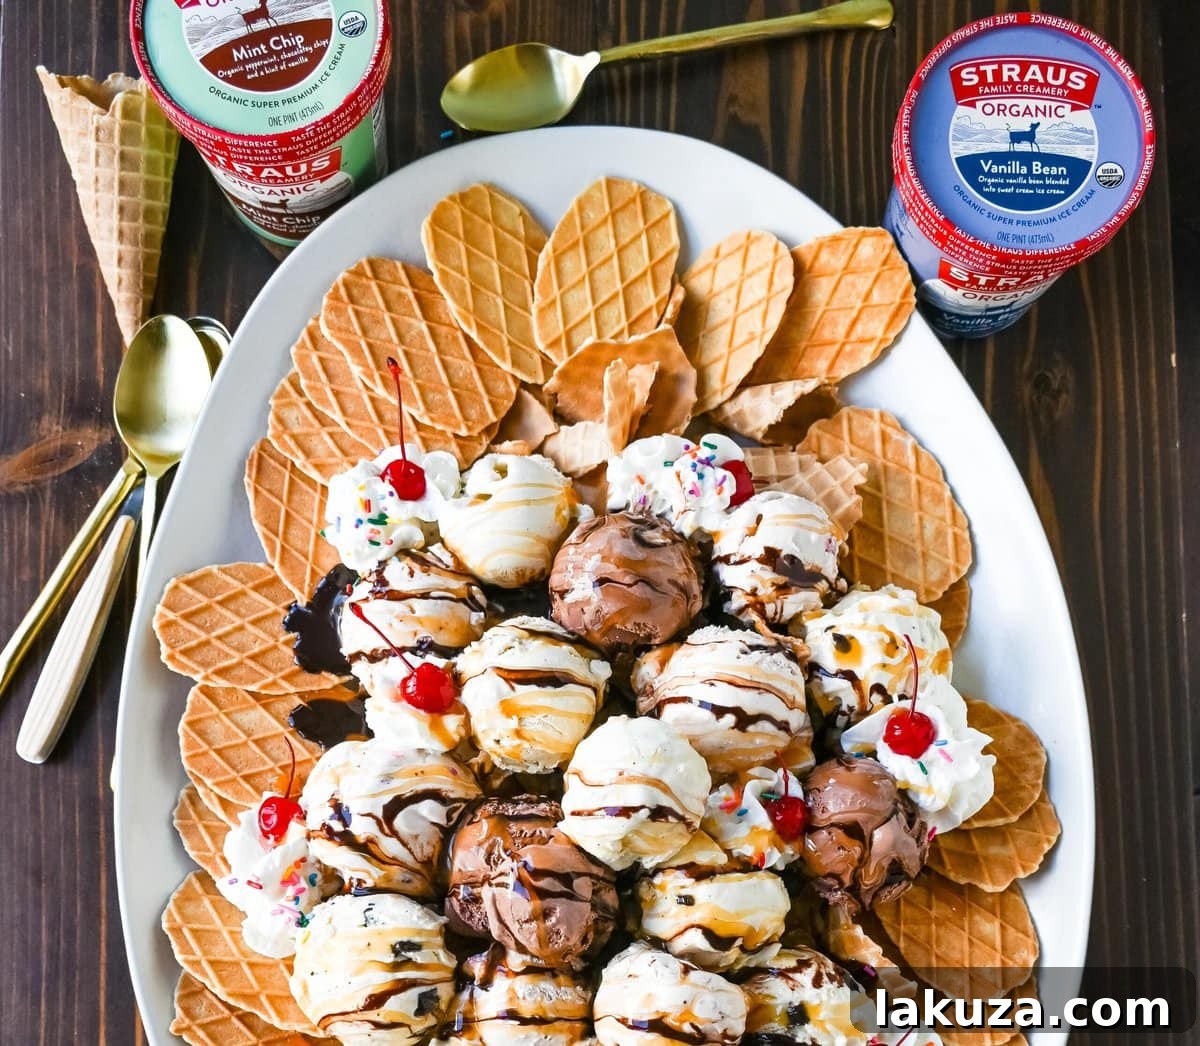
The Straus Family Creamery Difference: Quality You Can Taste
As a devoted ice cream enthusiast, I always make sure to keep my freezer stocked with Straus Family Creamery Ice Cream. Their commitment to quality is truly exceptional, and it’s a difference you can genuinely taste in every creamy scoop. Straus ice cream is meticulously crafted with organic milk and cream sourced exclusively from family dairy farms nestled along the picturesque Northern California Coast, ensuring a rich, pure flavor profile.
What truly sets Straus apart is their unwavering dedication to purity and natural ingredients: they steadfastly avoid using any preservatives, fillers, artificial ingredients, or synthetic coloring agents in their ice cream. This commitment results in a product that is not just delicious but also incredibly wholesome and authentic. It’s a super-premium quality ice cream, boasting less air and a higher butterfat content, which contributes to its extraordinarily rich, dense, and creamy texture that melts beautifully without disappearing too quickly. When you choose high-quality ingredients like Straus ice cream, your Ice Cream Nachos transition from a simple treat to an unforgettable dessert experience that truly stands out.


Ice Cream Nachos Recipe
Modern Honey®
This fun and creative dessert combines crunchy waffle cone pieces with scoops of your favorite ice cream, topped with a variety of delicious sauces and garnishes. It’s the ultimate customizable treat perfect for sharing at any gathering!
15 minutes
10
Ingredients
- 12-count pkg. Waffle Cones (or waffle bowls for thicker chips)
- (1) pkg. Butter Waffle Cookies (optional, for extra buttery crunch)
- (1) pint Straus Strawberry Ice Cream (or your preferred strawberry flavor)
- (1) pint Straus Vanilla Bean Ice Cream (or your preferred vanilla flavor)
- (1) pint Straus Dutch Chocolate Ice Cream (or your preferred chocolate flavor)
- Chocolate Fudge Sauce (warmed slightly)
- Caramel Sauce (warmed slightly)
- Whipped Cream
- Maraschino Cherries
Optional Toppings:
- Sprinkles (rainbow, chocolate, or themed)
- Mini M&M’s or other small candies
- Chopped Nuts (peanuts, walnuts, pecans, almonds)
- Fresh Sliced Strawberries or Bananas (or other favorite fruits)
- Chocolate chips or shavings
- Crushed cookies (e.g., Oreos, graham crackers)
- Coconut flakes (toasted or raw)
Instructions
- Prepare Waffle Cone Chips: Gently break the waffle cones (and optional butter waffle cookies) into chip-sized pieces. Arrange them on a large serving platter or individual plates to form an even base.
- Pre-Scoop Ice Cream: For easier assembly and to prevent rapid melting, use an ice cream scoop to form balls of each ice cream flavor. Place these scoops on a parchment-lined baking sheet and freeze for 1-2 hours, or until very firm.
- Arrange Ice Cream: Once firm, carefully place the pre-scooped ice cream balls over the waffle cone chips on your serving platter, distributing flavors evenly for variety.
- Drizzle Sauces: Generously drizzle both chocolate fudge sauce and caramel sauce over the ice cream and waffle cone chips. Warm the sauces slightly beforehand for a smoother, more decadent flow.
- Add Toppings: Sprinkle your chosen optional toppings, such as fresh fruit, nuts, sprinkles, candies, and chocolate pieces, liberally over the entire platter.
- Finish with Whipped Cream and Cherries: Add generous dollops of whipped cream on top, and crown each dollop with a vibrant maraschino cherry (or several!).
- Serve Immediately: Present your spectacular Ice Cream Nachos and enjoy right away for the best taste, texture, and communal dessert experience!
Notes
Pre-Scooping Ice Cream: Scooping and freezing ice cream ahead of time is highly recommended. It ensures the scoops are firm, speeds up assembly, and significantly slows down melting once served. You can prepare these scoops up to a day in advance and store them in an airtight container in the freezer.
Keeping Cold: To maximize enjoyment, serve your ice cream nachos immediately after assembly. If preparing for a party or buffet, consider keeping ice cream tubs nestled on ice to maintain optimal temperature and assemble individual portions as needed.
Preventing Soggy Cones: For an extra crispy base, toast the broken waffle cone pieces in an oven at 300°F (150°C) for 5-7 minutes. Let them cool completely before assembly. This adds extra crunch and helps them resist moisture from the ice cream and sauces.
Additional Info
Dessert
American
ice cream nachos, sweet nachos, homemade dessert, party food, waffle cone dessert
Loved this fun and easy recipe? We’d love to hear from you!
Jump to Comments to share your thoughts, creative topping ideas, or how your family enjoyed these Ice Cream Nachos!