
Homemade Chocolate Truffles: Crafting Decadent Delights
Embark on a culinary journey to create the most exquisite, rich, and velvety homemade chocolate truffles. Made with only the finest chocolate, luxurious heavy cream, and a touch of butter, these elegant confections are perfect for any occasion and easily customized with your favorite gourmet toppings.
For many, chocolate isn’t just a treat; it’s a daily ritual, a comforting indulgence, and a source of pure joy. I confess, my day often feels incomplete without a moment dedicated to this delightful confection. Whether it’s a simple square of dark chocolate after lunch or a more elaborate dessert, the allure of chocolate is undeniable and deeply satisfying.
My passion for chocolate extends to exploring its origins and diverse forms. Whenever I travel, one of my favorite pursuits is discovering local bakeries and artisan chocolate shops, each offering a unique glimpse into the world of cacao. I fondly recall a memorable chocolate tour at Theo Chocolates in Seattle. Witnessing the bean-to-bar process was fascinating, and the generous, unlimited samples made it an absolutely perfect day. It’s experiences like these that deepen my appreciation for the intricate craft of chocolate making.
With special occasions like Valentine’s Day or other celebrations on the horizon, the thought of presenting a truly unique and heartfelt gift often turns to homemade delights. And few homemade treats convey elegance and indulgence quite like chocolate truffles. Often perceived as complex and requiring expert skill, the truth is, crafting your own batch of rich, creamy truffles at home is surprisingly straightforward. This guide will demystify the process, showing you how to achieve gourmet results with minimal effort, transforming simple ingredients into an extraordinary confection.
What Exactly Are These Decadent Chocolate Truffles?
At their core, chocolate truffles are luxurious, bite-sized confections, celebrated for their intense chocolate flavor and remarkably smooth, melt-in-your-mouth texture. The traditional truffle consists of a rich chocolate ganache center, which is a harmonious emulsion of melted chocolate and heavy cream. This ganache is then typically rolled into small spheres, mimicking the irregular shape of the prized edible truffle fungus, from which they derive their name. Finally, they are often dusted with cocoa powder, finely chopped nuts, or other delicious coatings. Originating in French culinary traditions during the 19th century, truffles quickly became a symbol of sophisticated indulgence, evolving into a global phenomenon cherished by chocolate connoisseurs everywhere.
The beauty of a classic truffle lies in its simplicity and the quality of its core components. When crafted correctly, the interior ganache should be soft and yielding, offering a profound chocolate experience that lingers on the palate. The contrast between the smooth ganache and a textured coating is what makes each bite so enjoyable and unforgettable. They are not merely candies; they are miniature works of art, embodying richness and elegance in every aspect.
Why Choose Homemade? The Rewarding Art of DIY Truffles
While the convenience of store-bought truffles is undeniable, opting to make them at home unlocks a world of benefits that elevate the entire experience. There’s a profound satisfaction in creating something truly special with your own hands, especially when it results in such a luxurious treat. Here are compelling reasons to don your apron and dive into homemade truffle making:
- Unparalleled Ingredient Control: The primary advantage of homemade truffles is the complete command you have over ingredient selection. You can choose the highest quality chocolate, freshest heavy cream, and finest butter, ensuring a superior flavor profile free from unwanted additives, artificial flavors, or preservatives often found in commercial products. This control guarantees a purer, more authentic chocolate experience.
- Endless Customization Options: Homemade truffles offer an expansive canvas for your culinary creativity. You’re not limited to standard flavors or coatings. Experiment with different types of chocolate (dark, milk, white, or a blend), infuse your ganache with various extracts or liqueurs (vanilla, orange, raspberry, coffee, rum, brandy), and adorn them with an imaginative array of toppings. Each batch can be a unique expression of your taste or tailored perfectly to the preferences of those you’re treating.
- A Thoughtful, Personalized Gift: There’s a special sentiment attached to a handmade gift. A beautifully packaged box of homemade truffles speaks volumes, conveying thoughtfulness, effort, and care that mass-produced items simply cannot replicate. They are perfect for holidays, birthdays, anniversaries, or as a simple gesture of appreciation.
- Cost-Effectiveness: While investing in high-quality ingredients is important, making truffles at home is often significantly more economical than purchasing equivalent gourmet chocolates from specialty shops. You can produce a generous quantity for a fraction of the price, making indulgence more accessible.
- The Joy of Creation: The process itself is wonderfully therapeutic and enjoyable. From melting the chocolate to rolling and decorating, each step is a hands-on experience that connects you to the culinary craft. It’s a rewarding activity that yields delicious results and perhaps even a new favorite hobby.
The Simple Yet Crucial Ingredients for Perfect Chocolate Truffles
The magic of these exquisite chocolate truffles lies in their minimalist ingredient list. With just three core components, you can create a confection that tastes incredibly complex and refined. However, the success of your truffles hinges entirely on the quality of these ingredients. Do not compromise!
1. High-Quality Chocolate: The Soul of Your Truffles
The type of chocolate you select will profoundly impact the flavor, texture, and overall luxuriousness of your truffles. This is where you should invest in the best you can find. Prioritize premium chocolate baking bars or couverture chocolate from reputable brands. I highly recommend options like Ghirardelli or Guittard baking bars, Lindt chocolate bars, Theo Chocolate, or those from other esteemed chocolatiers. For an elevated experience, seek out authentic Swiss chocolate bars, which are renowned for their superior melting properties and exquisite taste.
- For Deeply Decadent and Intense Flavors: Opt for semi-sweet or dark chocolate, ideally with a cocoa content of 60% or higher. The higher percentage of cocoa solids provides a more profound, less sweet chocolate experience, characteristic of gourmet truffles.
- For a Sweeter, Milder Truffle: Milk chocolate can be used. Many enthusiasts, including myself, find that a blend of milk chocolate and semi-sweet or dark chocolate offers a perfect balance—combining the sweetness of milk chocolate with the depth of darker varieties.
Critical Guidance on Chocolate Selection:
- Avoid Chocolate Chips for Ganache: It is imperative that you DO NOT use standard chocolate chips when making the ganache. Chocolate chips contain less cocoa butter and often include stabilizers that prevent them from melting into a smooth, homogeneous consistency. This will result in a grainy or pasty ganache, far from the desired silky texture.
- Distinguish Between Ganache Chocolate and Dipping Chocolate: Similarly, DO NOT use chocolate melting wafers (often labeled for candy making or dipping) as the base for your ganache. These wafers contain added vegetable oils to ensure easy melting and a fluid consistency for dipping, but this formulation prevents the ganache from setting firmly enough to be properly scooped and rolled into truffles. However, these melting wafers are absolutely ideal for dipping your finished truffles to create a crisp, attractive outer shell.
2. Heavy Cream: The Binder of Richness
Heavy cream is the emulsifying agent that transforms melted chocolate into a luscious ganache. Its high fat content (typically 36% or more) is absolutely essential for creating the rich, stable, and creamy texture that defines a perfect truffle. The fat in the cream interacts with the cocoa butter in the chocolate, binding them together into a smooth, velvety emulsion.
- No Substitutions: There is no direct substitute for heavy cream in this recipe. Lighter creams, milk, or non-dairy alternatives will not provide the necessary fat content to properly set the ganache, leading to a runny or improperly formed truffle. Always use fresh, full-fat heavy whipping cream for optimal results.
3. Unsalted Butter: For Velvety Smoothness and Shine
A small quantity of unsalted butter, added at room temperature, is the secret to enhancing the ganache’s luxurious texture and adding a beautiful gloss. The butter contributes to a richer mouthfeel and helps the ganache achieve an even smoother, more stable consistency as it chills. It subtly rounds out the chocolate flavor, making the truffles even more irresistible.
4. Optional Flavor Extracts: Your Palette for Creativity
While the pure flavor of chocolate is divine, incorporating flavor extracts allows you to customize your truffles to an endless array of delicious profiles. Add these after the chocolate and cream are melted but before chilling to preserve their delicate aromas. Some fantastic options include:
- Classic Enhancements: Pure vanilla extract for a timeless flavor boost.
- Fruity and Zesty: Raspberry, strawberry, orange, or lemon extracts, or finely grated citrus zest for a bright, tangy contrast.
- Tropical and Nutty: Coconut or almond extract for an exotic or comforting note.
- Refreshing Mint: Peppermint or mint extract for a cool, invigorating sensation.
- Sophisticated Spirits: A tablespoon of your favorite liqueur such as Kahlua, Grand Marnier, Amaretto, or rum can add an adult twist and depth of flavor.
- Spicy Touches: A tiny pinch of cinnamon, cardamom, or even a hint of chili or cayenne powder can introduce an intriguing warmth and complexity.
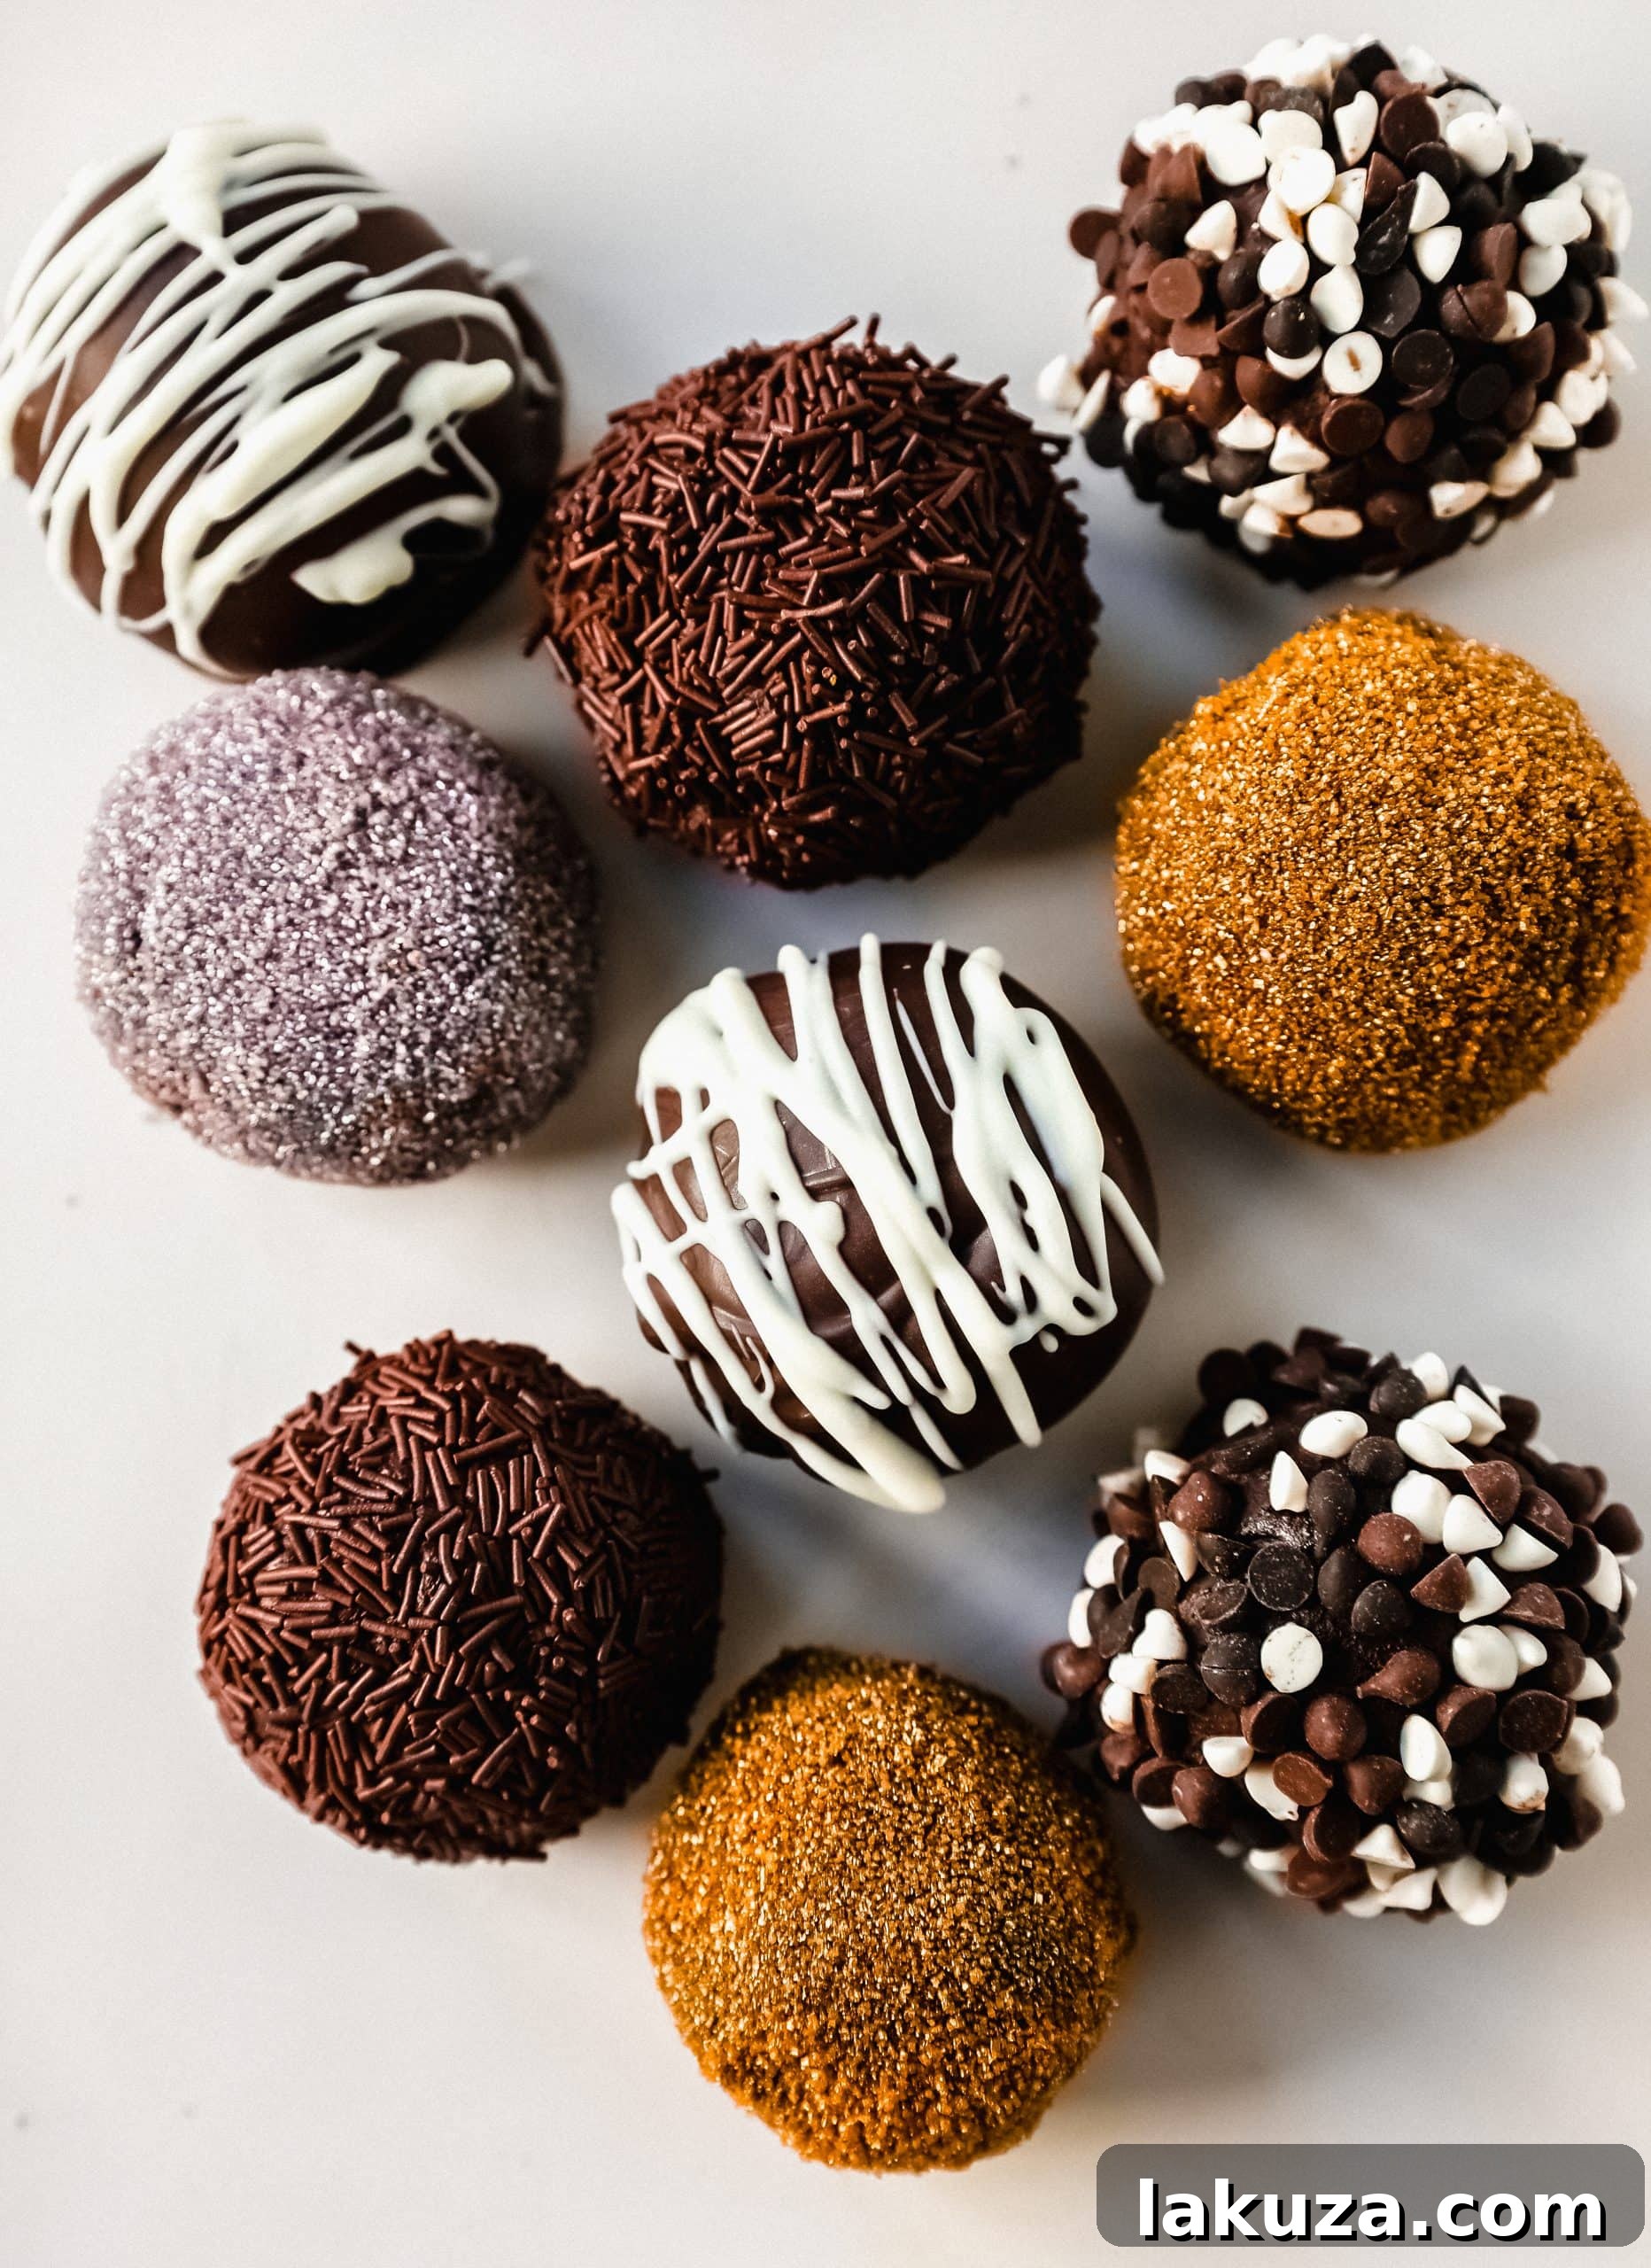
Unleash Your Inner Chocolatier: Creative Chocolate Truffle Toppings
Once your rich ganache balls are perfectly formed, the true artistic expression begins with selecting their outer coating. The right topping not only adds visual appeal but also introduces delightful textural and flavor contrasts that elevate the entire truffle experience. Don’t be shy about experimenting!
- Classic Cocoa Powder: The quintessential truffle coating. A generous dusting of unsweetened cocoa powder provides a beautiful matte finish and a pleasant bitterness that perfectly cuts through the sweetness of the ganache. For a sophisticated twist, sift a tiny amount of chili powder or cayenne pepper into your cocoa for a subtle, warming kick.
- Crushed Nuts: Elevate your truffles with the rich flavor and satisfying crunch of finely chopped nuts. Favorites include toasted pecans, pistachios (for color and flavor), hazelnuts, almonds, or walnuts. Lightly toasting them beforehand intensifies their nutty aroma.
- Chocolate Sprinkles or Mini Chocolate Chips: For a fun, classic, and undeniably chocolatey finish, roll your truffles in chocolate jimmies (sprinkles) or mini chocolate chips. This is a particularly popular choice for younger palates or festive occasions.
- Sparkling Sugar: For a dazzling presentation, sparkling sugars in various colors add a beautiful shimmer and a delicate crunch. They’re perfect for holiday themes or to add a touch of glamour.
- Melted Chocolate Dipped: For an extra layer of decadence, dip your truffles in a thin coating of melted chocolate.
- Dark or Milk Chocolate Dip: Use high-quality chocolate melting wafers (these are formulated to melt smoothly and set firmly, making them ideal for dipping, unlike for ganache). This creates a crisp, shell-like exterior that beautifully encases the soft ganache.
- White Chocolate Dip: Offers a stunning visual contrast and a creamy, sweet flavor that pairs wonderfully with a dark chocolate ganache. You can also drizzle white chocolate over dark-dipped truffles, or vice versa, for an elegant design.
- Sweetened Shredded Coconut: Toasted coconut adds a warm, nutty flavor and a delightful chewiness, while untoasted provides a fresher, milder coconut essence.
- Matcha Powder: For a unique and sophisticated flavor profile, roll truffles in vibrant green matcha powder. Its slightly bitter, earthy notes pair surprisingly well with rich chocolate.
- Crushed Cookies or Candies: Get creative with crushed shortbread cookies, ginger snaps, peppermint candies (especially for the holiday season), or even crushed freeze-dried fruits for intense flavor.
- Sea Salt Flakes: A delicate sprinkle of flaky sea salt on top of plain or chocolate-dipped truffles amplifies the chocolate’s complexity and adds a gourmet touch. The “salted chocolate” trend is a classic for a reason!
Expert Tips for Crafting Flawless Homemade Truffles
Creating truly exquisite chocolate truffles is a skill that comes with practice, but these expert tips will guide you toward success, ensuring your homemade confections are perfect every time. Pay close attention to temperature and technique, as these are the keys to a professional finish.
1. The Critical Chill: Achieving Perfect Ganache Consistency
The most vital step in truffle making, often underestimated, is ensuring your chocolate ganache has sufficient time to chill and firm up. This is not a moment to rush! I strongly recommend refrigerating your ganache for a minimum of 3 to 4 hours. For those times when you need to expedite the process, you can place the ganache in the freezer for about 30 to 60 minutes, but it’s crucial to monitor it closely to prevent it from becoming rock hard. The ideal consistency for rolling is firm enough to be easily scooped and hold its shape without becoming excessively sticky, yet soft enough to yield to gentle pressure and not crumble.
If your ganache is too soft, it will be messy and difficult to roll. If it’s too hard, it will be brittle and challenging to scoop. A perfectly chilled ganache will be pliable and smooth, making the rolling process a breeze.
2. Master the Roll: Keeping Your Hands Cool
One of the biggest challenges when rolling truffles is preventing the warmth from your hands from melting the ganache, leading to a sticky, shapeless mess. Here are proven strategies to maintain cool hands and create perfectly spherical truffles:
- Wear Disposable Gloves: Food-safe, thin disposable gloves are an excellent barrier against hand warmth. They also make cleanup easier and ensure hygiene.
- Frequent Hand Cooling: Periodically run your hands under very cold water, dry them thoroughly, or rub them with an ice cube. You can also keep an ice pack nearby and press your hands against it for a few seconds as needed.
- Work in Batches & Chill the Bowl: Instead of rolling the entire batch at once, work with a smaller portion of ganache at a time, keeping the rest refrigerated. You can also place the bowl of ganache into a larger bowl filled with ice, which helps maintain its cool temperature while you scoop and roll.
- Speed is Your Friend: The quicker you can roll each truffle, the less time it has to melt in your hands. Aim for smooth, efficient motions.
3. Achieving Uniformity: The Power of a Scoop
For consistent size and professional presentation, a small cookie scoop (often referred to as a mini ice cream scoop or melon baller, typically 2 teaspoons to 1 tablespoon in volume) is an invaluable tool. Using a scoop ensures each truffle is roughly the same size, which not only looks appealing but also guarantees even serving portions. After scooping, a quick, gentle roll between your palms will smooth out any rough edges and perfect the sphere.
4. Optimal Flavor Infusion: When to Add Extracts
To maximize the potency and vibrancy of any flavor extracts you choose to add, incorporate them into your ganache after the chocolate and cream have fully melted and you’ve removed the mixture from the heat. Add them just before stirring in the butter. This timing prevents the delicate aromatic compounds from evaporating due to excessive heat, ensuring a robust and delicious infusion that truly shines in your final truffle.
Essential Tools for Your Chocolate Truffle Adventure
While the process of making chocolate truffles is relatively simple, having the right tools can significantly enhance your experience, making it more efficient and enjoyable. These are the items I find most helpful in my kitchen:
- Chocolate Dipping Tools: If you plan to coat your truffles in a melted chocolate shell, a set of specialized dipping tools (usually thin-pronged forks or spiral dippers) is a game-changer. They allow for easy handling of the truffles, ensuring a smooth, even coating with minimal mess and without leaving fingerprints.
- Pyrex Glass Mixing Bowls: Durable and microwave-safe, glass mixing bowls are excellent for melting chocolate and cream. They retain heat well, making it easier to achieve a smooth ganache, and their transparency allows you to easily monitor the melting process.
- Small Cookie Scoop: As highlighted in our tips, a 1-tablespoon or 2-teaspoon cookie scoop is indispensable for portioning out consistent amounts of ganache, leading to uniformly sized and professional-looking truffles.
- Parchment Paper or Silicone Mats: Essential for lining your baking sheets. This prevents your truffles from sticking, both during the initial chilling phase and after they’ve been rolled in their various toppings.
- Microwave or Double Boiler Setup: Both are effective for gently melting the chocolate and cream. A microwave offers speed, while a double boiler provides very precise, gentle heat control, minimizing the risk of scorching the chocolate.
- Whisk or Spatula: A sturdy whisk or a flexible silicone spatula is crucial for thoroughly stirring the ganache until it’s perfectly smooth and glossy.
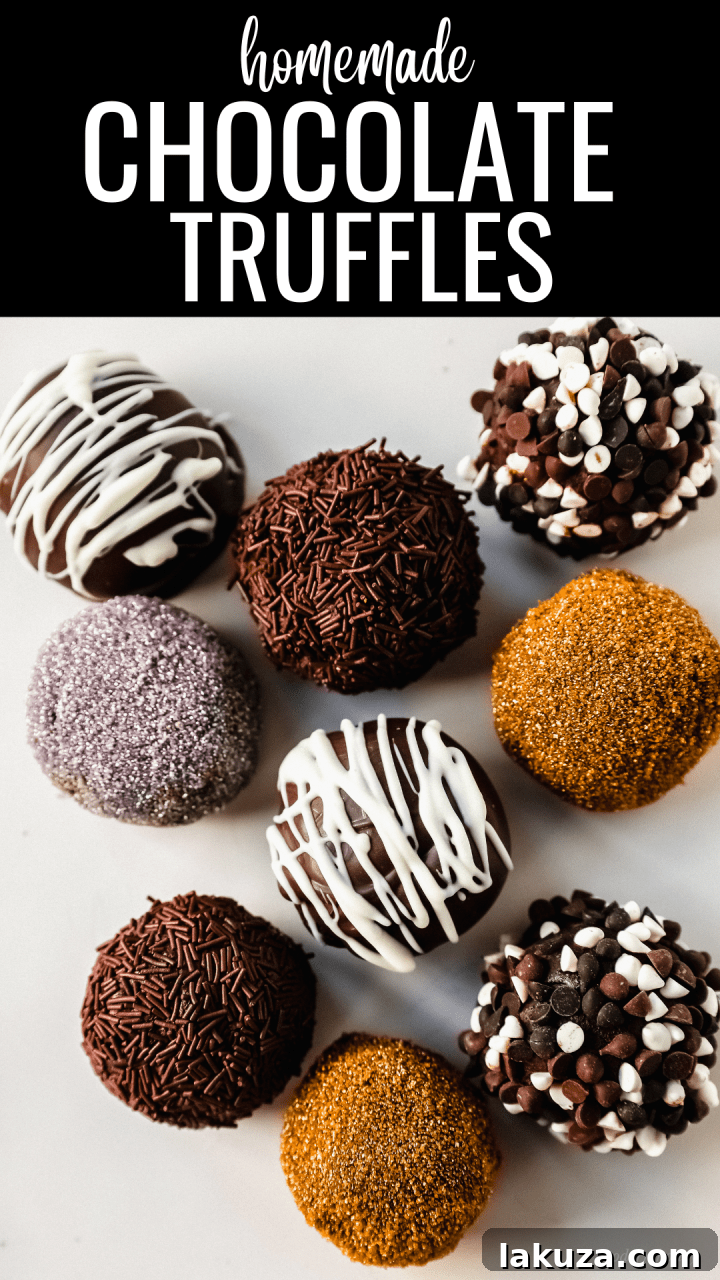

Homemade Chocolate Truffles
Ingredients
- 8 ounces High-Quality Chocolate Bars * (two 4-ounce bars, chopped)
- 1/2 cup + 1 Tablespoon Heavy Cream
- 1 Tablespoon Unsalted Butter (room temperature)
- 1 teaspoon Vanilla Extract ** (optional, or other flavor extracts)
Topping Ideas:
- Chopped Nuts (Pecans, Pistachios, Hazelnuts, Almonds, or Walnuts)
- Chocolate Sprinkles (Jimmies)
- Mini Chocolate Chips
- Sparkling Sugar (in various colors)
- Melted Dark or Milk Chocolate for dipping (e.g., Ghirardelli Melting Wafers for dipping)
- Melted White Chocolate for dipping (e.g., Ghirardelli Melting Wafers for dipping)
- Sweetened Shredded Coconut
- Matcha Powder
- Cocoa Powder (add a touch of chili or cayenne powder for spice, if desired)
Instructions
-
Prepare the Ganache: Place your finely chopped high-quality chocolate and heavy cream into a microwave-safe bowl. Heat at 50% power in 30-second increments, stirring thoroughly after each interval. This gentle heating prevents scorching. The chocolate should be completely melted and smooth after approximately 2 to 2 1/2 minutes. Stir until the mixture is beautifully smooth and glossy.
-
Incorporate Butter and Flavoring: Add the room-temperature butter and your chosen flavor extract (if using) to the warm chocolate mixture. Stir continuously until the butter is completely melted and fully incorporated, and the ganache is perfectly smooth and emulsified.
-
Chill Thoroughly: Cover the bowl tightly with plastic wrap or foil, pressing the wrap directly onto the surface of the ganache to prevent a skin from forming. Place the bowl in the refrigerator to chill for at least 3-4 hours, or until the ganache is firm enough to scoop and roll. For a quicker set, you may place it in the freezer for 30-60 minutes, checking frequently.
-
Scoop and Roll: Once the chocolate ganache has solidified to a workable consistency, use a small cookie scoop (about 2 teaspoons to 1 tablespoon, depending on desired size) or two small spoons to portion out balls of ganache. Gently roll these portions between your palms to form smooth spheres. For best results and to prevent melting, follow the “Rolling Tips” mentioned in the article above. Place the rolled truffles onto a baking sheet lined with parchment paper.
-
Add Toppings and Set: Roll the truffles immediately into your preferred toppings, ensuring an even coating. Once topped, return the truffles to the refrigerator and allow them to set completely, typically for another 30 minutes to an hour. Chill until ready to serve for the best texture.
Notes
** Feel free to experiment with various extracts like vanilla, strawberry, raspberry, orange, coconut, or mint to customize your truffle flavors. Add these after melting the chocolate and cream.
Nutrition information is automatically calculated, so should only be used as an approximation.
Additional Information
Storing Your Homemade Chocolate Truffles
Once your exquisite chocolate truffles are made and fully set, proper storage is key to maintaining their fresh taste and perfect texture. Homemade truffles, especially those made with fresh cream, are best enjoyed within a reasonable timeframe. To maximize their shelf life and ensure every bite is as delicious as the first, follow these storage guidelines:
- Airtight Container: Always store truffles in an airtight container. This prevents them from absorbing odors from other foods in the refrigerator and protects them from drying out.
- Refrigeration is Essential: Due to their fresh cream content, chocolate truffles must be stored in the refrigerator. Arrange them in a single layer if possible, or separate layers with parchment paper to prevent them from sticking together. They will keep well in the refrigerator for up to 1-2 weeks.
- Bring to Room Temperature (Optional): For the most luxurious, melt-in-your-mouth experience, allow your truffles to come to room temperature for about 15-30 minutes before serving. This softens the ganache slightly, enhancing its creamy texture and allowing the full spectrum of chocolate flavors to emerge.
- Freezing for Longer Storage: If you’ve made a large batch or wish to prepare truffles in advance, they freeze beautifully. Place the finished truffles (without delicate toppings like fresh fruit) in a single layer on a parchment-lined baking sheet and freeze until solid. Once frozen, transfer them to an airtight freezer-safe container or bag, again separating layers with parchment paper. They can be stored in the freezer for up to 1-2 months. Thaw them in the refrigerator overnight or at room temperature for an hour before serving.
The Perfect Gift: Gifting Homemade Truffles
Homemade chocolate truffles make for an incredibly thoughtful and impressive gift. Whether for holidays, hostess gifts, birthdays, or just because, the personal touch of handmade confections is always appreciated. Here are some ideas for packaging and presenting your truffle gifts:
- Elegant Gift Boxes: Small, decorative gift boxes or candy boxes with individual paper liners (mini cupcake liners work perfectly) are ideal for presentation. Arrange an assortment of different flavored and topped truffles for visual appeal.
- Glass Jars or Cellophane Bags: For a rustic or more casual presentation, place truffles in a clean glass jar tied with a ribbon, or in clear cellophane bags, again with decorative ties.
- Personalized Touches: Add a handwritten tag with a personalized message, a list of the truffle flavors, and instructions for storage. This shows extra care and attention to detail.
- Consider Temperature: If you’re gifting truffles on a warm day, advise the recipient to refrigerate them immediately or use a small insulated bag with an ice pack for transport.
Conclusion: The Sweet Reward of Homemade Truffles
Crafting homemade chocolate truffles is more than just following a recipe; it’s an immersive experience that blends simplicity with gourmet results. From selecting the finest ingredients to customizing each velvety sphere with unique toppings, every step is a testament to the joy of creation. These rich, decadent treats are not only a delightful indulgence for yourself but also a truly heartfelt gift that speaks volumes. So, next time you’re craving something extraordinary or seeking a perfect way to show you care, embrace the art of homemade truffles. Your taste buds, and those of your loved ones, will thank you.
Enjoy the process, savor the flavor, and delight in the unparalleled luxury of your very own homemade chocolate truffles!