

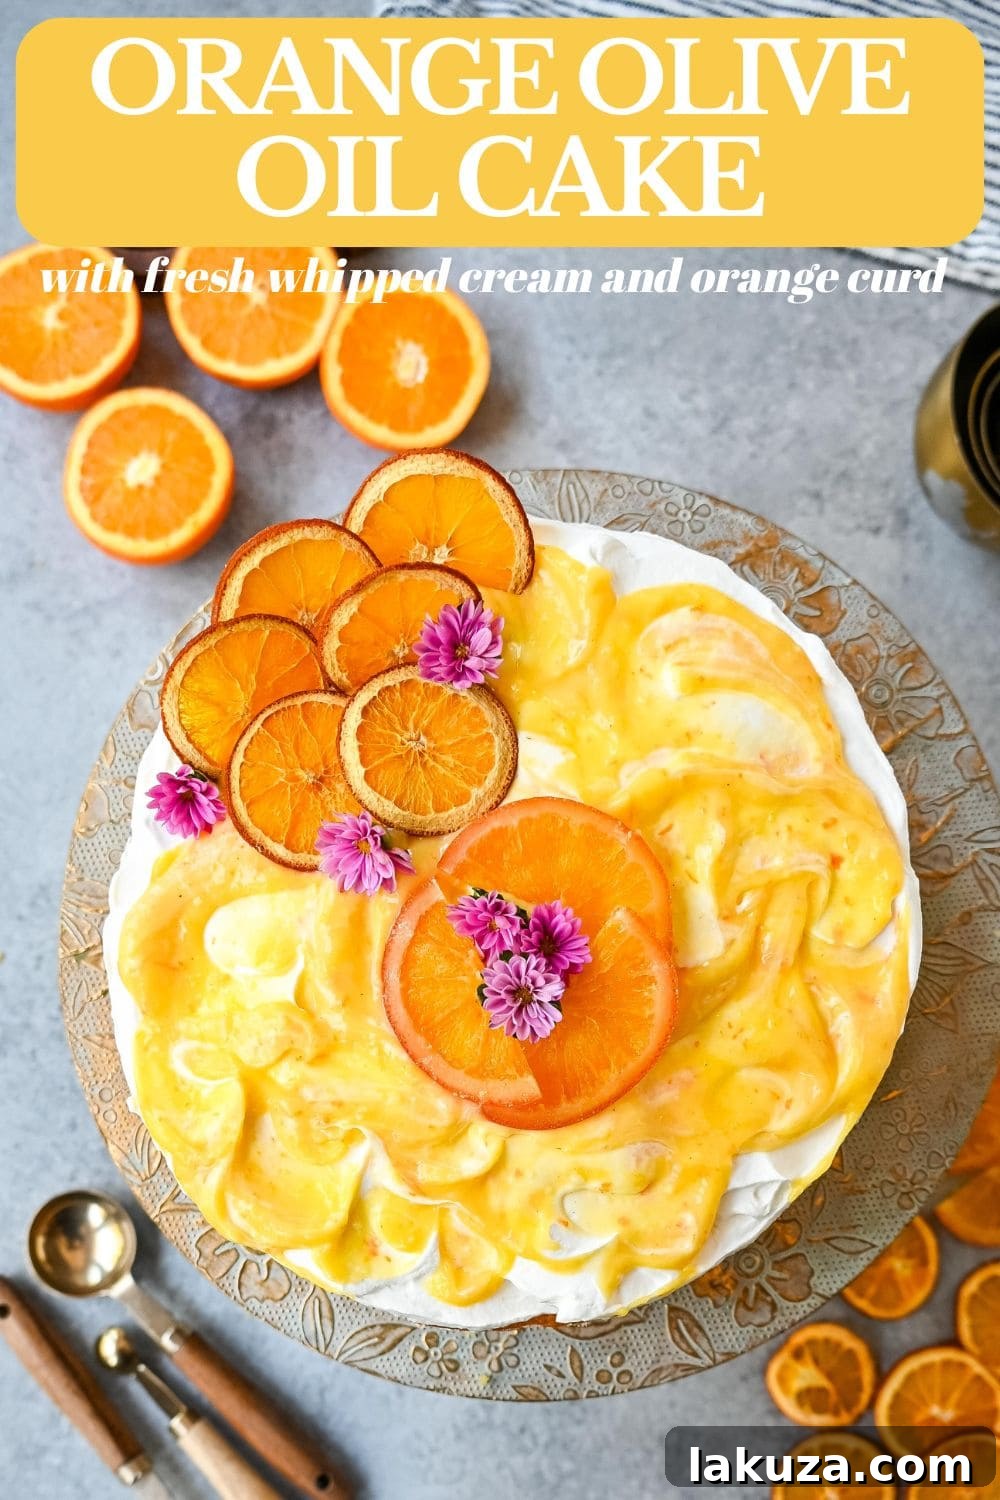
Delight your senses with the exquisite flavors of a homemade Orange Olive Oil Cake. This beautifully moist and tender dessert combines the vibrant, zesty essence of fresh oranges with the rich, nuanced aroma of premium extra virgin olive oil. It’s a truly elegant treat that embodies the best of Mediterranean-inspired baking, perfect for any occasion, from a casual afternoon tea to a sophisticated dinner party.

There’s something uniquely captivating about an olive oil cake. Its subtle complexity, derived from the quality of the oil, elevates it far beyond a typical butter-based dessert. When infused with the bright, sunny notes of orange, it transforms into an unforgettable experience. This particular recipe yields a cake that is wonderfully tender and incredibly moist, making it a favorite in my kitchen. It pairs exquisitely with a cloud of fresh whipped cream and a dollop of tangy homemade orange curd, creating a harmonious balance of textures and tastes.
While many associate rich desserts with cooler months, this Orange Olive Oil Cake shines as a light and refreshing option, especially perfect for summer gatherings. Its vibrant citrus profile and delicate texture make it an ideal centerpiece for warm-weather celebrations or simply a delightful way to enjoy fresh seasonal fruit. Get ready to fall in love with this homemade orange olive oil cake recipe – it’s destined to become a staple in your baking repertoire.

If you’re a fan of elegant, yet surprisingly simple cakes, you’re in the right place. My collection of cake recipes consistently garners rave reviews, and I’m thrilled to share some other highly-rated favorites that might inspire your next baking adventure:
- Classic Orange Cake
- Italian Lemon Olive Oil Cake
- Traditional Olive Oil Cake
- Zesty Key Lime Cake
- Lemon Cake with Cream Cheese Frosting
- Bright Citrus Sheet Cake
Key Ingredients for Your Orange Olive Oil Cake
Crafting this simple yet spectacular 9-inch orange olive oil cake begins with selecting the finest ingredients. The beauty of this recipe lies in its straightforward nature, allowing the quality of each component to truly shine. While a luscious pairing of fresh whipped cream swirled with orange curd is highly recommended, this cake also welcomes a creamy, sweet cream cheese frosting. Should you opt for the latter, simply use half the amount of cream cheese frosting from my popular orange cake with cream cheese frosting recipe.
Below, you’ll find a detailed list of the ingredients needed to create this delightful dessert. Pay close attention to the notes for each, as they offer crucial tips for achieving the best possible flavor and texture.

For the Orange Olive Oil Cake:
- Extra Virgin Olive Oil: The star ingredient! Its quality significantly impacts the cake’s flavor. Choose a fresh, fruity, and slightly peppery variety for optimal results. Refer to our dedicated section below on “Choosing the Right Olive Oil” for more guidance.
- Large Eggs: Always use large-sized eggs in baking recipes unless otherwise specified. They provide structure and moisture to the cake.
- Fresh Orange Juice: For the most vibrant and authentic orange flavor, use only freshly squeezed orange juice from ripe oranges. Bottled juice simply won’t yield the same bright taste.
- Orange Zest: Packed with essential oils, orange zest is key to amplifying the citrus aroma. Always zest your oranges before juicing them – it’s much easier when they are firm.
- Granulated Sugar: Provides sweetness and helps create a tender crumb.
- Whole Milk: I highly recommend using whole milk for its richness, which contributes to the cake’s moist texture. However, 2% milk or even buttermilk can be used as alternatives, each imparting a slightly different nuance.
- All-Purpose Flour: The foundational dry ingredient, providing structure.
- Baking Powder and Baking Soda: These leavening agents work together to give the cake its beautiful lift and airy texture.
- Salt: A pinch of salt balances the sweetness and enhances all the other flavors.
For the Homemade Orange Curd (Optional, but highly recommended):
- Fresh orange juice
- Orange zest
- Granulated Sugar
- Egg yolks
- Unsalted Butter
- Cornstarch: Acts as a thickener, giving the curd its smooth, luscious consistency.
For the Fresh Whipped Cream:
- Heavy Cream: Ensure it’s very cold for best whipping results.
- Powdered Sugar: Sweetens the cream and helps stabilize it.
- Vanilla Bean Paste or Extract: Adds a fragrant depth of flavor.

To elevate the presentation of your homemade orange olive oil cake, I love to garnish it with delicate homemade dried oranges. These add a beautiful rustic touch and an intensified citrus flavor. You can also use sweetened dried oranges from specialty stores like Trader Joe’s for a quicker option. Making your own dried oranges is surprisingly simple and adds a personal touch to your dessert.
How to Make Homemade Dried Orange Slices
Creating your own beautiful dried orange slices is a simple process that adds a professional and aromatic garnish to your cake. Follow these easy steps:
- Preheat Your Oven: Set your oven to a low temperature of 200°F (95°C). This gentle heat is crucial for slowly dehydrating the oranges without burning them, preserving their vibrant color and essential oils.
- Prepare the Oranges: Using a very sharp knife or a mandoline slicer, slice your oranges into thin, even rounds, approximately 1/8-inch (3-4 mm) thick. Consistency in thickness ensures they dry uniformly.
- Arrange on Baking Sheet: Line a baking sheet with parchment paper. This prevents the orange slices from sticking to the pan and makes for easy cleanup. Arrange the orange slices in a single layer on the prepared sheet, ensuring none of them overlap. Proper spacing allows for even air circulation and drying.
- Dehydrate in Oven: Place the baking sheet in the preheated oven. Bake the oranges for 2 to 4 hours, depending on their thickness and moisture content. For even drying, remember to flip the slices halfway through the baking time. The oranges are perfectly dried when they feel firm and dry to the touch, and appear slightly translucent. They should not be brittle or burnt.
Choosing the Right Olive Oil: The Secret to a Superior Cake
The selection of your olive oil is not merely a detail; it’s fundamental to the character and depth of flavor in your Orange Olive Oil Cake. A high-quality extra virgin olive oil (EVOO) with a distinct fruity, sometimes slightly peppery, finish will yield the most exquisite results. Avoid bland or heavily processed olive oils, as their lack of character will diminish the cake’s overall appeal.
What to Look For:
- “Extra Virgin”: This designation ensures the oil is cold-pressed and unrefined, retaining its natural flavors and health benefits.
- Harvest Date: Look for a recent harvest date on the bottle. Olive oil, much like wine, can lose its vibrancy over time. Freshness is key for that bright, aromatic quality.
- Flavor Profile: Some EVOOs are intensely grassy and peppery, while others are milder and more buttery. For this orange cake, a medium-bodied EVOO with a pleasant fruitiness and perhaps a slight peppery finish will complement the citrus notes beautifully without overpowering them. Consider oils from Tuscany, Sicily, or California for excellent options.
- Taste Test: If possible, taste a small amount of the olive oil before baking. It should taste fresh, clean, and flavorful, without any musty or metallic notes.
Storage Tips: To preserve the freshness and flavor of your chosen olive oil, store it in a cool, dark place, away from direct sunlight and heat. An airtight, dark glass bottle or stainless steel container is ideal, preventing oxidation and rancidity.

How to Bake Your Perfect Orange Olive Oil Cake with Whipped Cream and Orange Curd
Baking this cake is a rewarding experience, leading to a truly delightful dessert. Follow these steps carefully to ensure a perfect outcome every time.
- Prepare Your Oven and Pan: Begin by preheating your oven to 325°F (160°C). This slightly lower temperature ensures the cake bakes evenly and remains wonderfully moist. Concurrently, prepare your 9-inch round cake pan. Proper pan preparation is essential to prevent sticking and ensure a smooth release. Refer to the detailed “Preparing the Cake Pan” tips below for best practices.
- Combine Dry Ingredients: In a large mixing bowl, thoroughly whisk together the all-purpose flour, granulated sugar, baking powder, baking soda, and salt. Whisking ensures these dry ingredients are well combined and evenly distributed.
- Mix Wet Ingredients: In a separate bowl, gently beat the large eggs until they are well combined. Gradually stream in the olive oil, followed by the fresh orange juice, orange zest, and whole milk, mixing until the mixture is smooth and emulsified.
- Combine Wet and Dry: Pour the wet ingredient mixture into the bowl containing the dry ingredients. Using a spatula, gently fold the ingredients together until they are *just* combined. Be mindful not to overmix the batter; overmixing can lead to a tough cake. A few small lumps are perfectly fine.
- Bake the Cake: Carefully pour the prepared batter into your greased and floured 9-inch cake pan. Use a spatula to gently smooth the top surface of the batter. Bake for approximately 35-40 minutes, or until a wooden skewer or toothpick inserted into the center of the cake comes out clean. The cake should be golden brown and spring back lightly when pressed.

- Cooling the Cake: Once baked, remove the cake from the oven and let it cool in the pan for about 10 minutes. This allows the cake to firm up slightly before unmolding. After 10 minutes, carefully run a thin knife around the edges of the pan to loosen the cake, then invert it onto a wire rack to cool completely. Allowing it to cool fully before topping is crucial for the best texture.
- Prepare the Orange Curd: While the cake cools, prepare the luscious orange curd. Detailed instructions for making the curd are provided in the recipe section below. This step can also be done in advance to save time.
- Whip the Cream: In a thoroughly chilled mixing bowl, combine the very cold heavy whipping cream, powdered sugar, and vanilla extract or paste. Using an electric mixer or stand mixer fitted with a whisk attachment, beat on medium-high speed until soft, billowy peaks form. Be careful not to overbeat, or you’ll end up with butter!
- Serve and Enjoy: Once the orange olive oil cake has cooled completely, it’s ready for its delicious toppings. Serve individual slices with a generous dollop of fresh whipped cream and a spoonful of the bright, tangy orange curd. Garnish with homemade dried orange slices for an elegant finish.
- Storage: Store any leftover cake in an airtight container at room temperature for up to 3 days. If you’ve added whipped cream and orange curd, the cake should be stored in the refrigerator, where it will keep beautifully for up to 5 days.
Expert Tips for Preparing Your Cake Pan
Properly preparing your cake pan is a small but critical step that guarantees your beautifully baked Orange Olive Oil Cake will release effortlessly, preserving its perfect shape. A 9-inch round cake pan, ideally with a removable bottom or a springform pan, is recommended for this recipe. Follow this meticulous method for flawless results:
- Thoroughly Grease the Pan: Generously grease the bottom and sides of your cake pan. You can use a high-quality olive oil, softened butter, or a non-stick cooking spray. Ensure every crevice is covered.
- Line with Parchment Paper: Cut a round piece of parchment paper to perfectly fit the bottom of your 9-inch pan. Place this parchment round inside the greased pan. Then, grease the parchment paper as well. This double layer of non-stick protection is incredibly effective.
- Lightly Flour the Sides: Lightly dust the greased sides of the pan with all-purpose flour. Rotate the pan and tap gently to ensure the flour coats all surfaces, then invert the pan and tap out any excess flour. This creates a non-stick barrier that helps the cake climb and release cleanly.
By following these steps, you create an optimal environment for your cake, ensuring it emerges from the pan perfectly intact and ready for decoration.

Frequently Asked Questions (FAQ’s) about Orange Olive Oil Cake
While the recipe specifically calls for extra virgin olive oil to achieve its signature flavor profile, you absolutely can experiment with other oils. Keep in mind that the type of oil significantly influences the cake’s final taste. A light olive oil will yield a milder flavor, allowing the orange to dominate, while a robust extra virgin olive oil will lend a more pronounced, earthy, and sometimes peppery note. For a neutral flavor, canola oil or avocado oil are excellent alternatives. Coconut oil can also be used, but it will impart a subtle tropical hint and a slightly different texture to the cake. Choose an oil that aligns with your preferred flavor outcome.
Determining when your cake is done is crucial for a moist and tender result. The most reliable method is the toothpick test: insert a wooden skewer or toothpick into the very center of the cake. If it comes out clean or with only a few moist crumbs clinging to it, your cake is ready. Additionally, the cake’s surface should have a lovely light golden-brown color, and when you gently press the top, it should spring back immediately. Avoid overbaking, as this can lead to a dry cake.
Proper storage ensures your cake remains fresh and delicious. If the cake is unfrosted or without whipped cream and curd, store it in an airtight container at room temperature for up to 3 days. For cakes adorned with fresh whipped cream and orange curd, refrigeration is necessary; store it in an airtight container in the refrigerator for up to 5 days. For longer storage, the unfrosted cake can be frozen for up to 3 months. To freeze, wrap the cooled cake tightly in plastic wrap, then an additional layer of aluminum foil, to prevent freezer burn. Thaw it at room temperature before serving or adding toppings.
More Popular Cake Recipes to Explore
Beyond the delightful world of citrus cakes, there’s a universe of tempting recipes waiting to be discovered. Here are some of my most popular and highly-rated cake creations. Don’t forget to check the earlier links in this post for even more citrus-inspired baking ideas!
Best Orange Cake
Love at First Sight Chocolate Cake
Yellow Birthday Cake with Milk Chocolate Frosting
Berry Chantilly Cake

Print Recipe
Orange Olive Oil Cake
Ingredients
- 1 1/2 cups Flour
- 1 1/2 cups Sugar
- 3/4 teaspoon Baking Powder
- 1/4 teaspoon Baking Soda
- 3/4 teaspoon Salt
- 3/4 cup Olive Oil
- 2 large Eggs
- 1 cup Whole Milk (or buttermilk)
- 1 1/2 to 2 Tablespoons Orange Zest
- 2 teaspoons Orange Juice (freshly squeezed)
ORANGE CURD (optional):
- 1 Tablespoon Orange Zest
- 1/2 cup Fresh Orange Juice (about 1-2 oranges)
- 1/2 cup Sugar
- 3 large Egg Yolks
- 1/2 teaspoon Cornstarch
- 3 Tablespoons Butter
WHIPPED CREAM:
- 8 ounces Heavy Cream
- 1/3 cup Powdered Sugar
- 1 teaspoon Vanilla Bean Paste or Extract
DECORATIONS:
- Homemade dried oranges (see blog post for instructions) or sweetened dried oranges from Trader Joe’s.
Instructions
-
In a large bowl, whisk together the flour, sugar, baking powder, baking soda, and salt until well combined.
-
In another bowl, beat the eggs until light and well combined. Gradually add the olive oil, orange juice, orange zest, and milk, mixing until the wet ingredients are smooth and fully incorporated.
-
Pour the wet ingredients into the dry ingredients. Gently fold them together with a spatula until just combined. Be careful not to overmix, as this can result in a tough cake. Pour the batter into the prepared 9-inch cake pan and smooth the top evenly with a spatula.
-
Bake for 35-40 minutes, or until a toothpick inserted into the center of the cake comes out clean.
-
Allow the cake to cool in the pan for 10 minutes. Then, carefully run a knife around the edges of the pan before inverting it onto a wire rack to cool completely.
ORANGE CURD:
-
In a small saucepan, whisk together the fresh orange juice, orange zest, sugar, cornstarch, and egg yolks until smooth. Cook this mixture over medium heat, stirring constantly, until it thickens to a consistency similar to pudding, which typically takes about 5-7 minutes. Remove the saucepan from the heat and whisk in the butter, one piece at a time, until it is fully melted and the curd is smooth and glossy. Pour the hot curd into a clean bowl, then cover it with plastic wrap, pressing the wrap directly onto the surface of the curd to prevent a skin from forming. Refrigerate until thoroughly chilled, at least 2 hours, or overnight.
WHIPPED CREAM:
-
In a chilled mixing bowl, combine the very cold heavy whipping cream, powdered sugar, and vanilla extract or paste. Beat with an electric mixer or stand mixer on medium-high speed until soft peaks form. Be careful not to overbeat.
-
Once the orange olive oil cake has cooled completely, you can serve it by placing a generous dollop of fresh whipped cream and a spoonful of homemade orange curd on top of each slice. Garnish as desired with dried orange slices.
Notes
Preparing the Cake Pan:
Greasing the cake pan properly is essential to ensure the cake comes out smoothly without sticking. A 9-inch round cake pan with a removable bottom or springform pan works best for this cake. To prepare the pan:
- Grease the bottom and sides of the pan generously with olive oil or non-stick cooking spray.
- Cut a round piece of parchment paper to fit the bottom of the pan, place it inside, and grease the parchment paper as well.
- Lightly dust the sides of the pan with flour, tapping out any excess.
This detailed method ensures that the cake will be released easily from the pan after baking.
Additional Info
Love this recipe? Share your thoughts below!Jump to Comments